
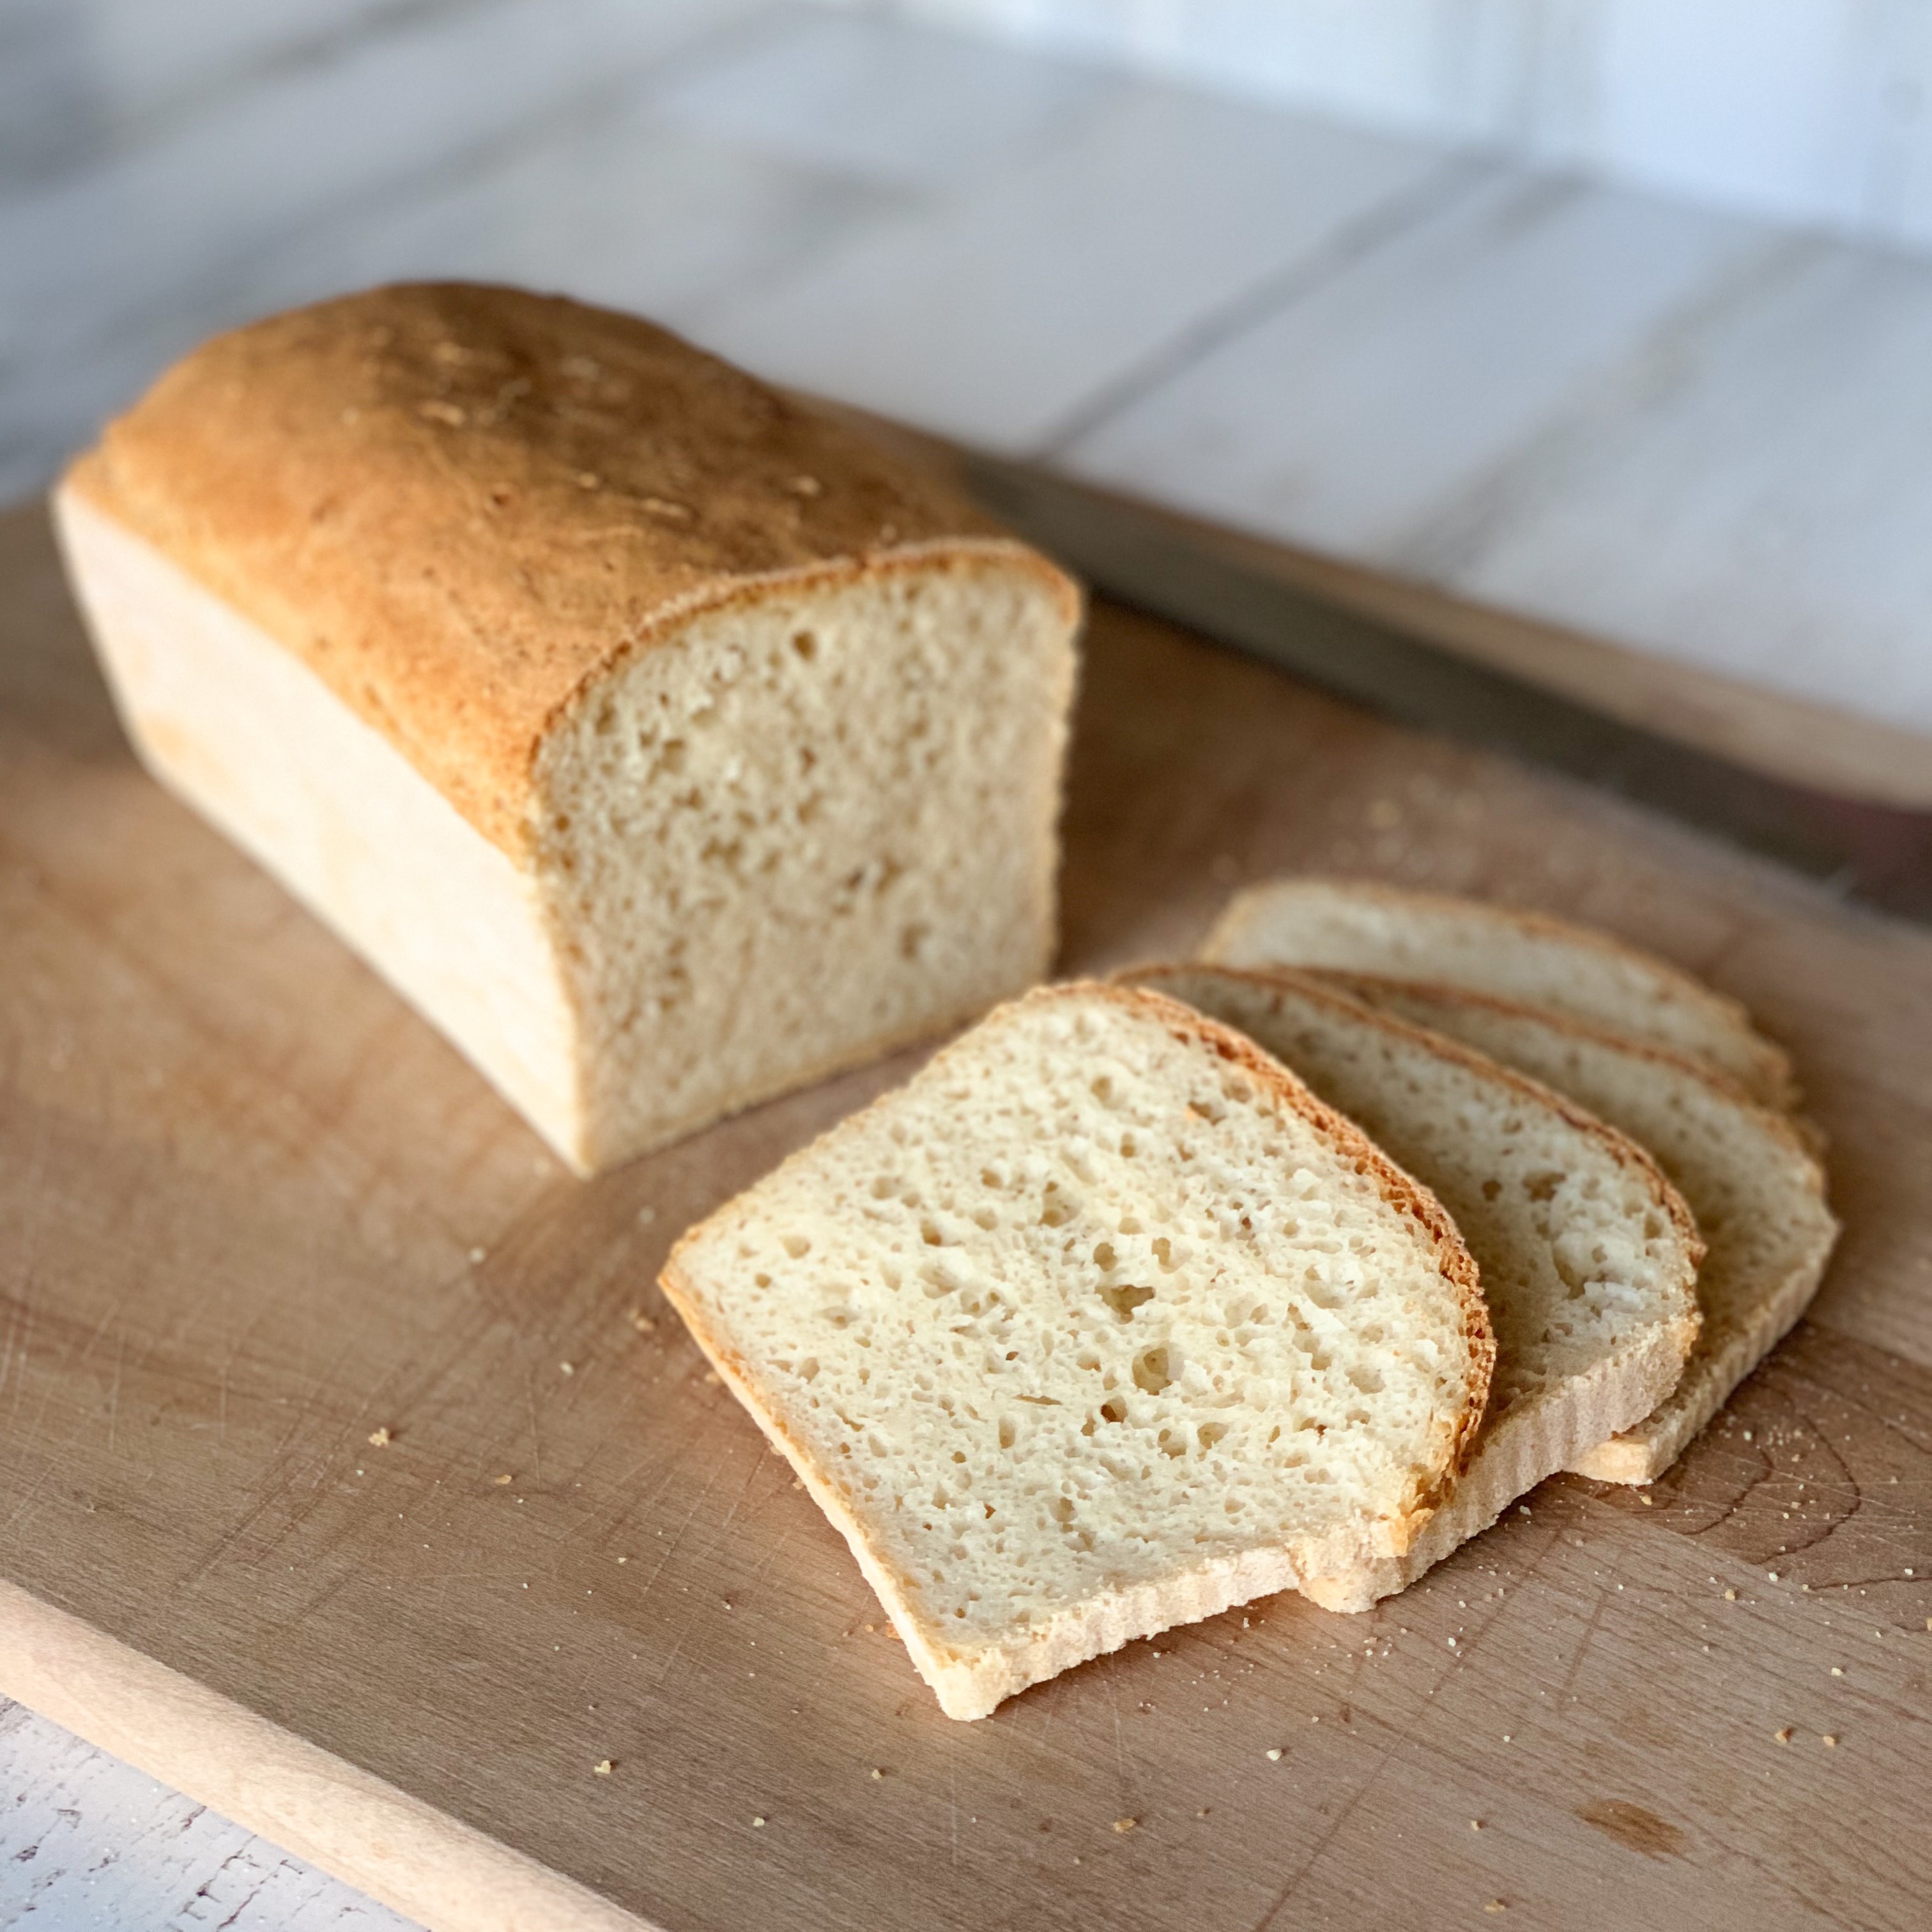
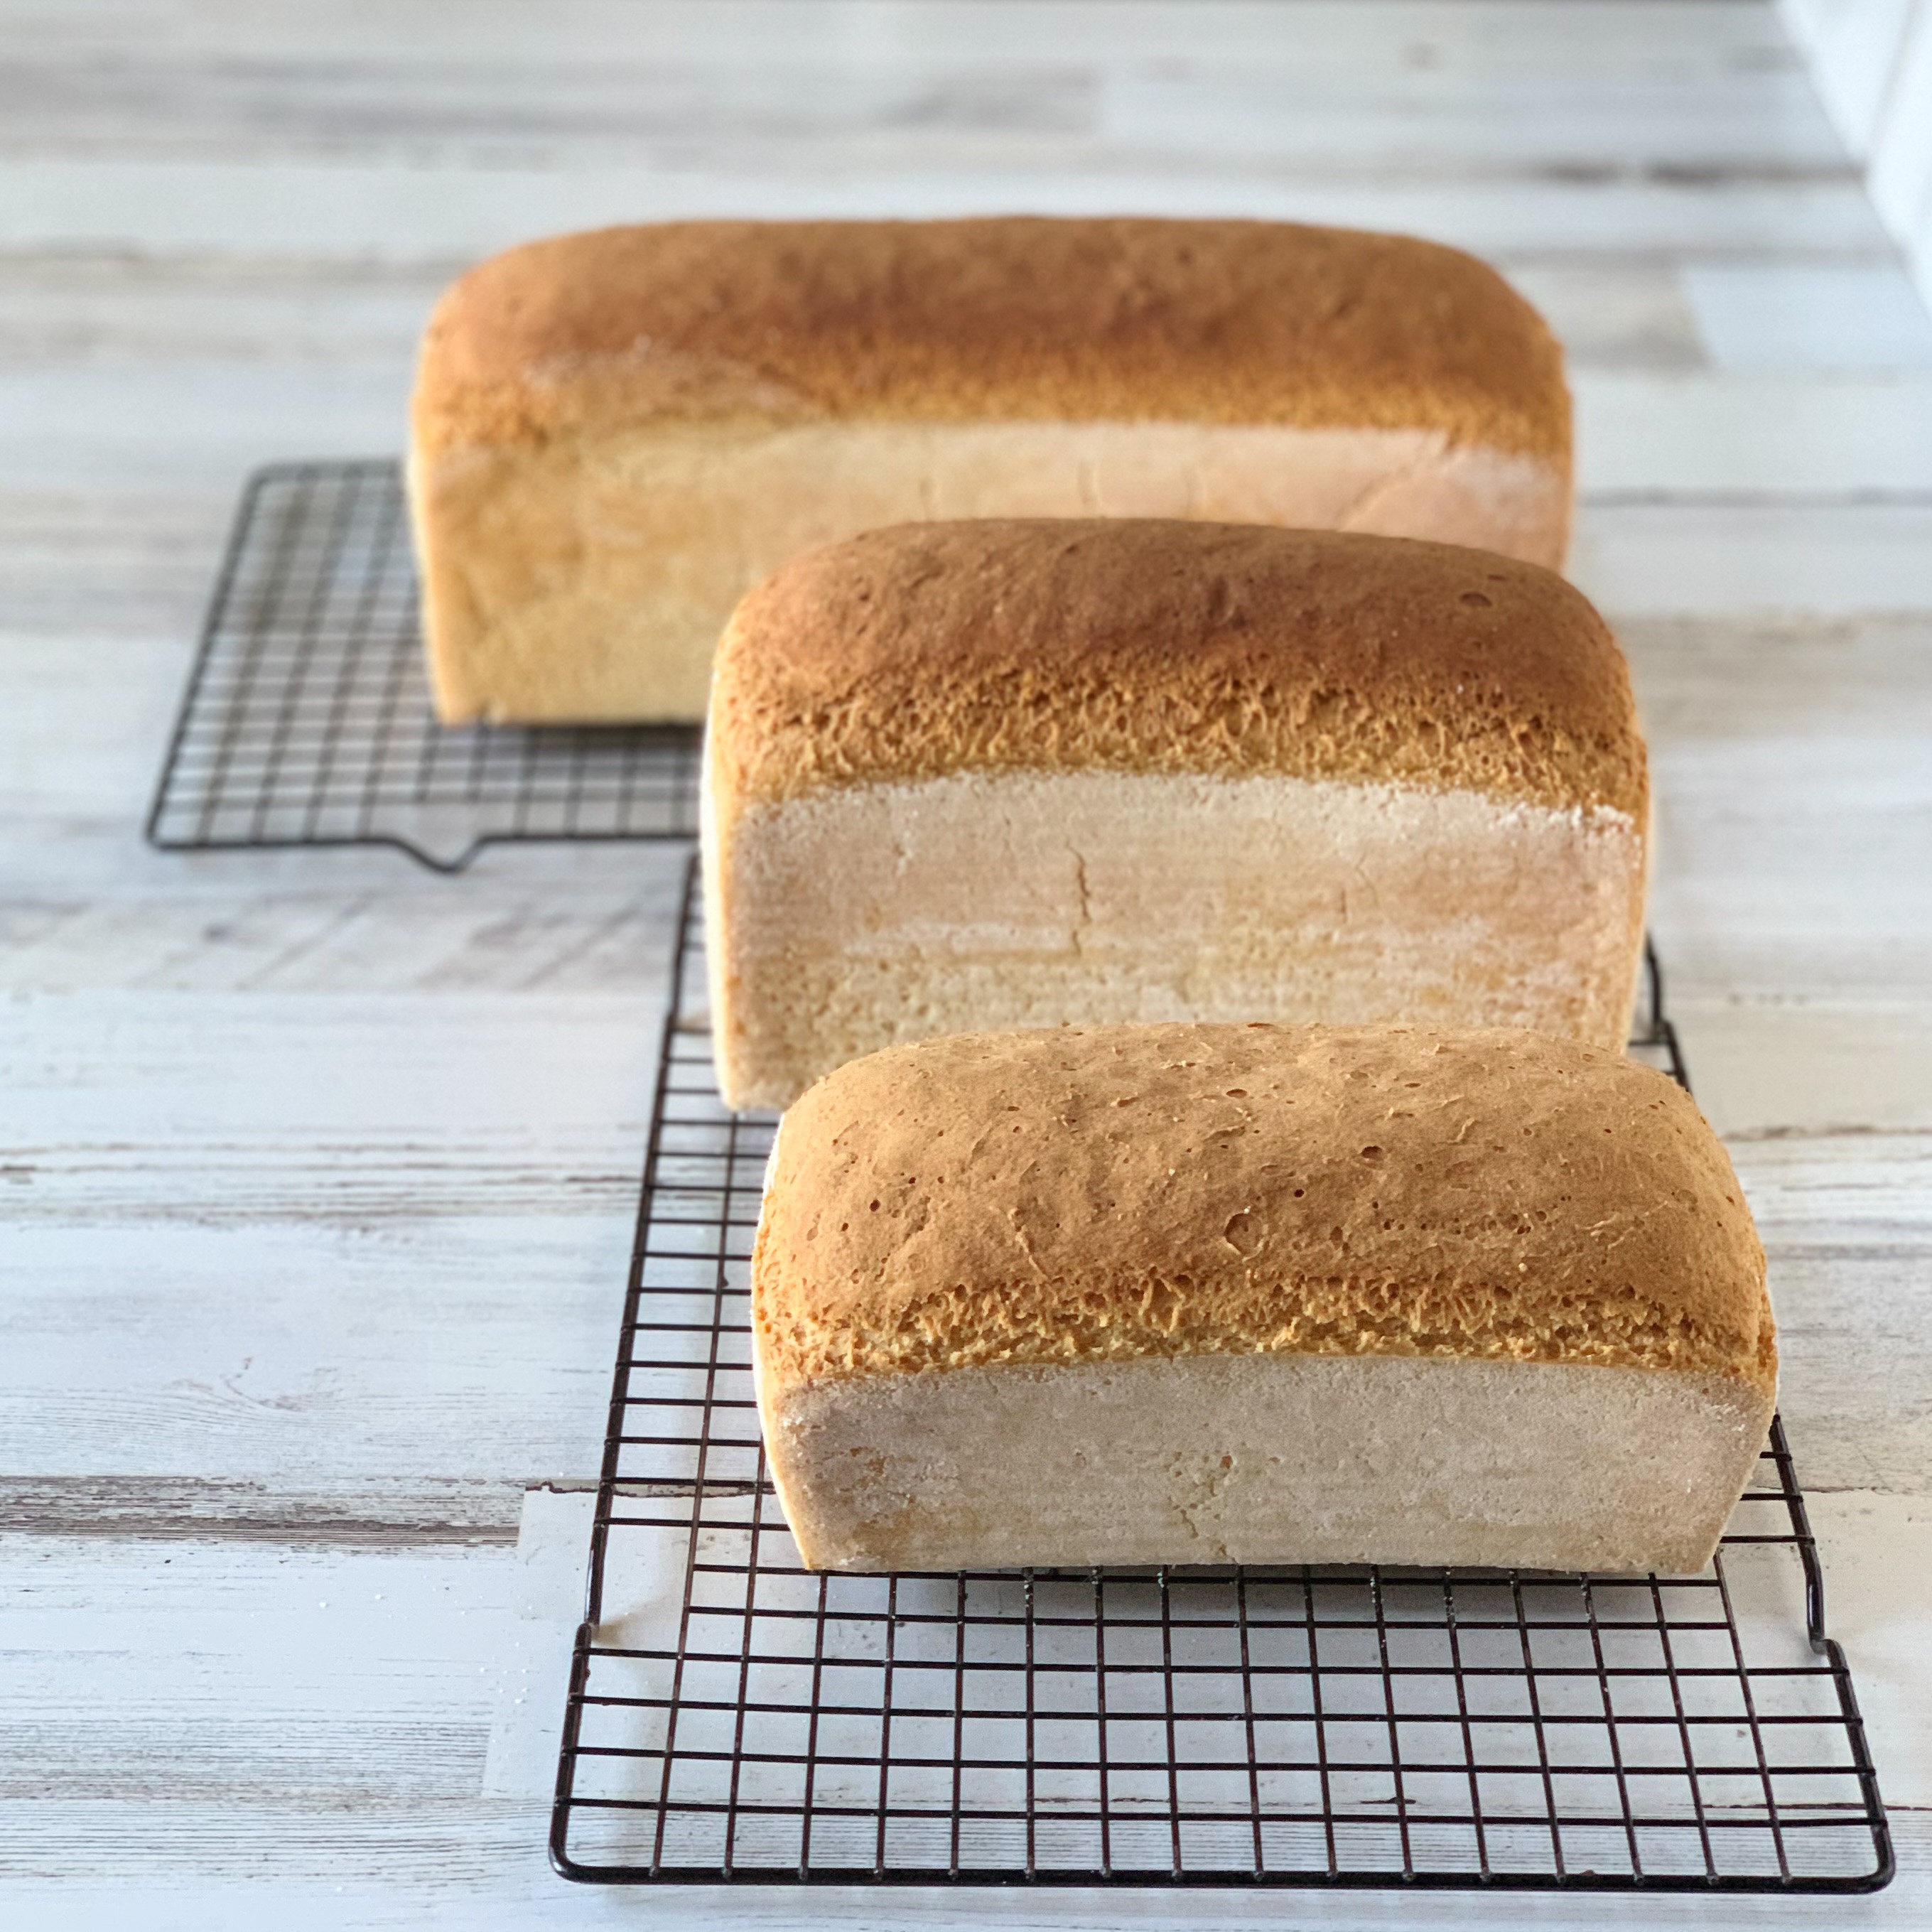
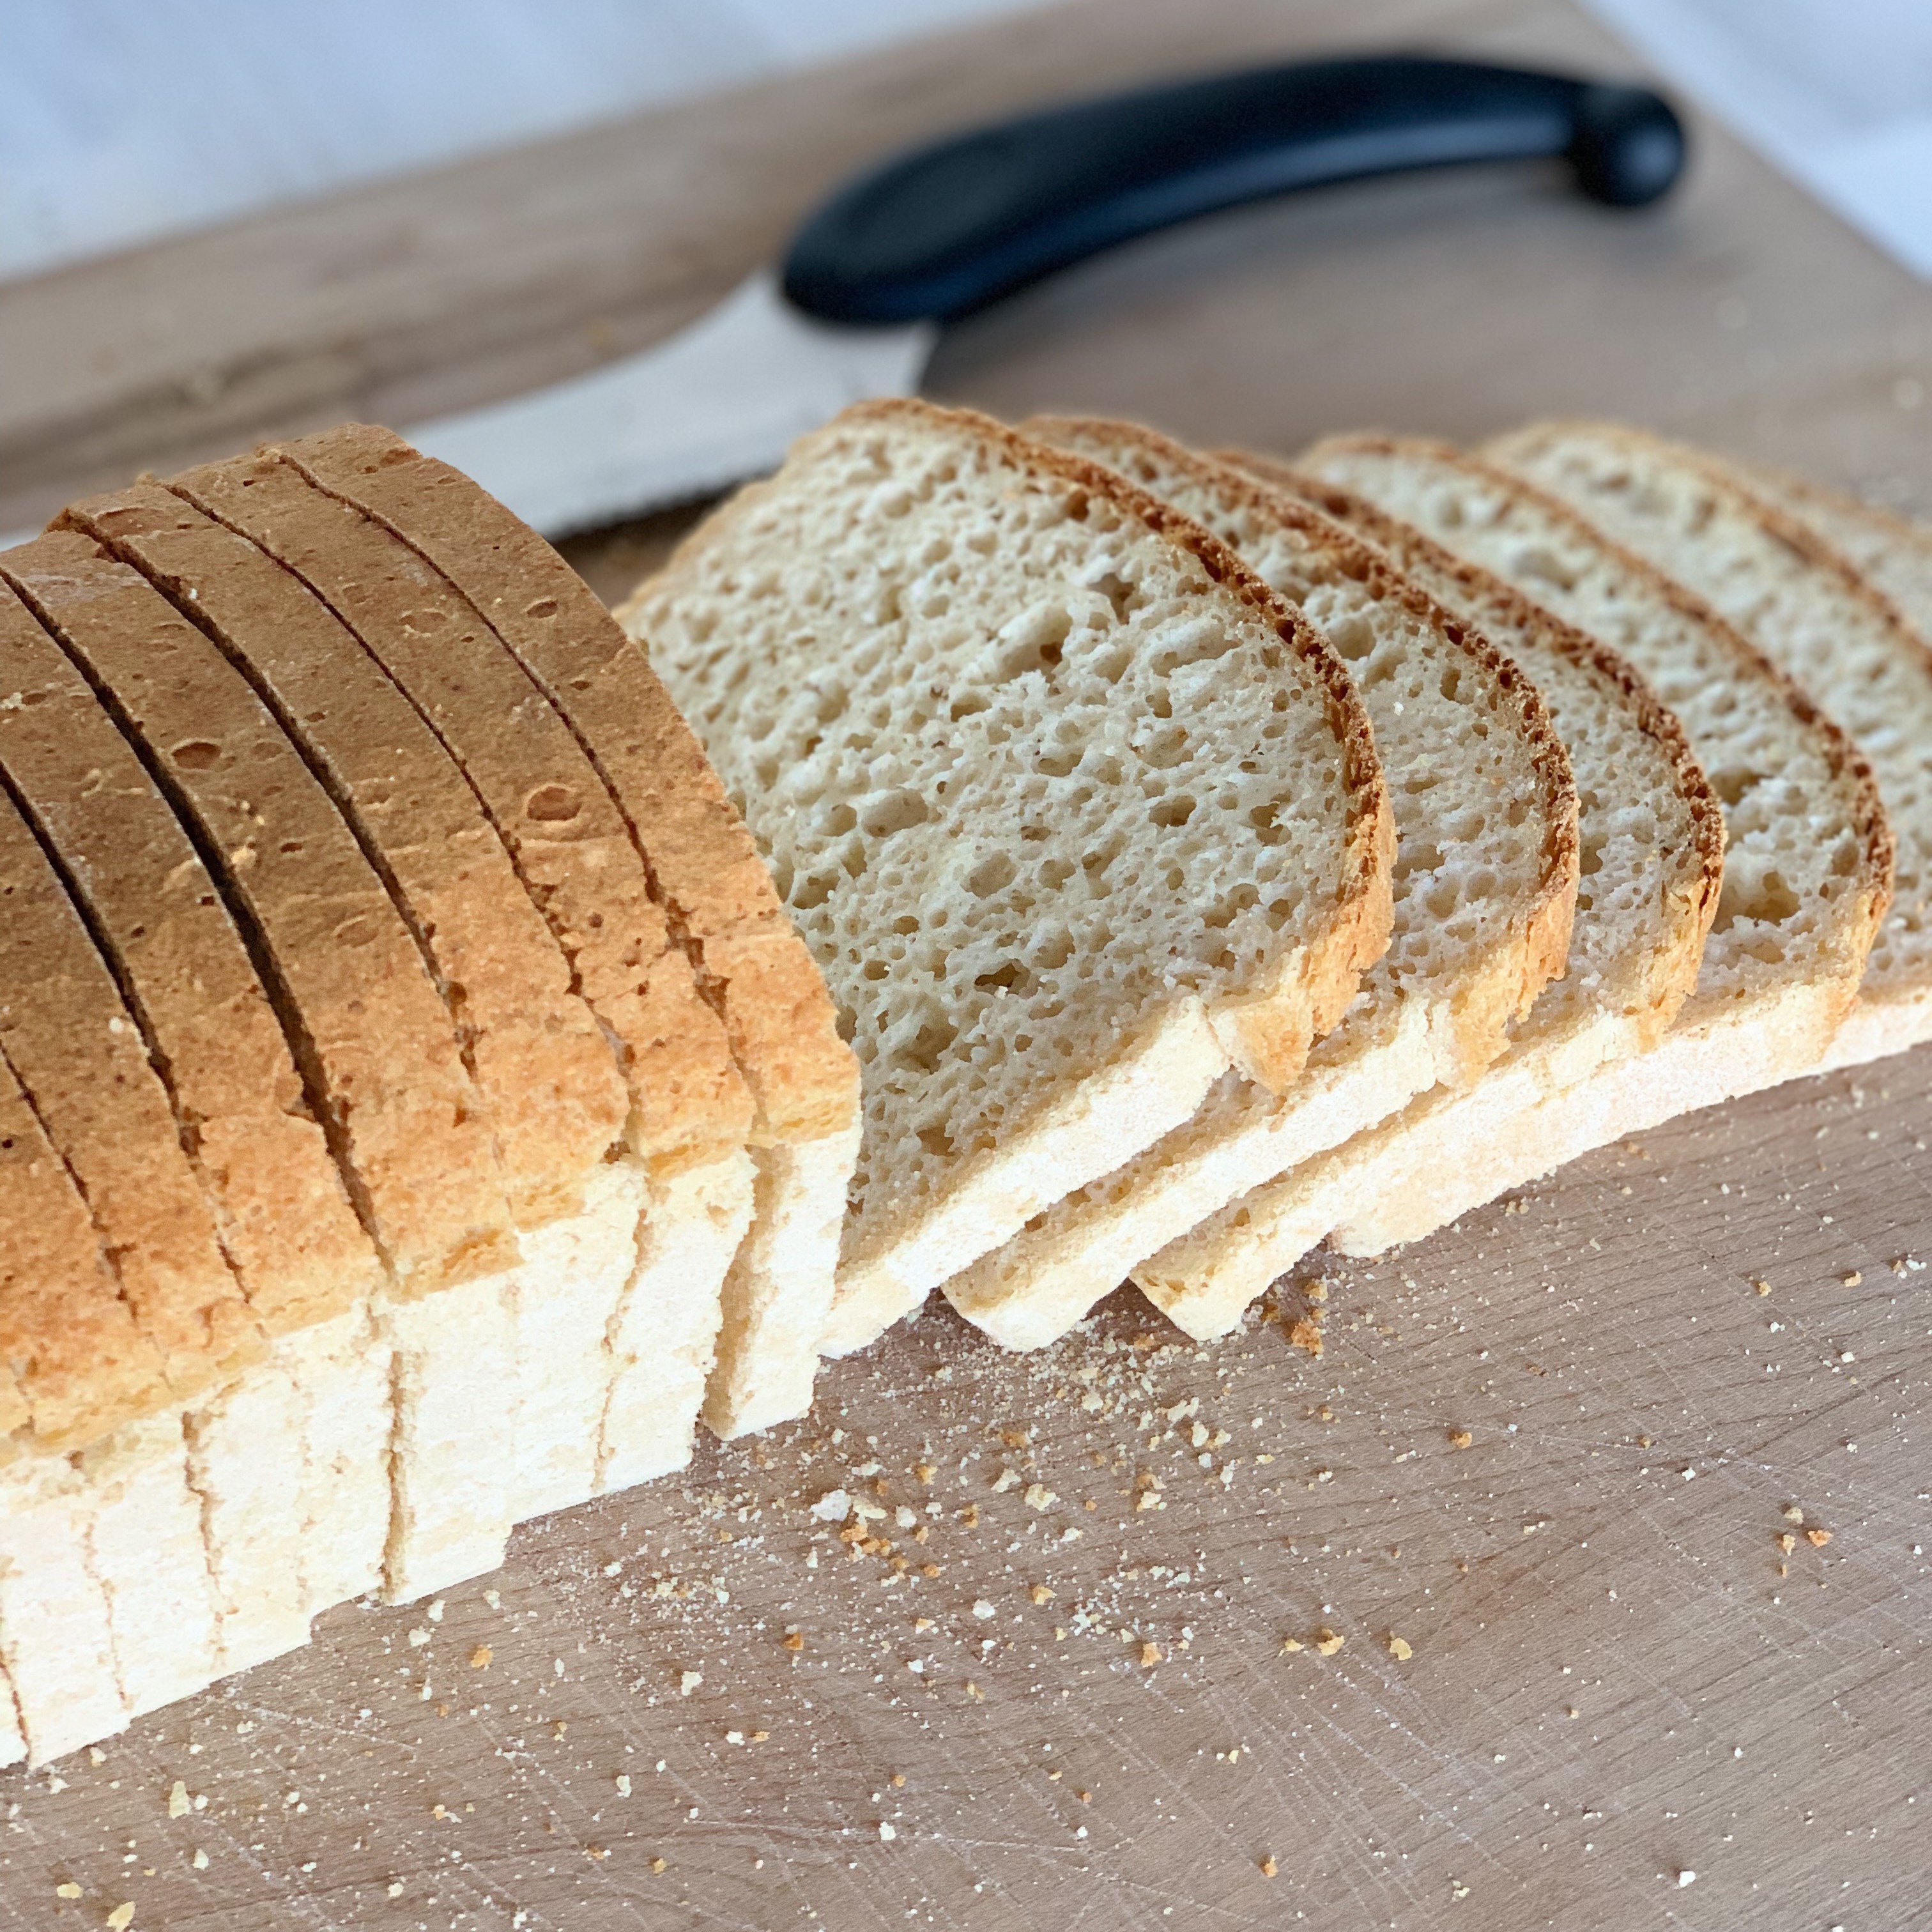
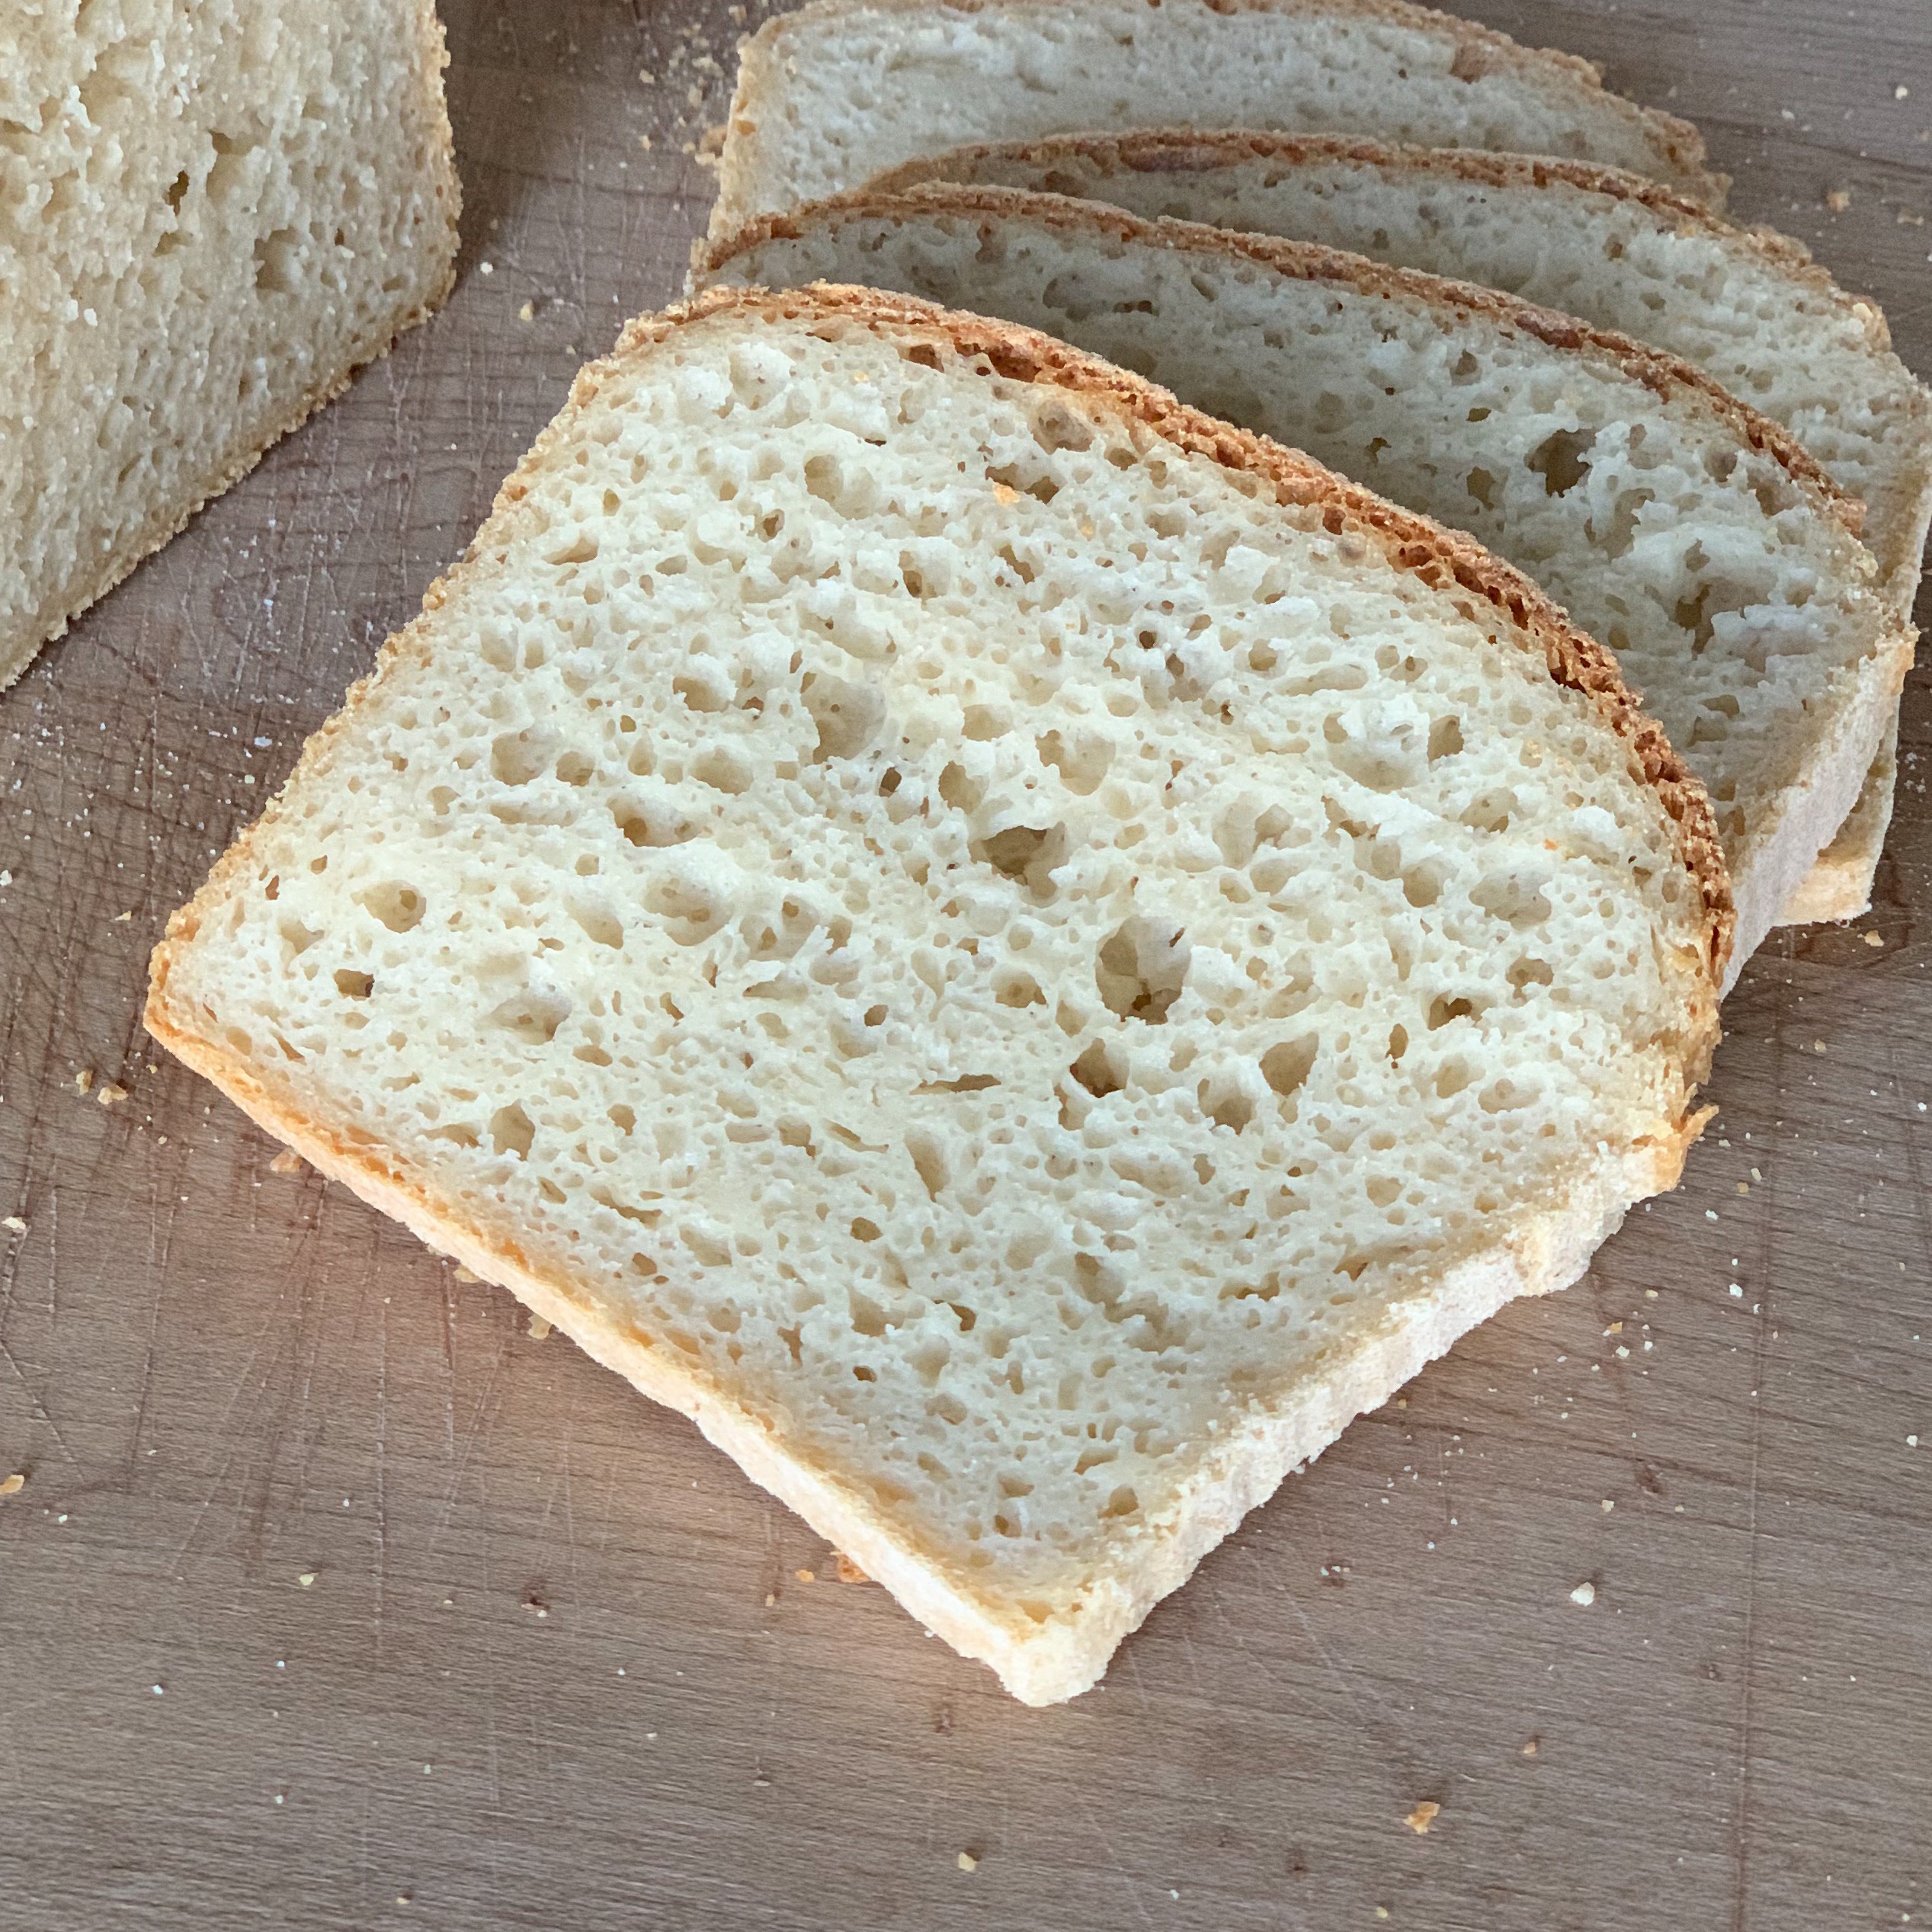
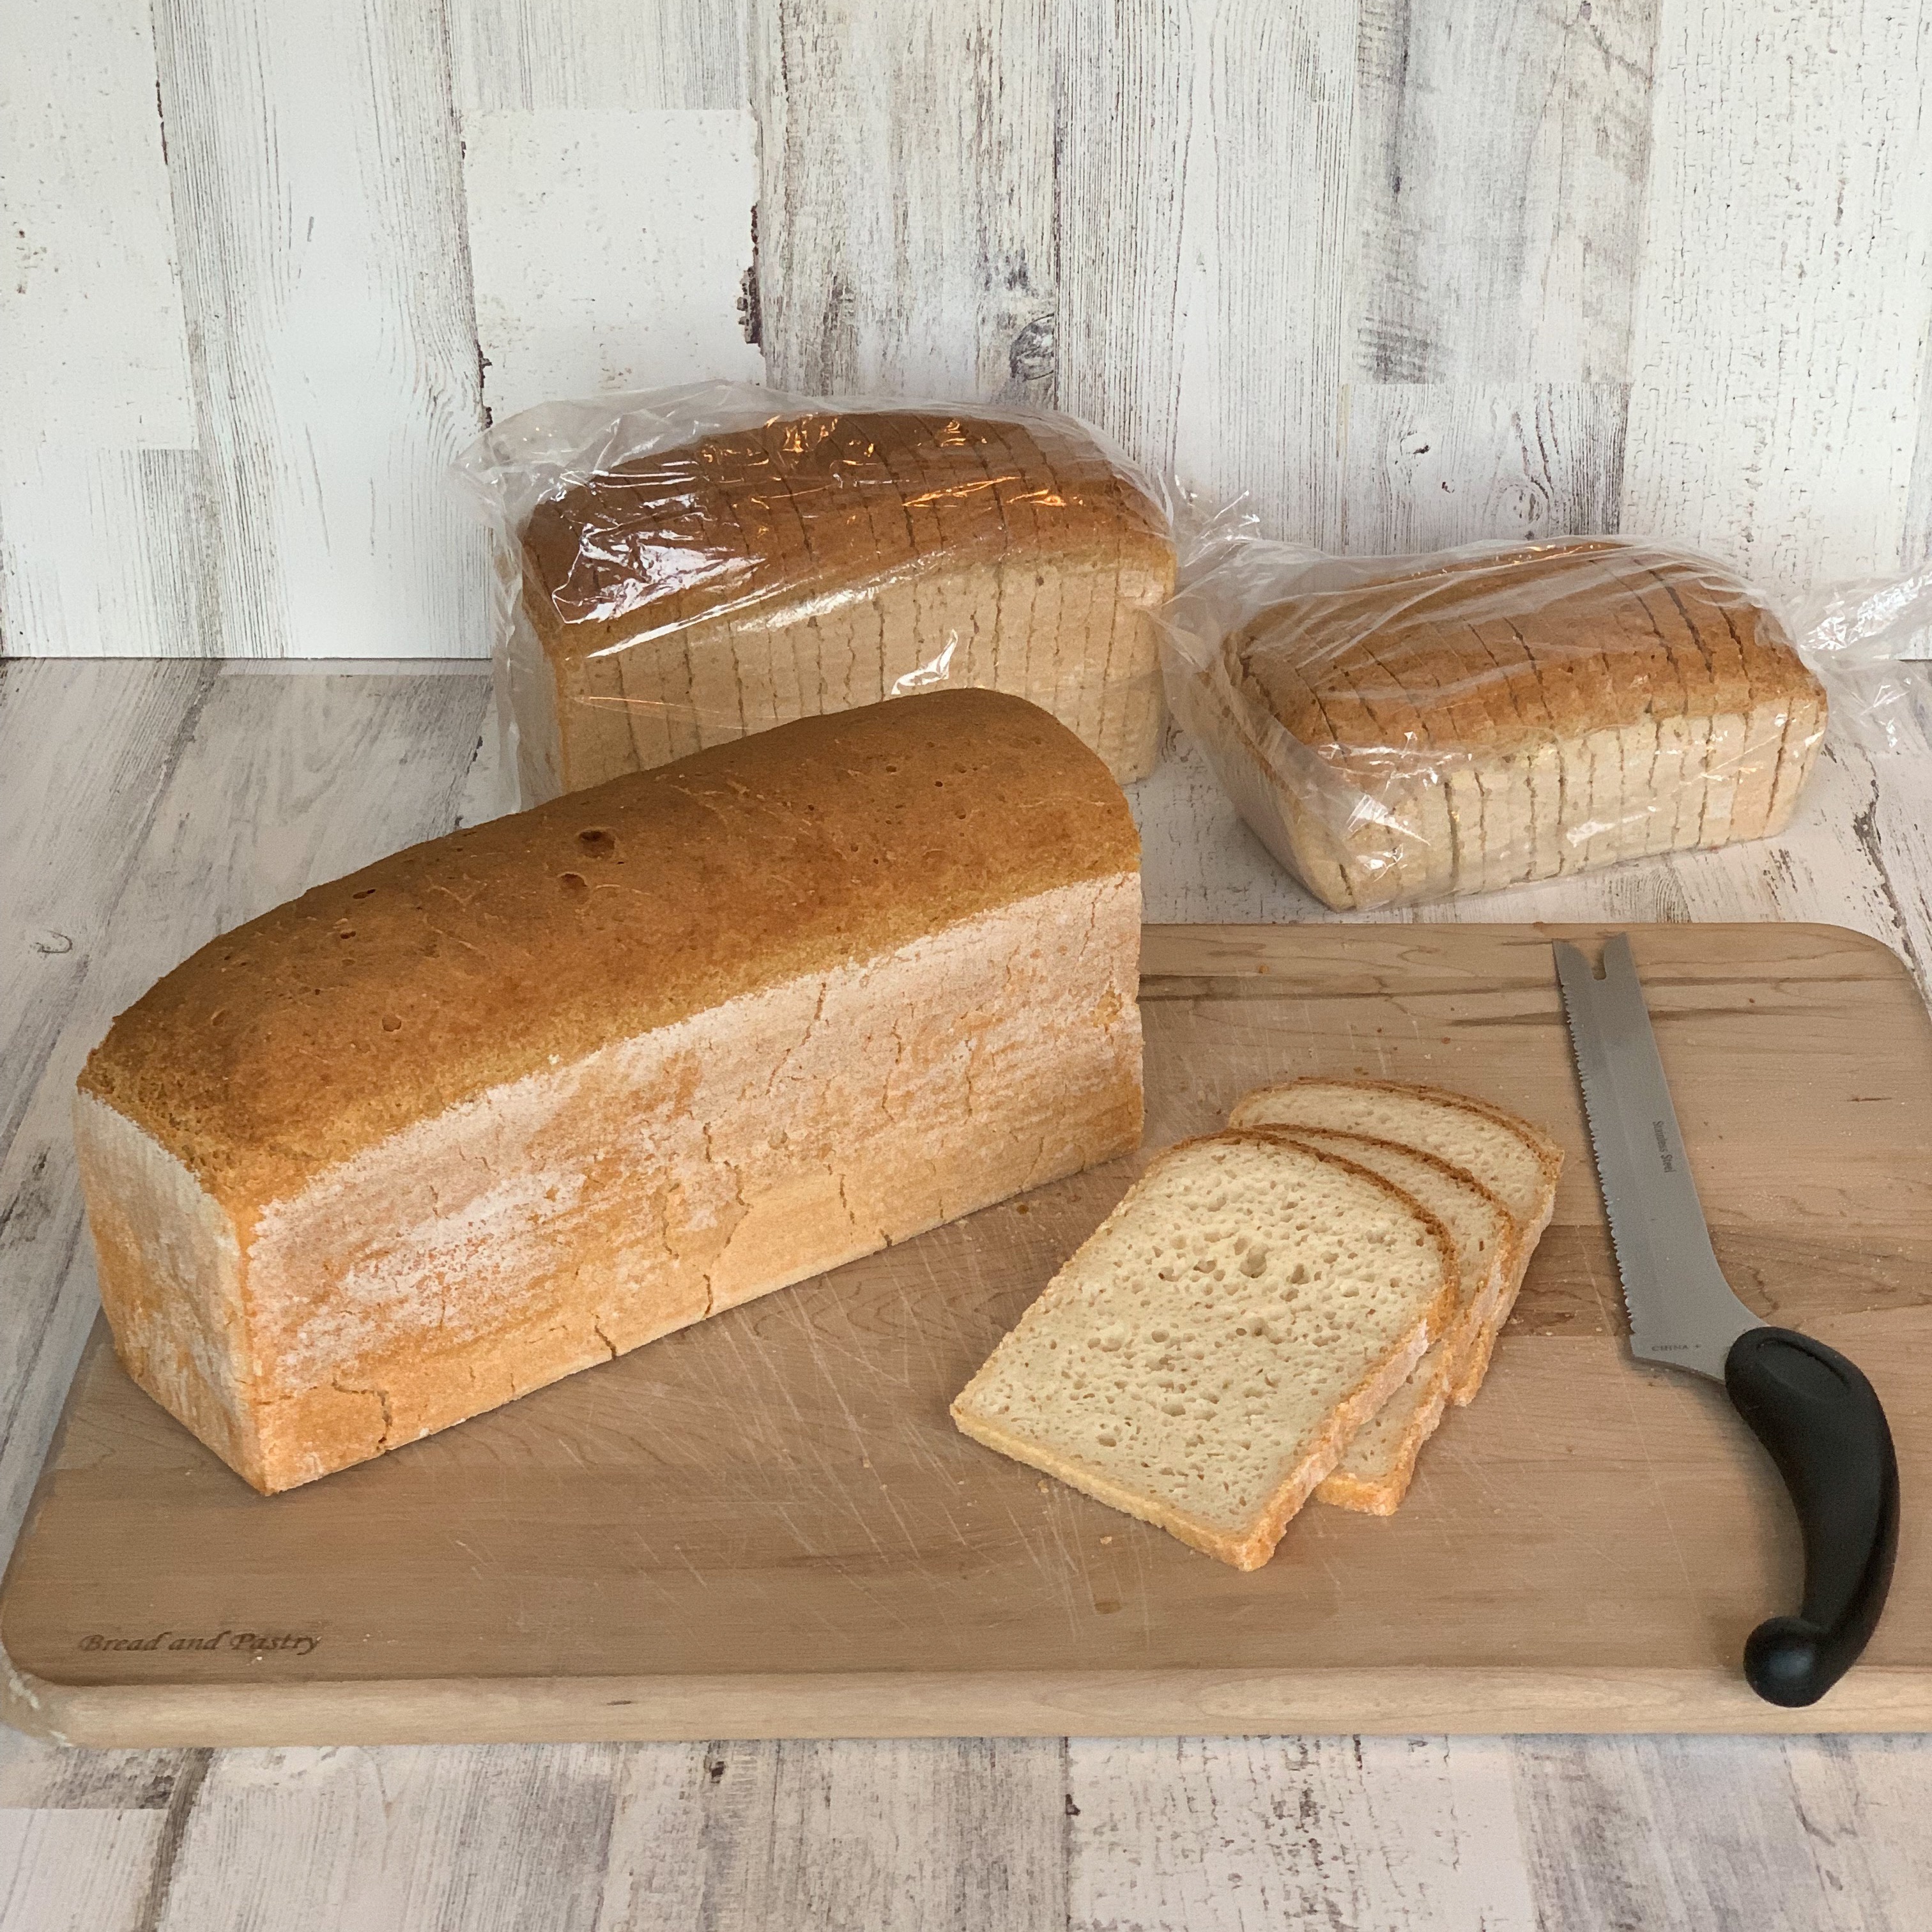
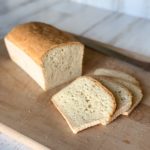
Making a light and fluffy, full-size loaf of gluten free sandwich bread is really easy when you use the right ingredients and techniques. You don’t even need xanthan gum or eggs, and your bread will be much better without them. Just look at that beautiful texture!
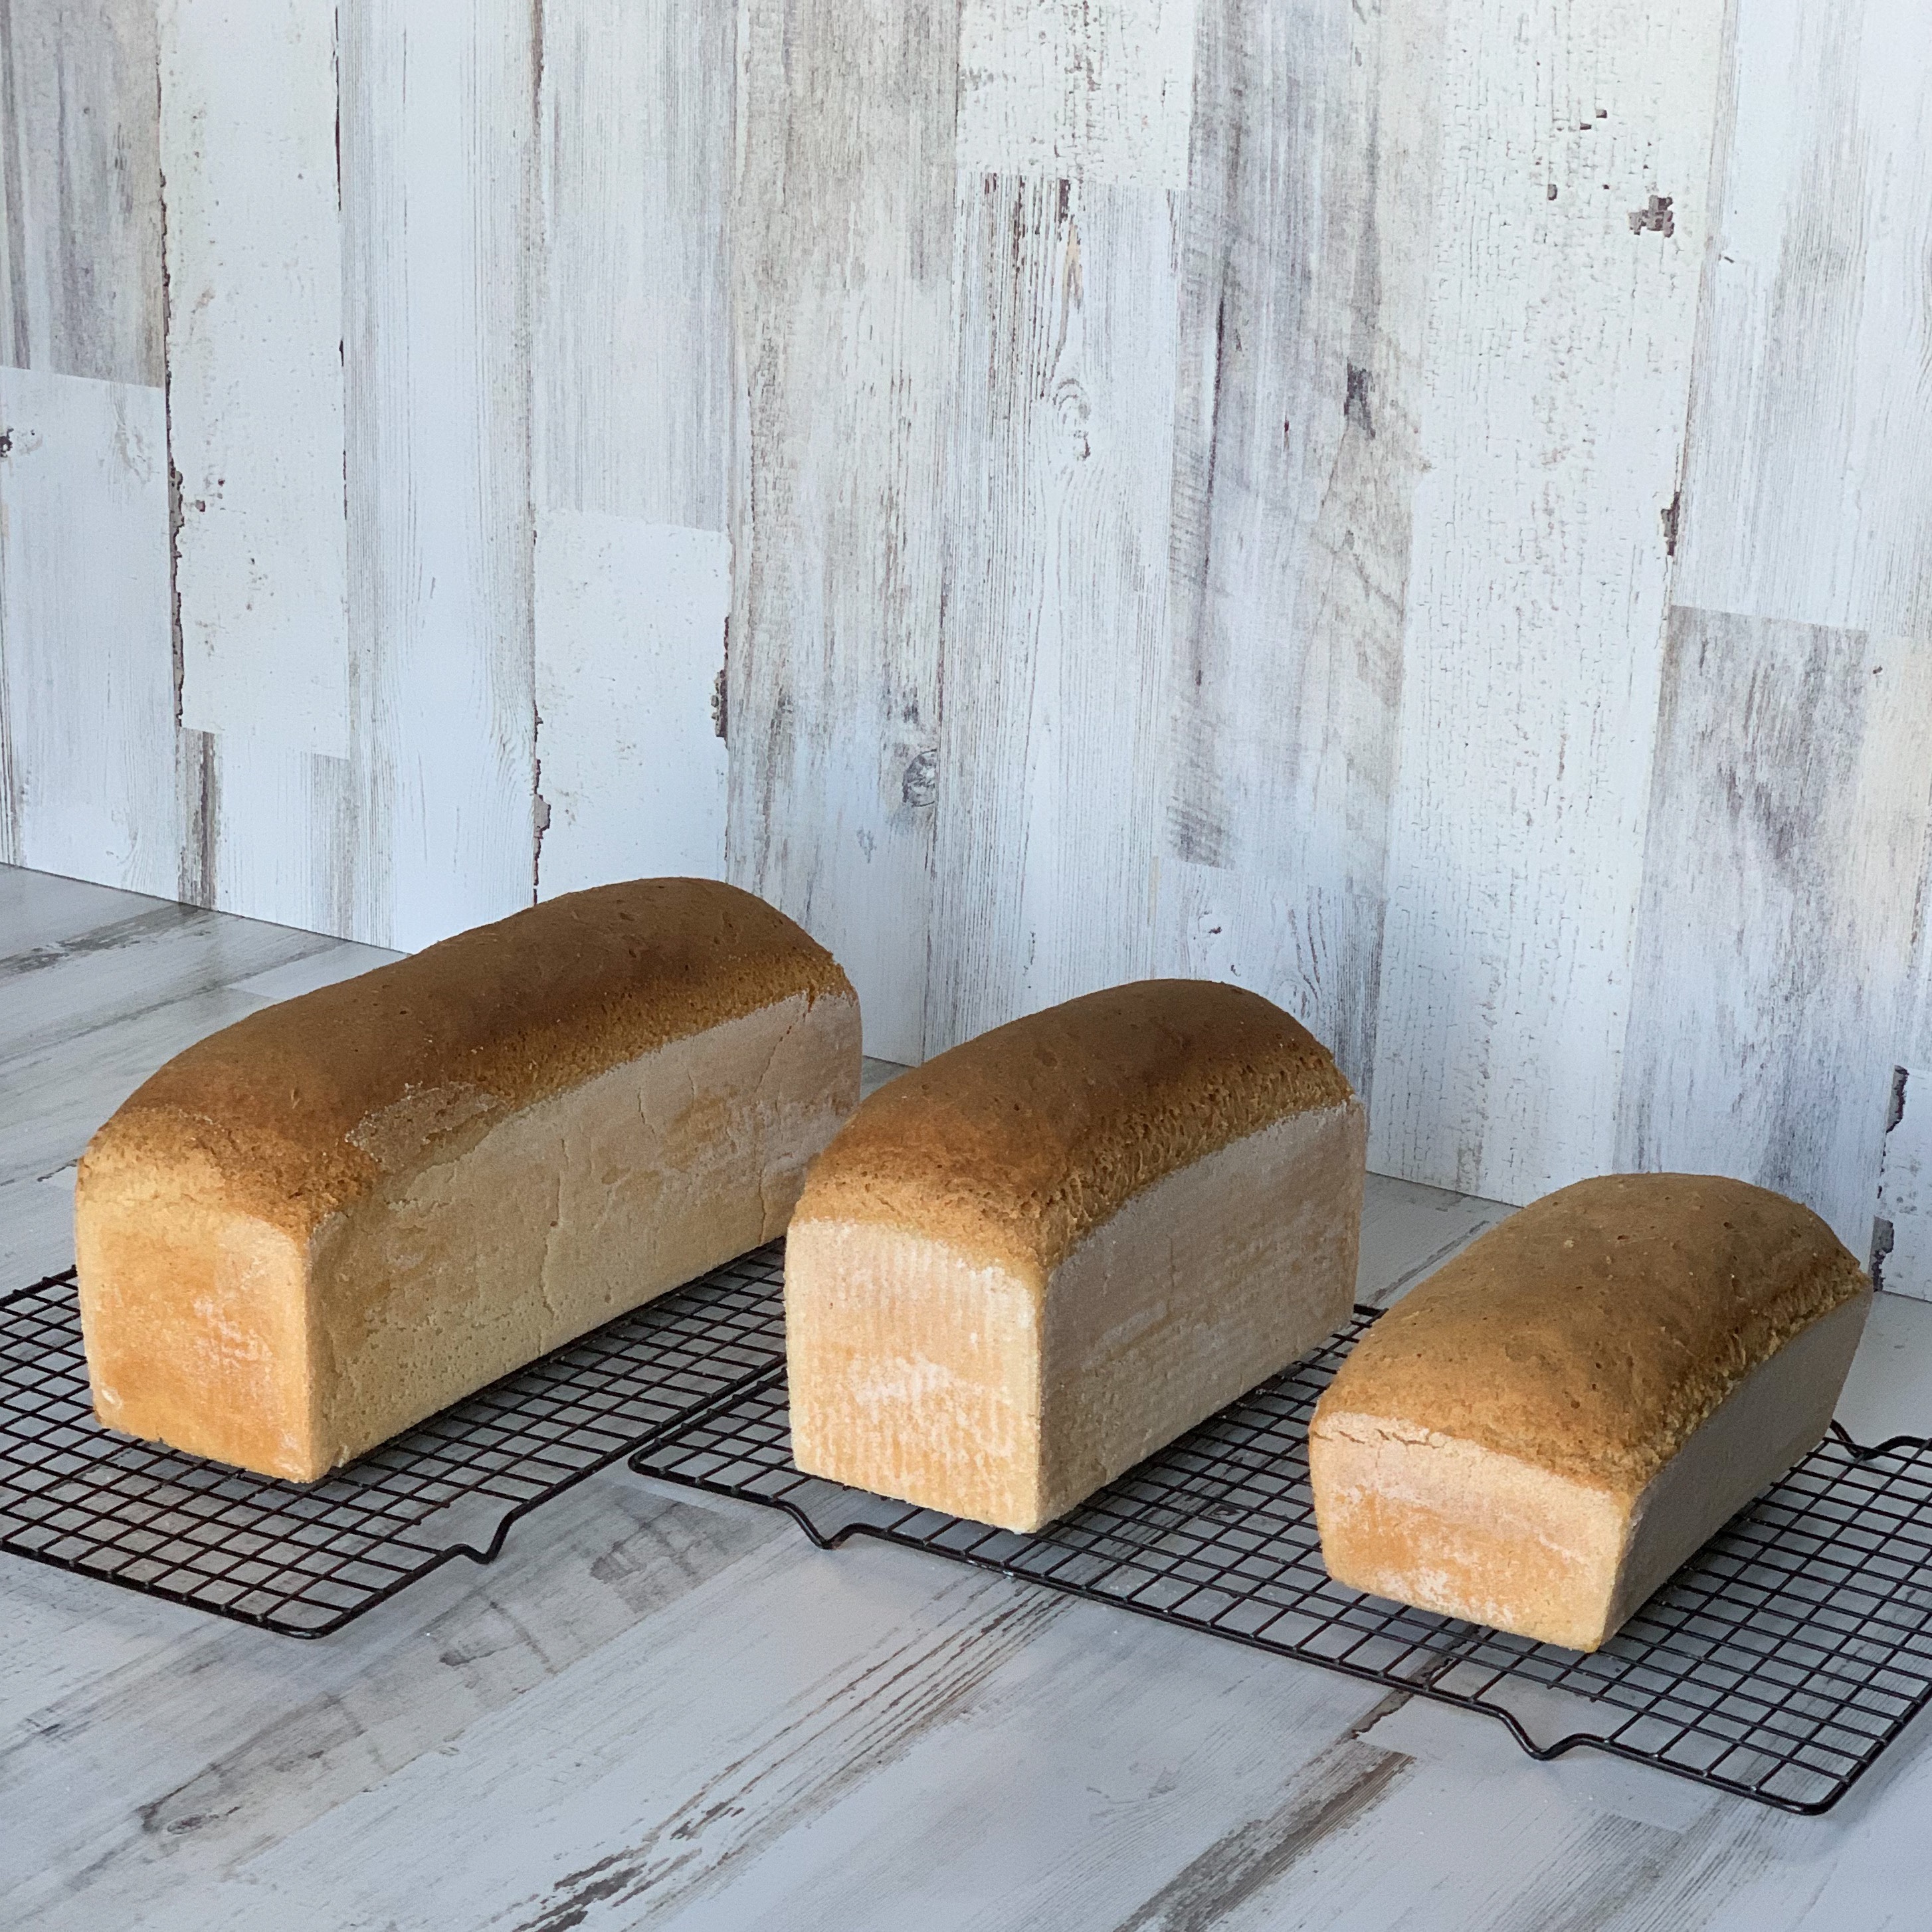
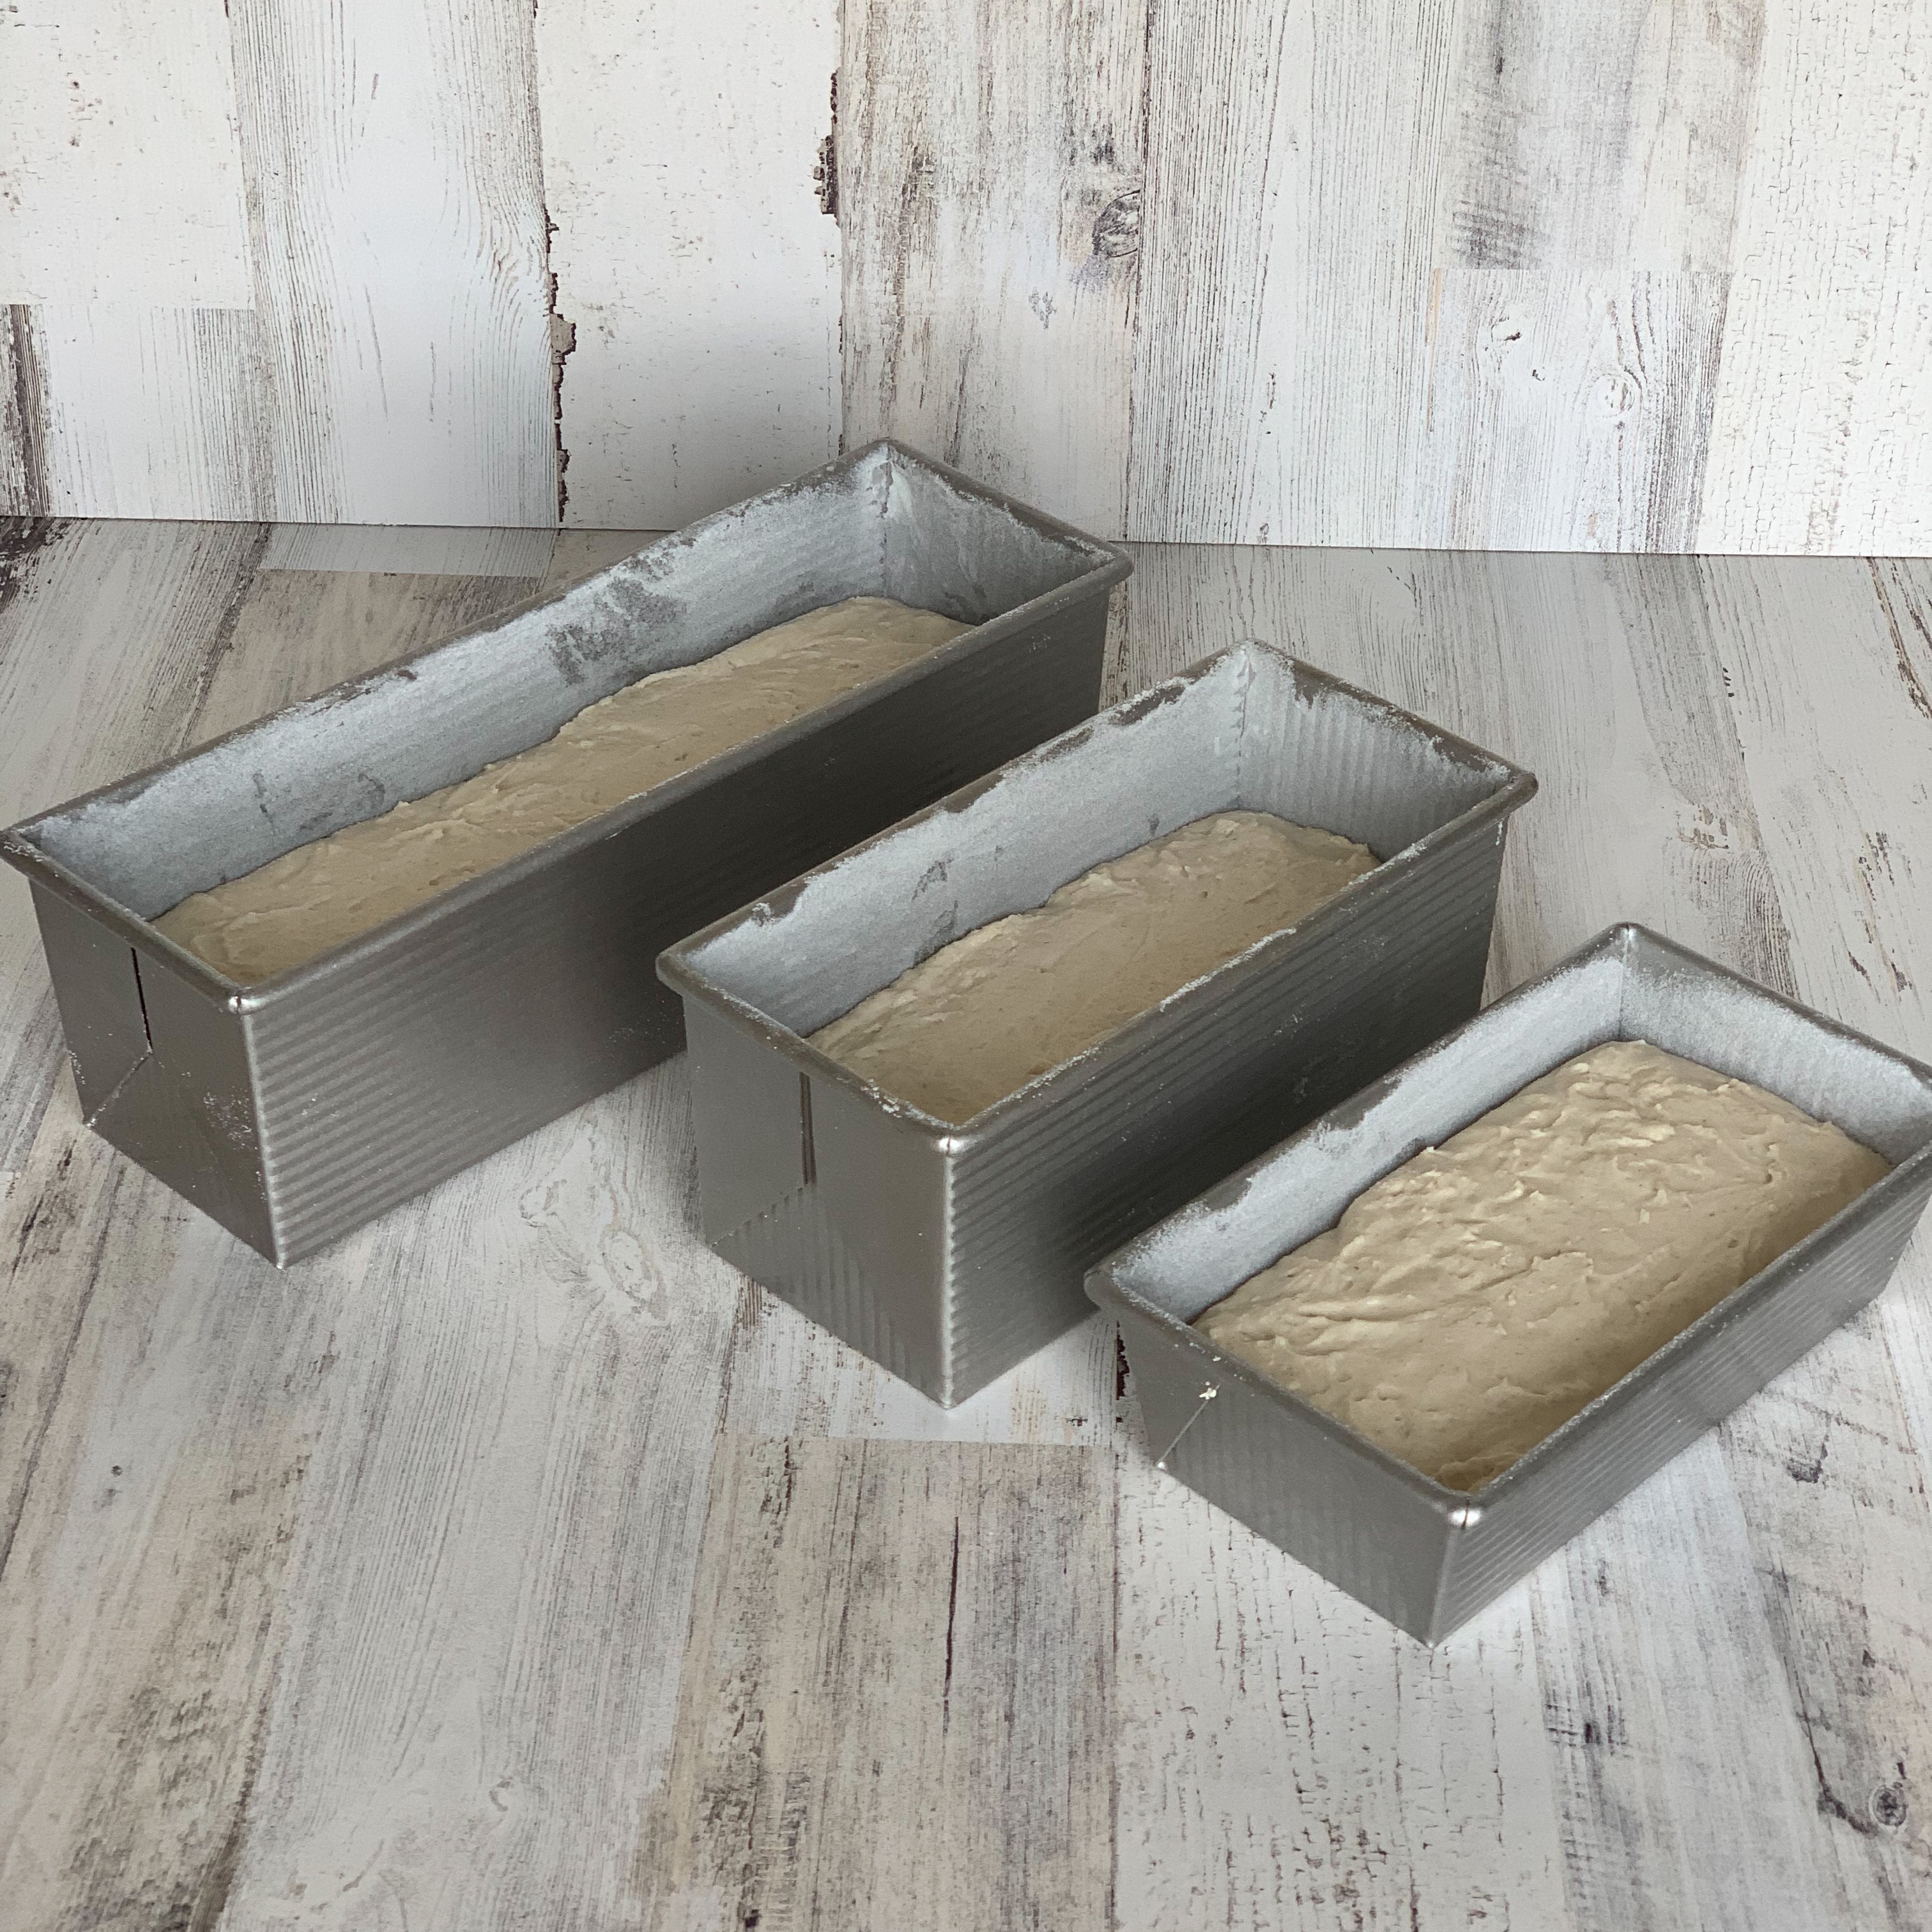
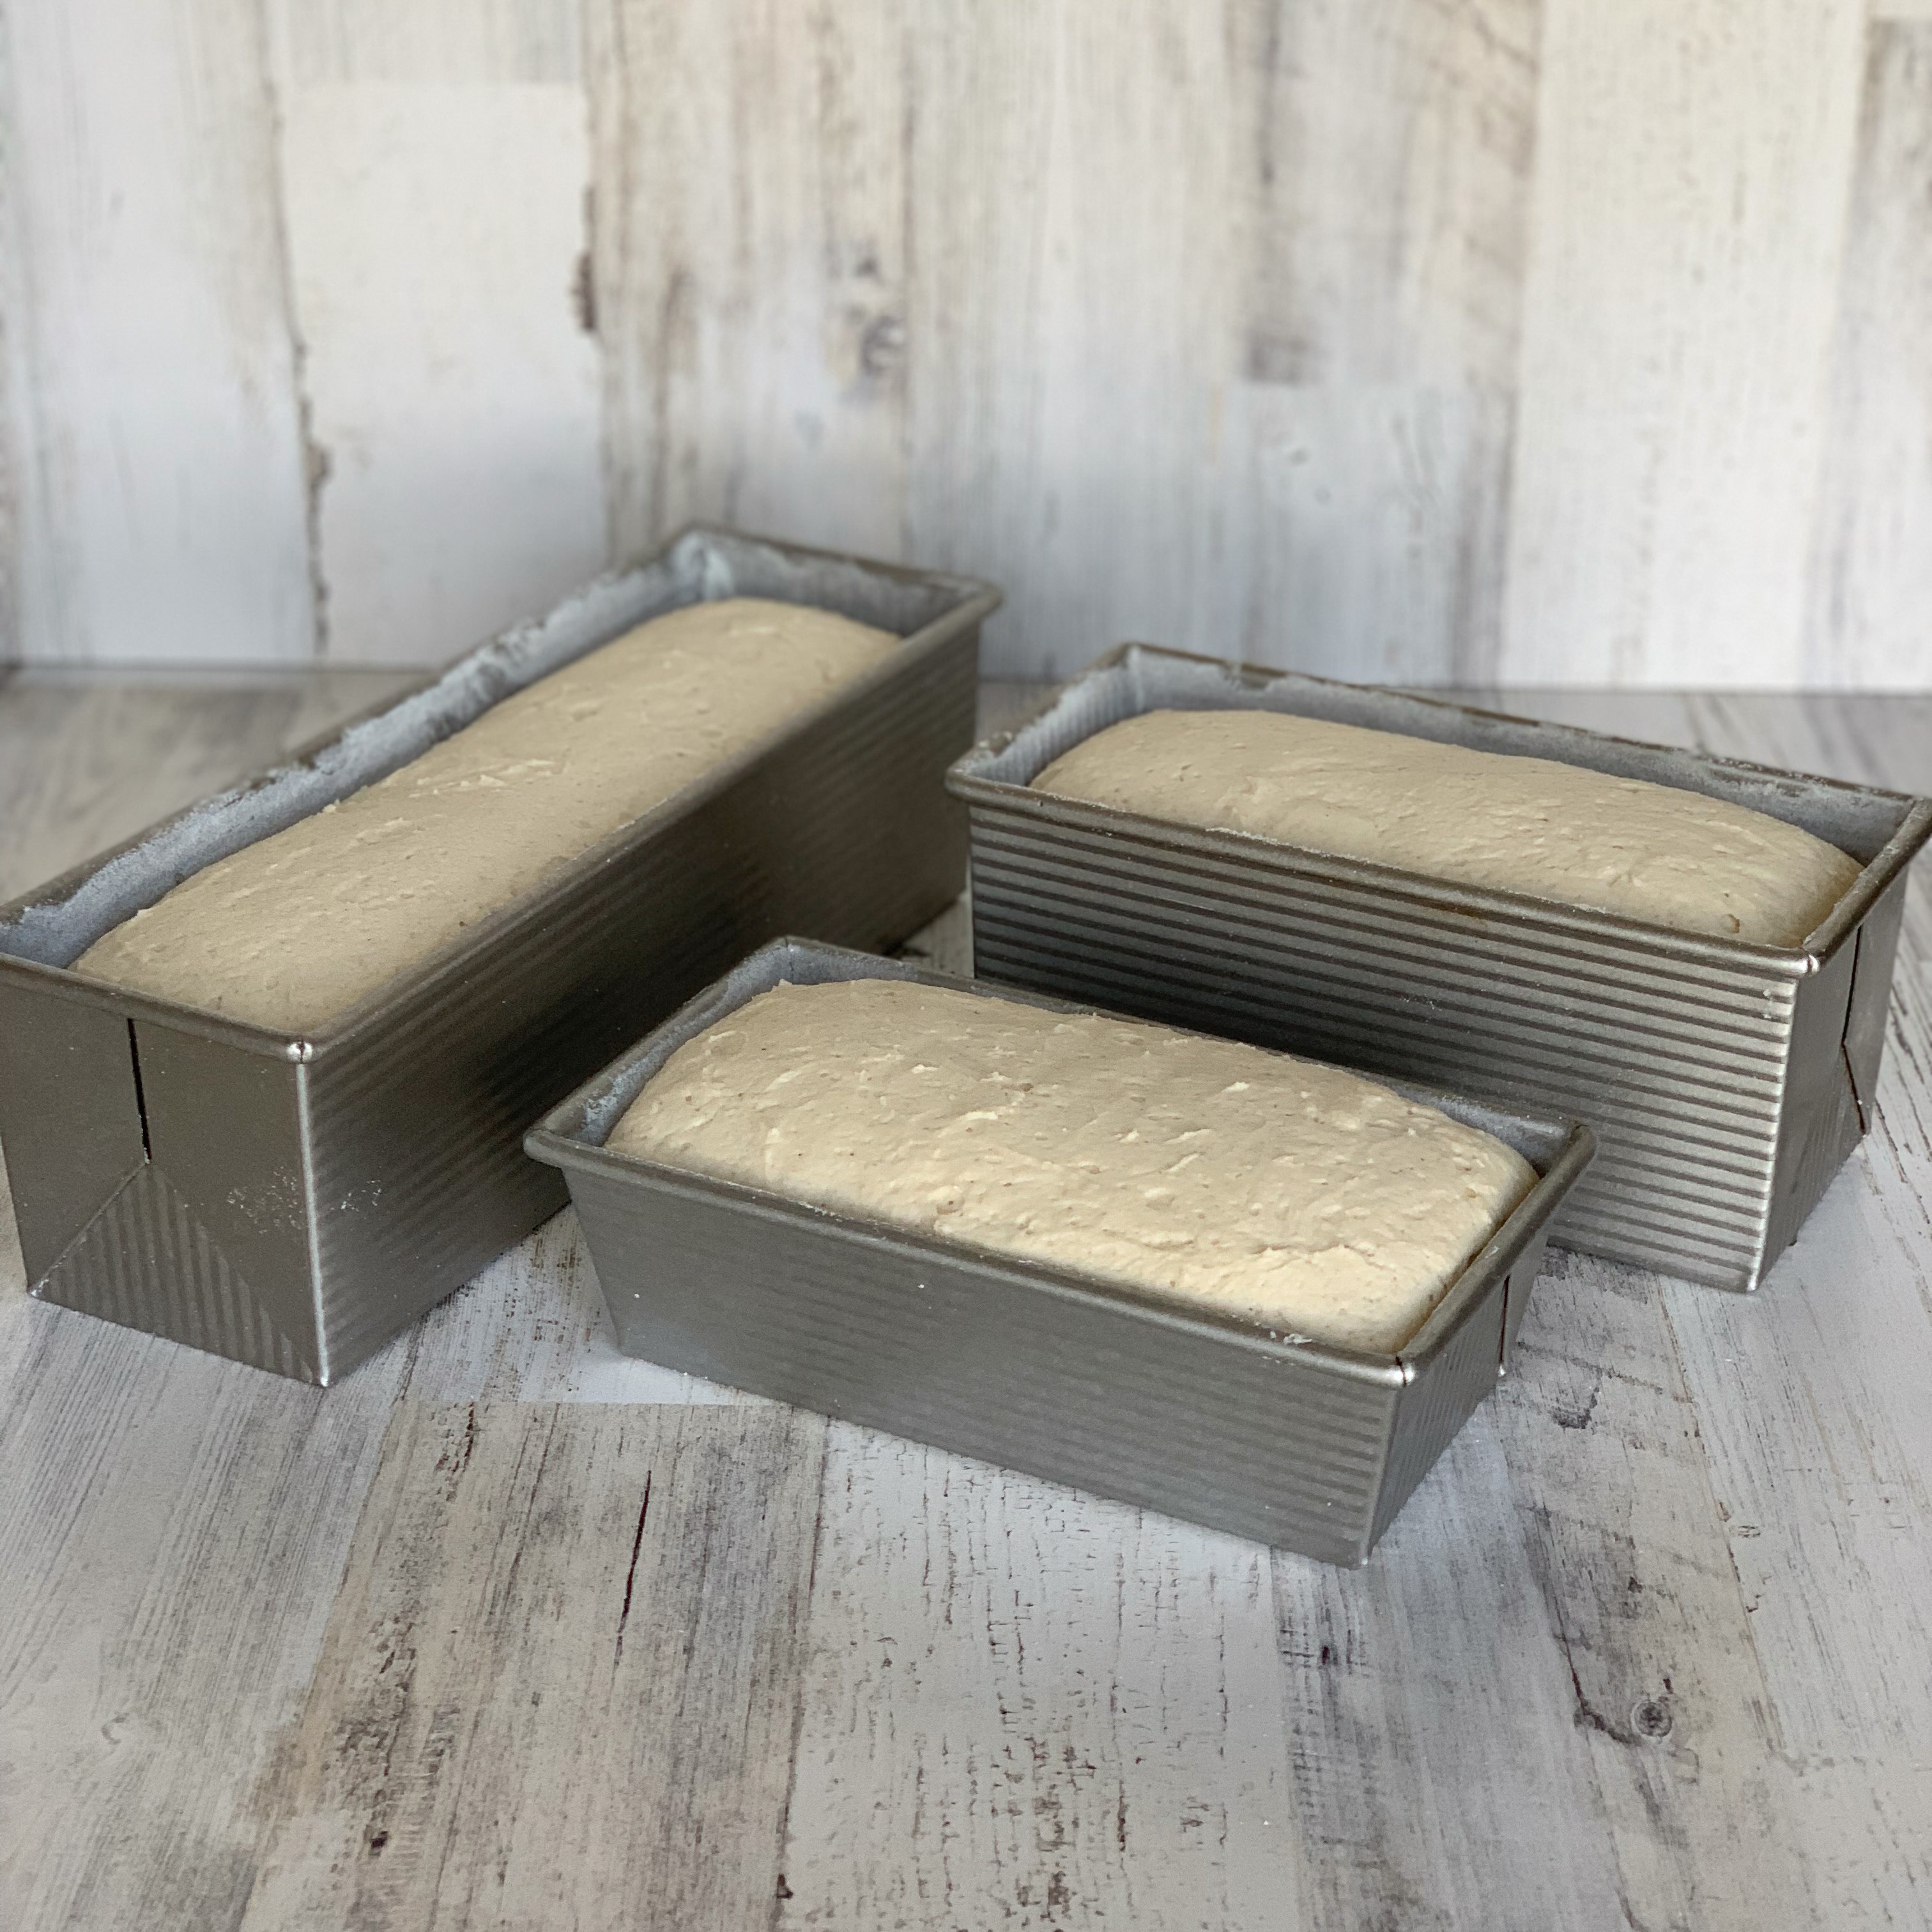
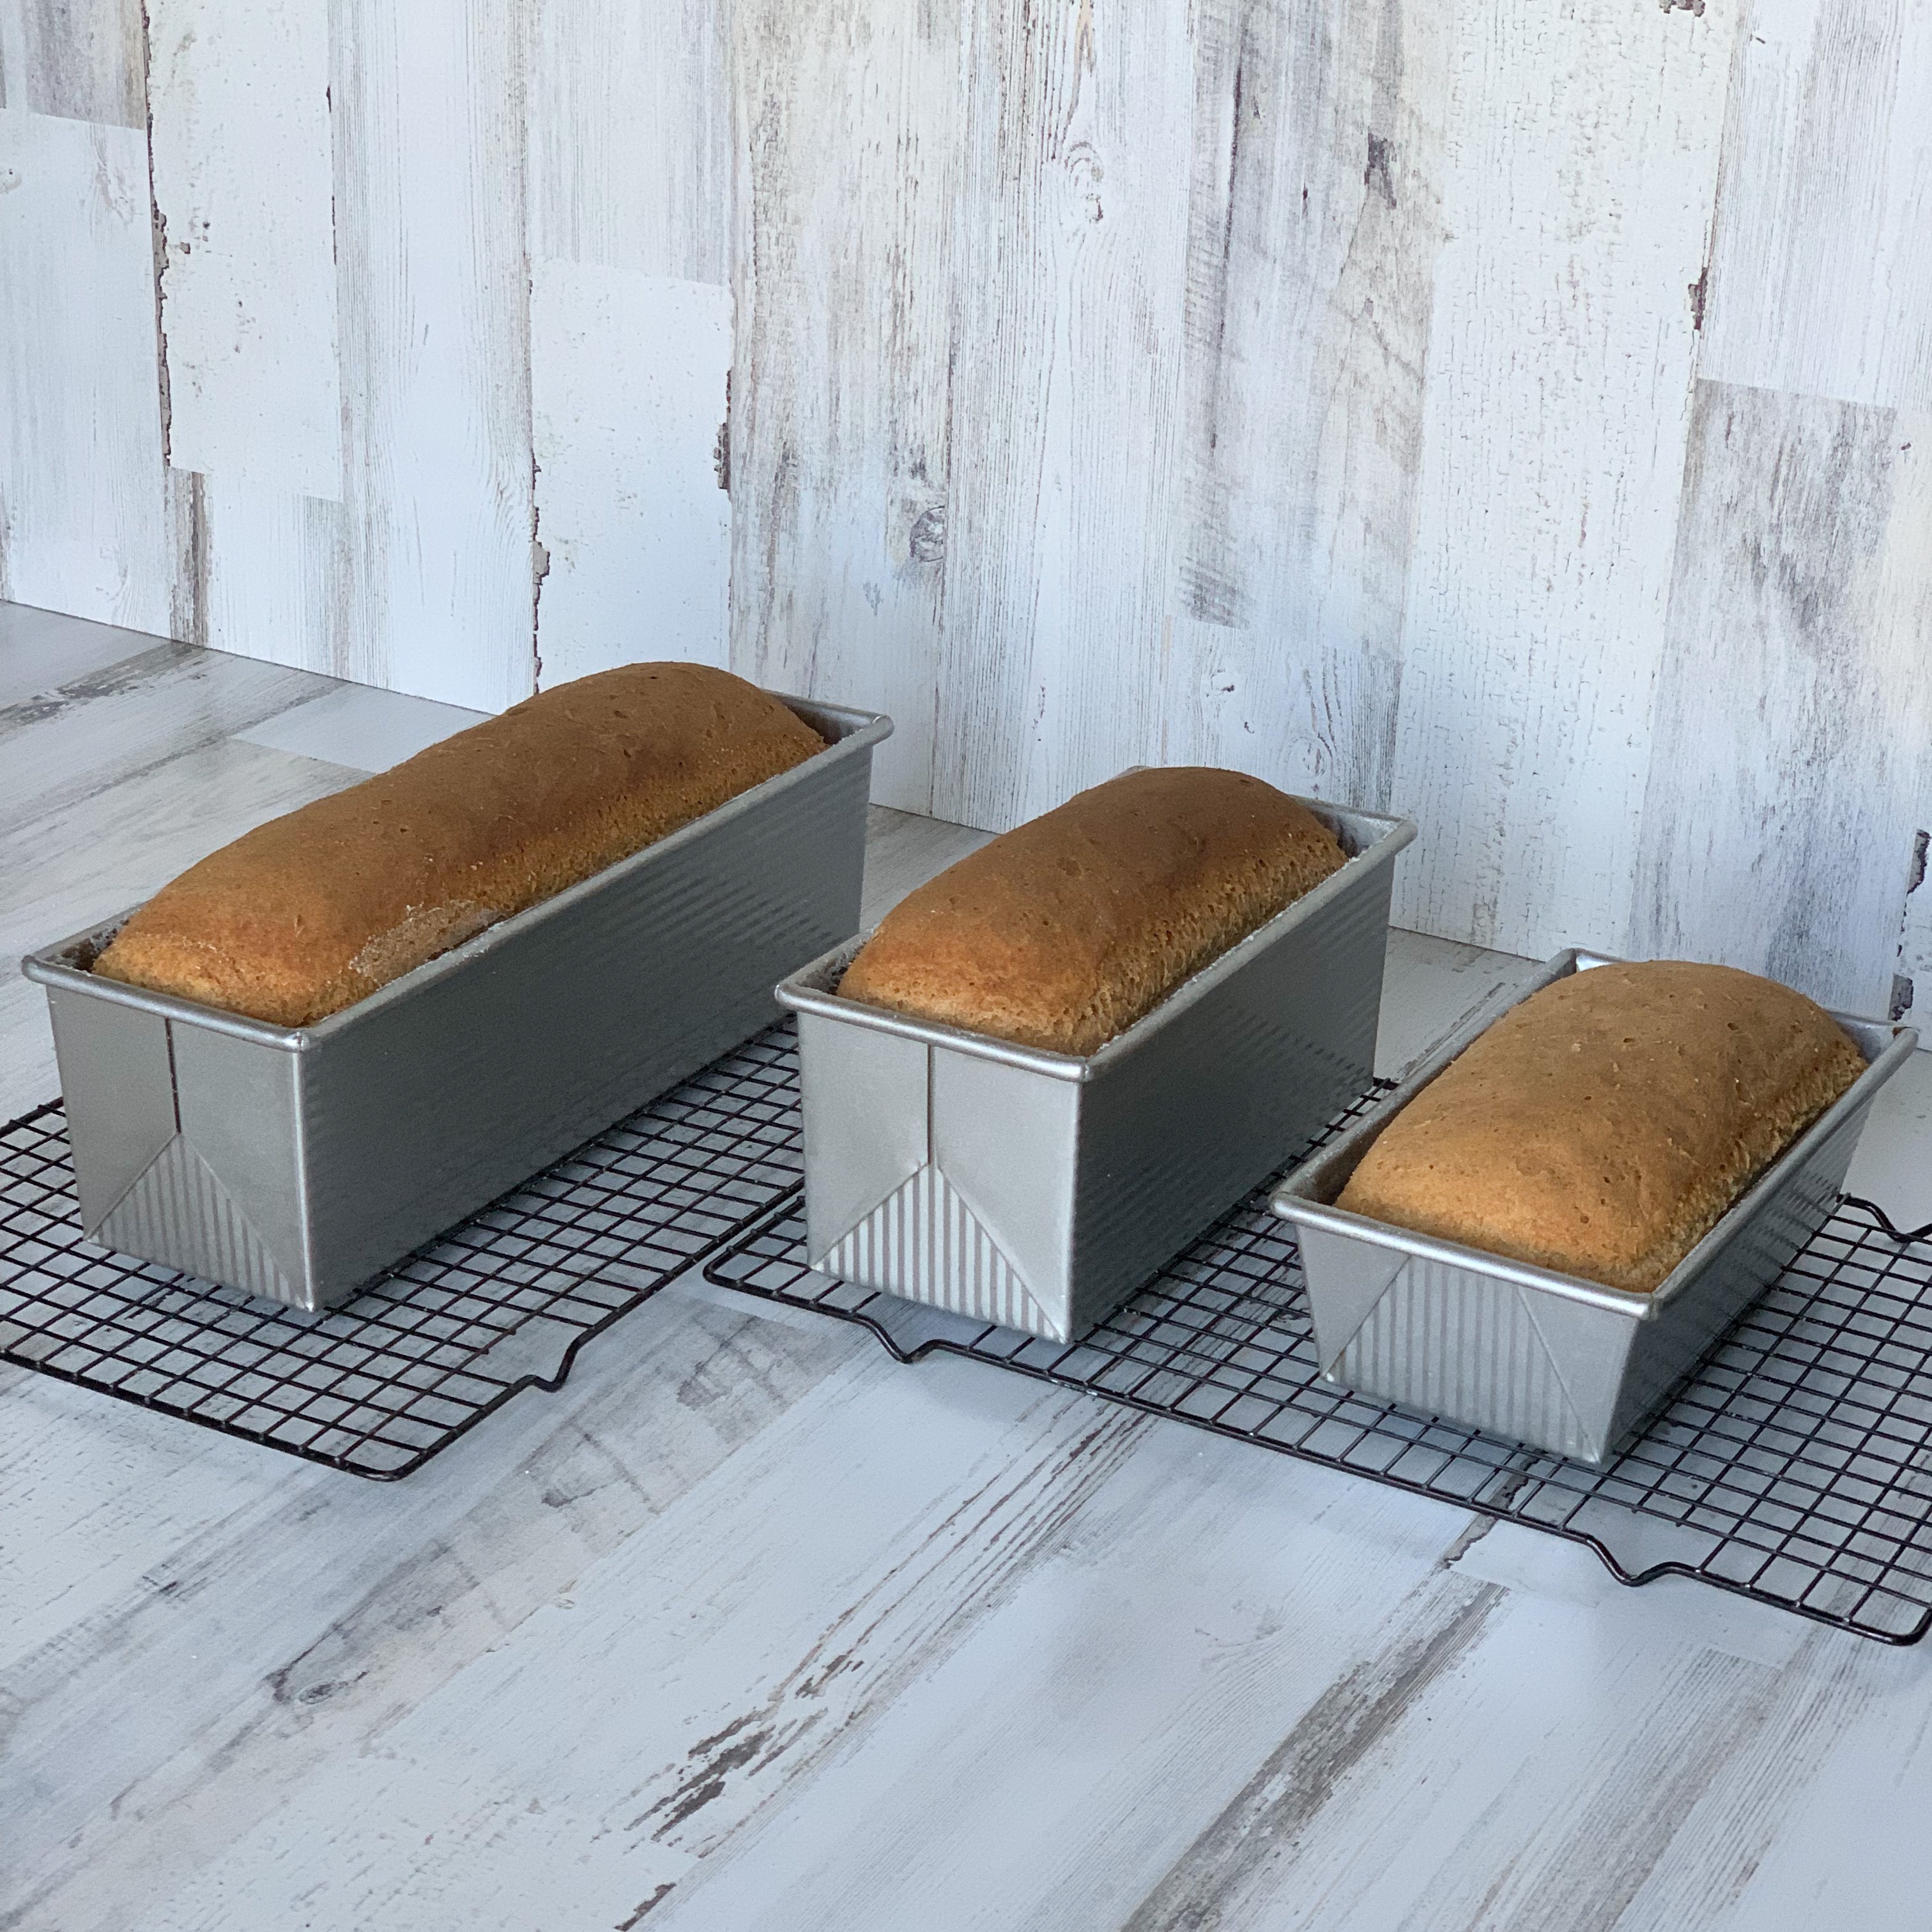
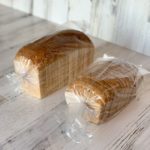
You will find three recipes below, one for each of the sizes shown here. The bread on the left was baked in a large Pullman pan (13″ x 4″ x 4″) and is a proper bakery-sized loaf. The one in the middle was baked in a small Pullman pan (9″ x 4″ x 4″), and the small one on the right was baked in a standard 8.5″ x 4.5″ x 2.75″ loaf pan. I prefer the straight sides of the Pullman pans, but you can also use a regular 9″ x 5″ loaf pan for the medium-sized bread. I do not recommend using glass, cast iron, or silicone pans for bread baking.
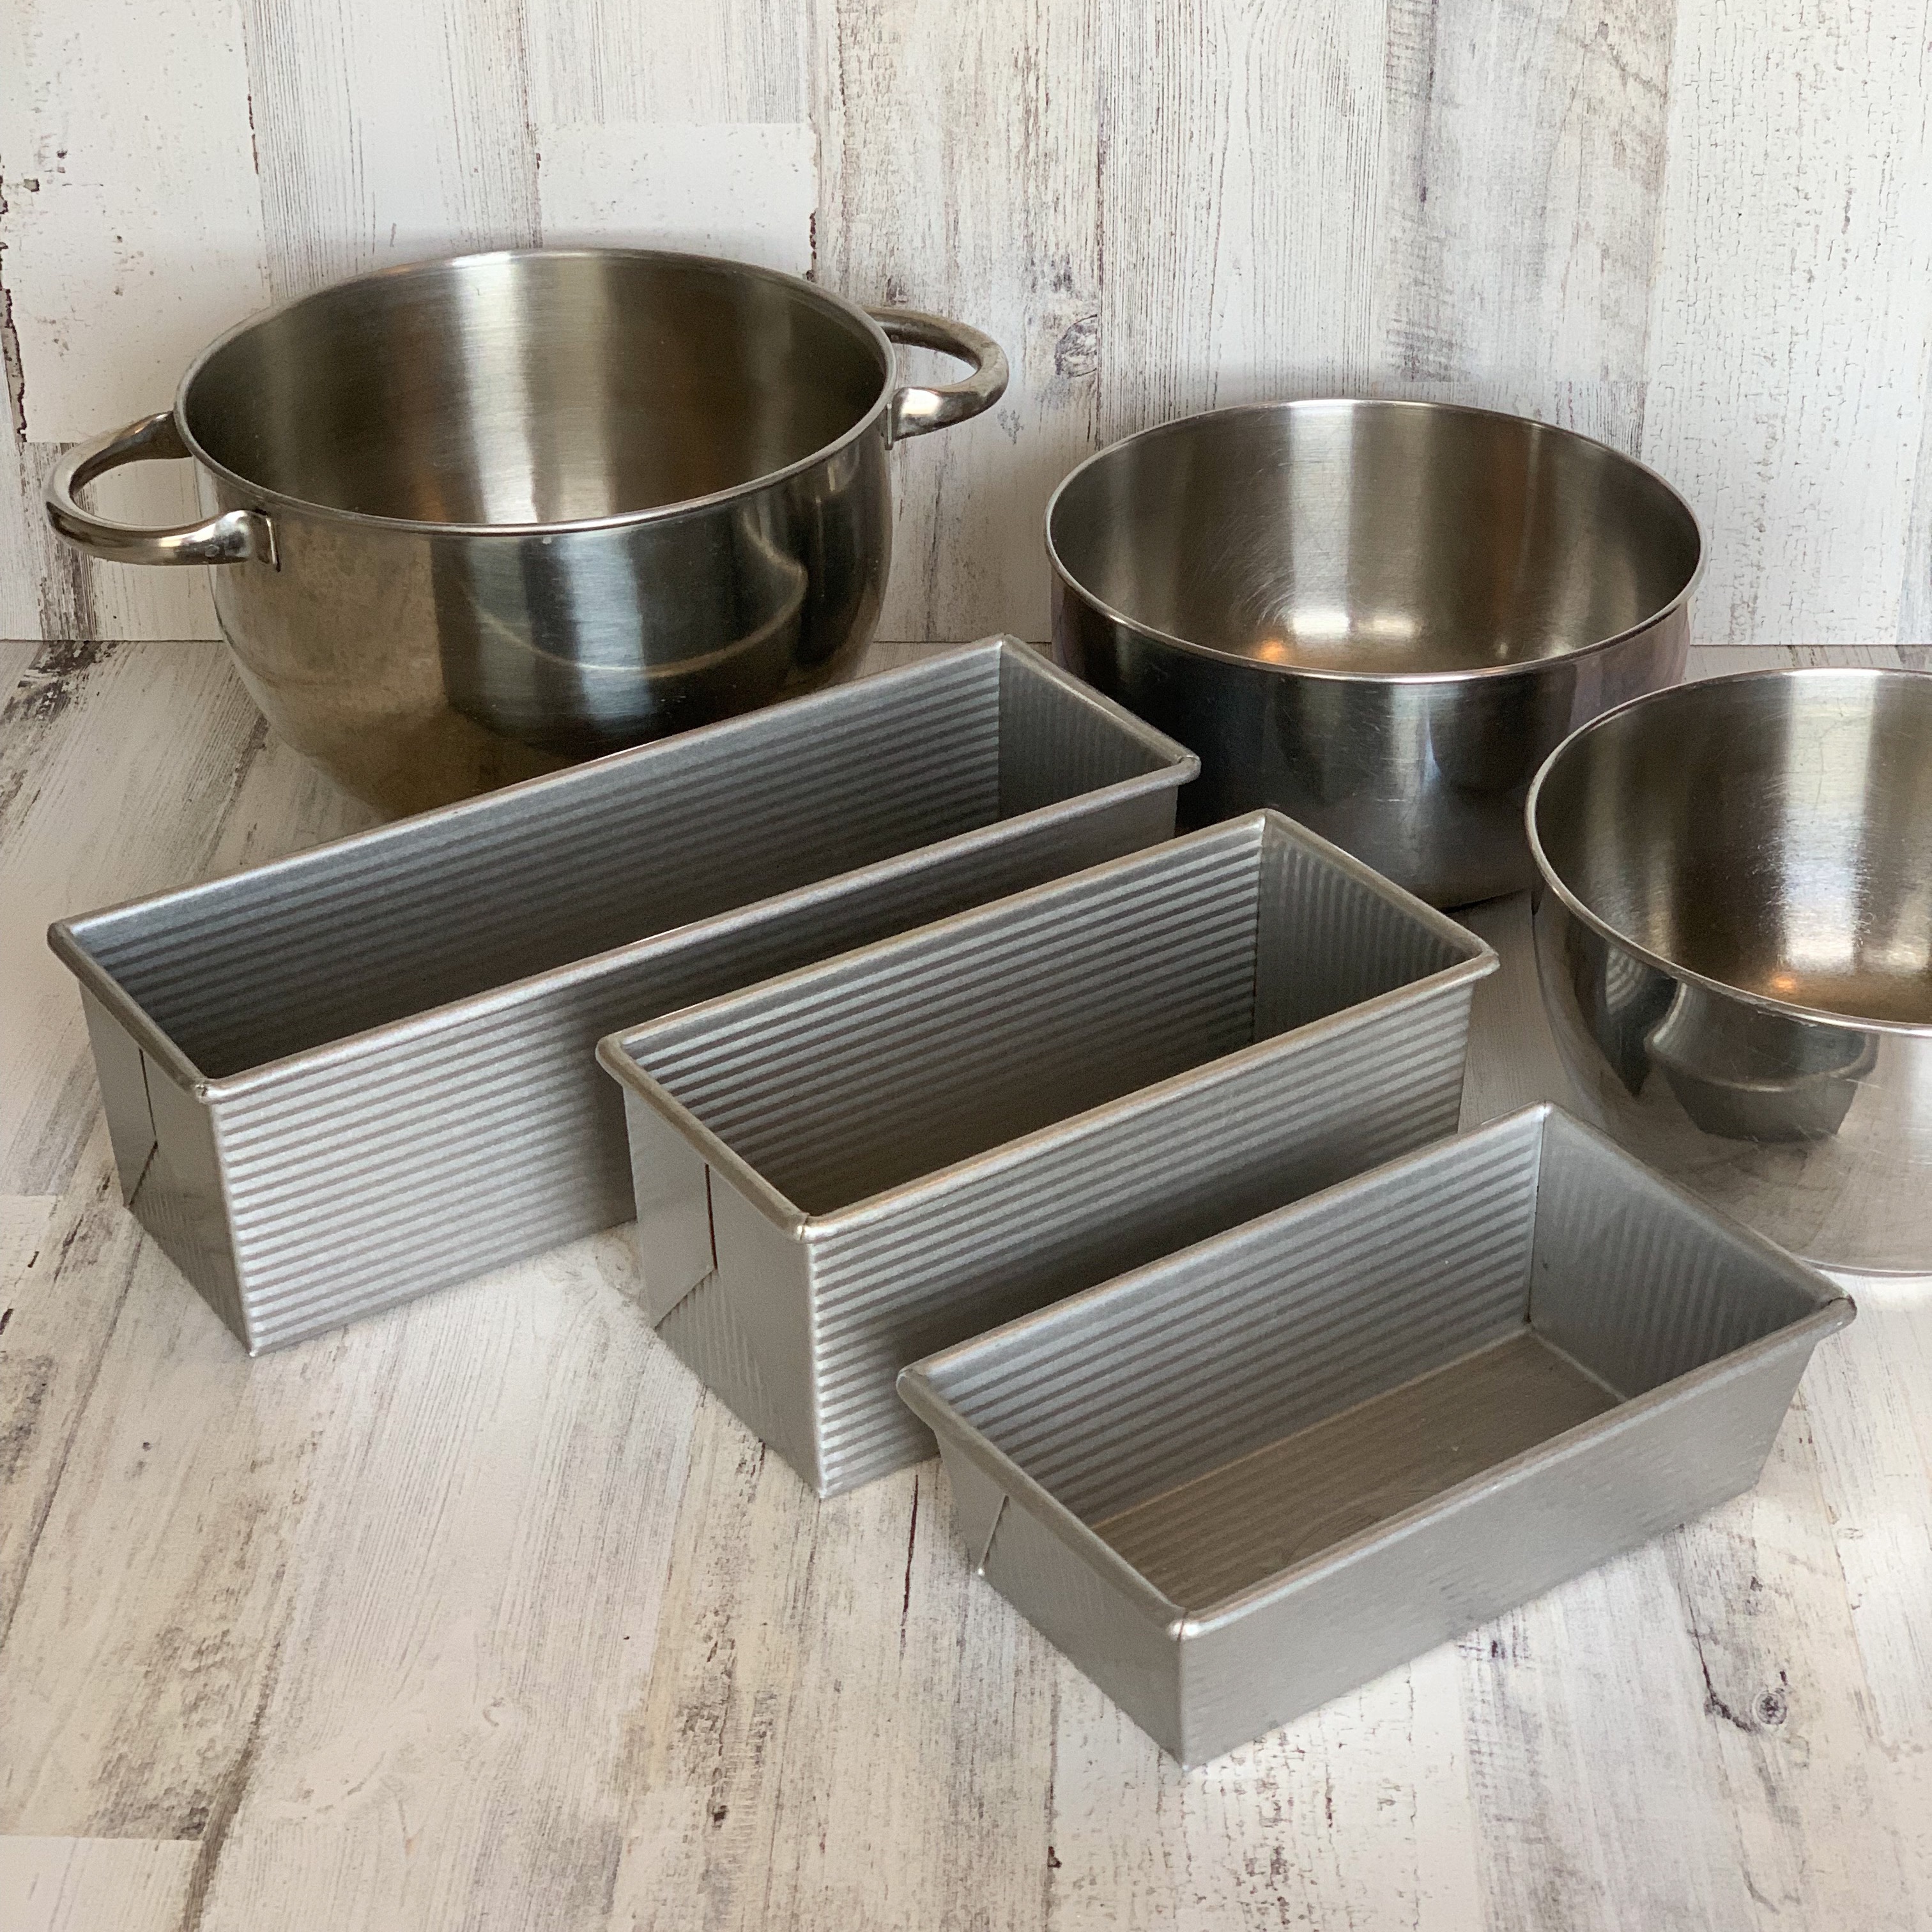
You can use a medium to large mixing bowl and a hand mixer with dough hooks for the small and medium-sized loaves. You will need a stand mixer, though, for the large loaf as the dough will not fit into a smaller bowl and it’s too much for a hand mixer to handle.
Please see my posts on Mastering the Art & Science of Gluten Free Bread Baking – Part Two and Part Three for in-depth details about the ingredients and additional equipment you will need to make any of my bread recipes. In order to keep my recipe posts from getting too long, I am going to write as if you already know the information in those two posts.
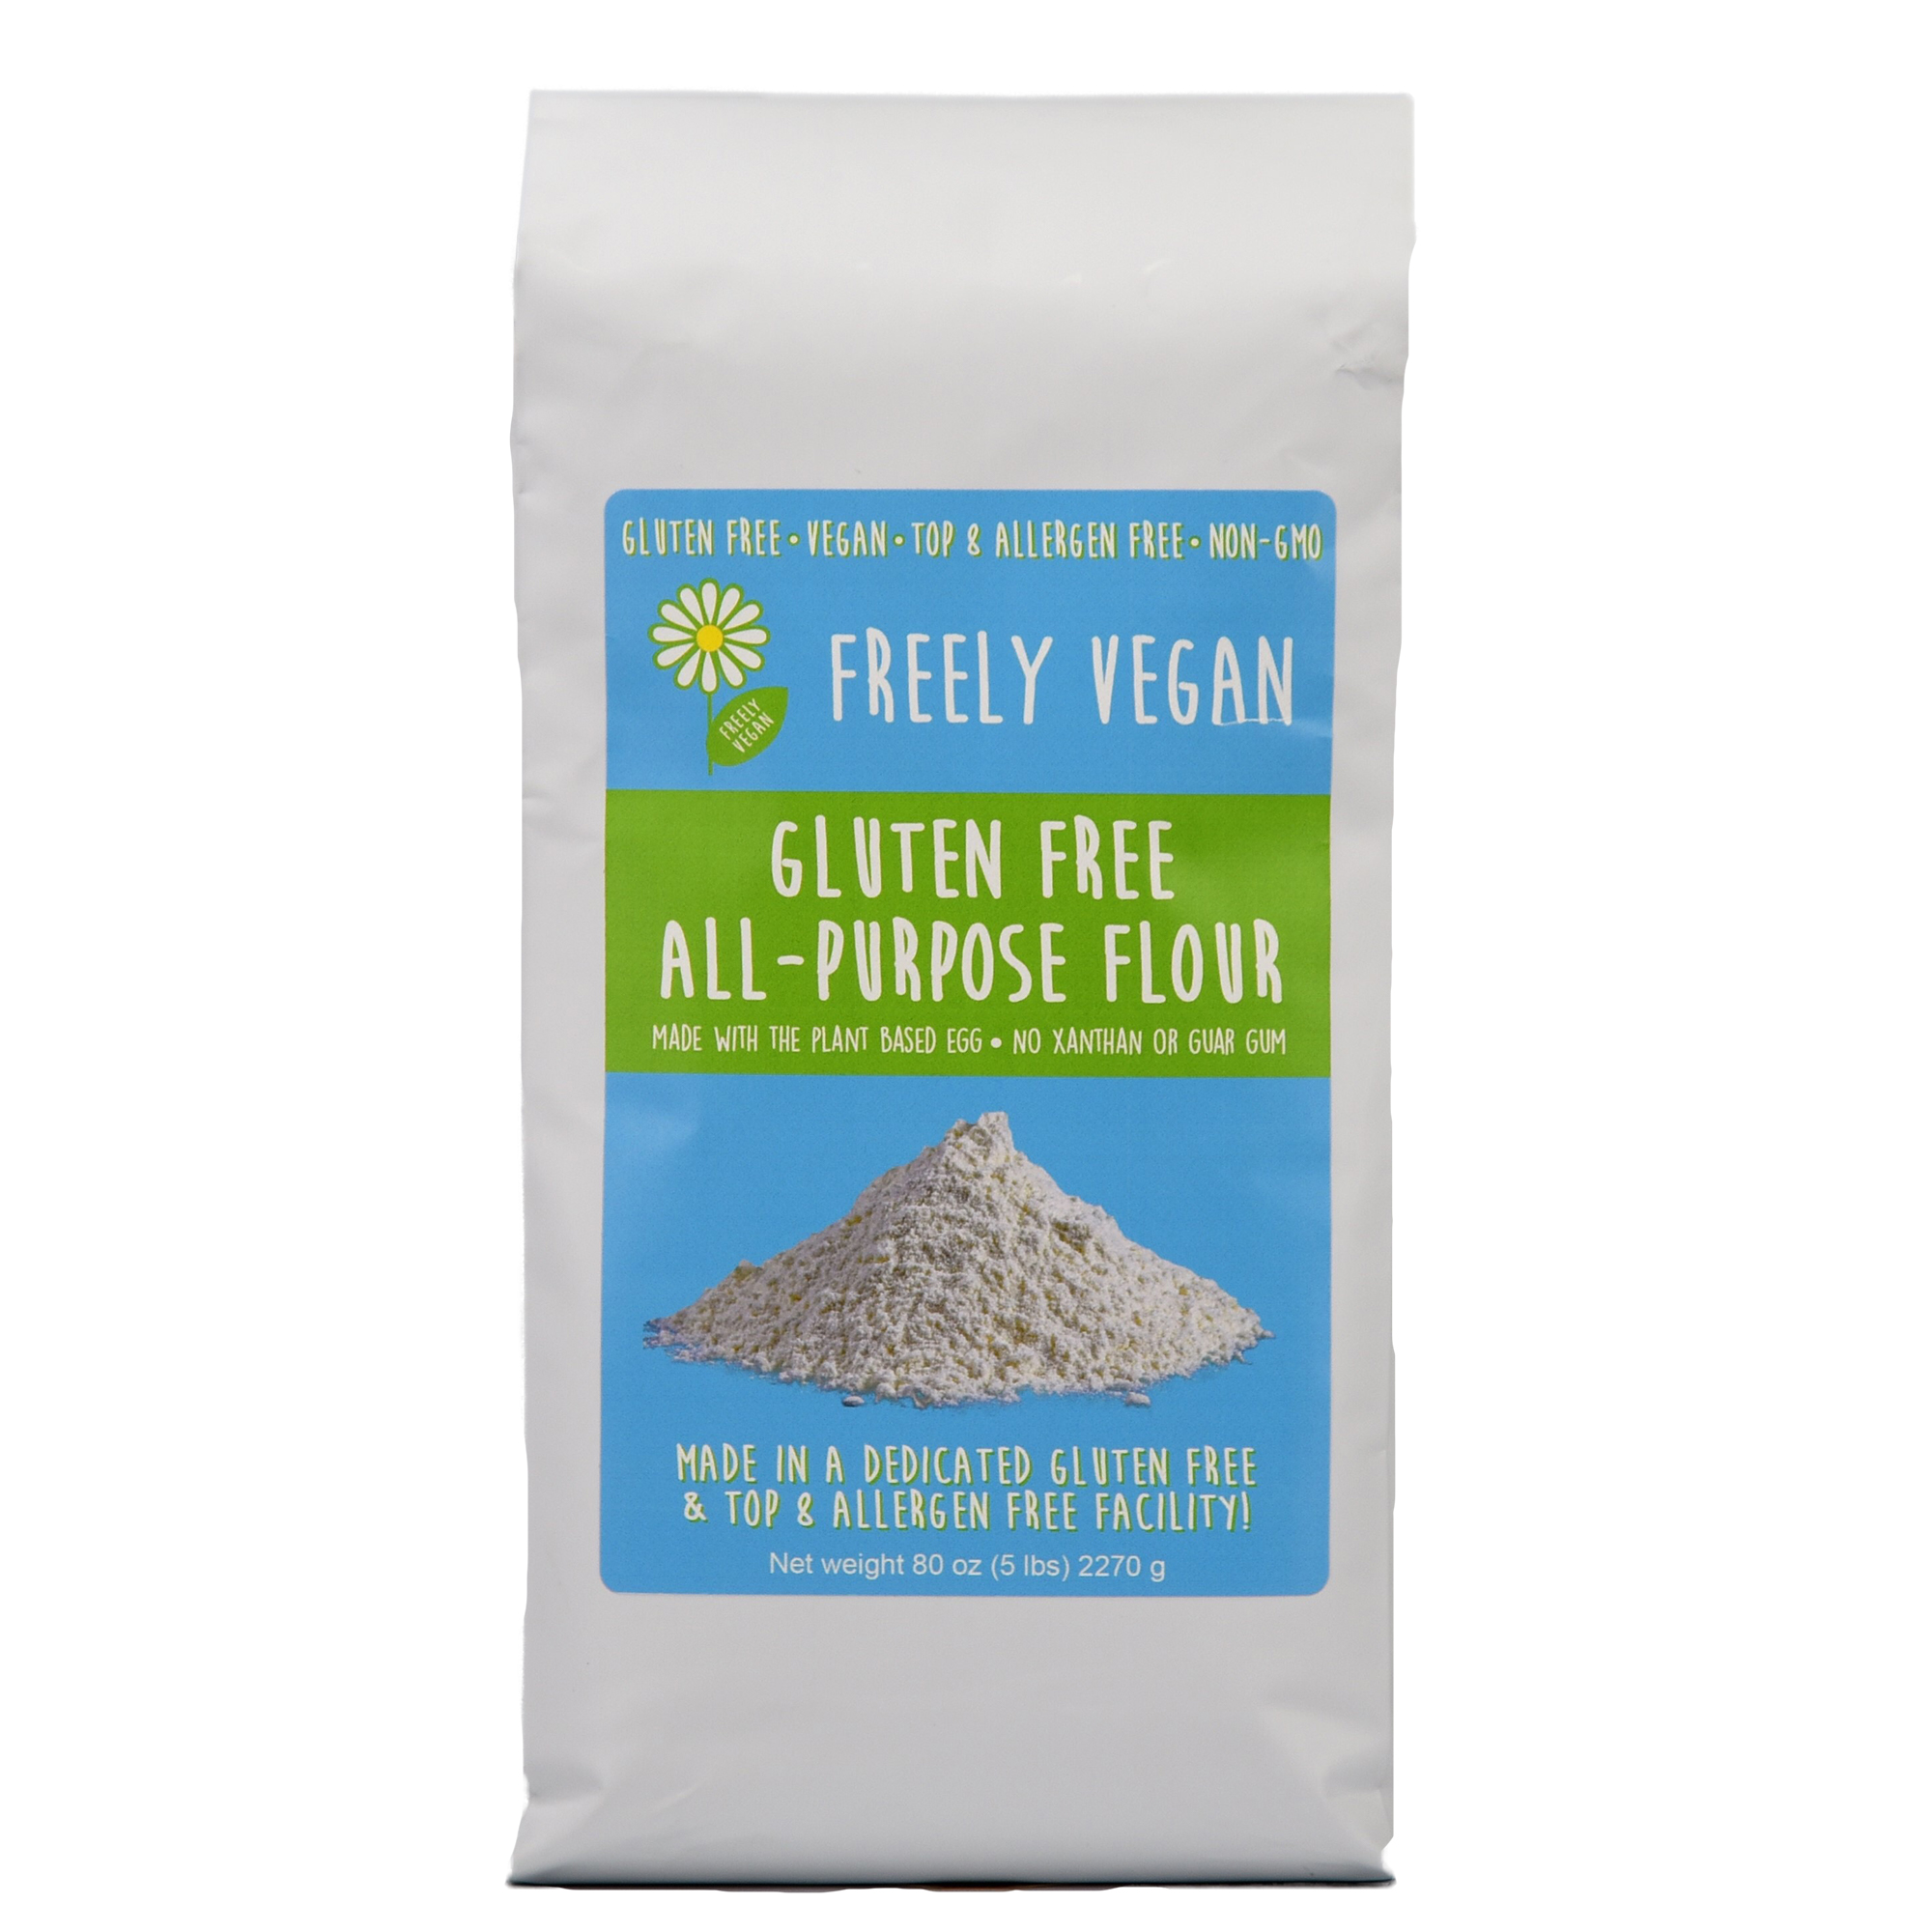
I will, however, mention the two absolutely essential things you will need in order to make this recipe: a digital kitchen scale and gluten free flour made with The Plant Based Egg. All of my bread recipes were developed without xanthan gum, guar gum, or eggs, and you need to use one of my flour blends for my bread recipes to work properly. The easiest way to do this is to use Freely Vegan flour. It already has The Plant Based Egg built in and is ready to use in all of my recipes straight out of the bag. You can order it from either Freely Vegan or Amazon. The next best option is to mix up my Two-Ingredient flour, which also works well in my bread recipes. If you cannot tolerate one of the ingredients in either of these flours, I recommend looking through the flour blend recipes on this post. It has a variety of flour blend options for different dietary needs. However, I have not tested those DIY flour blends in full-size sandwich loaves and you may be better off with making rolls or tiny loaves if you use one of them.
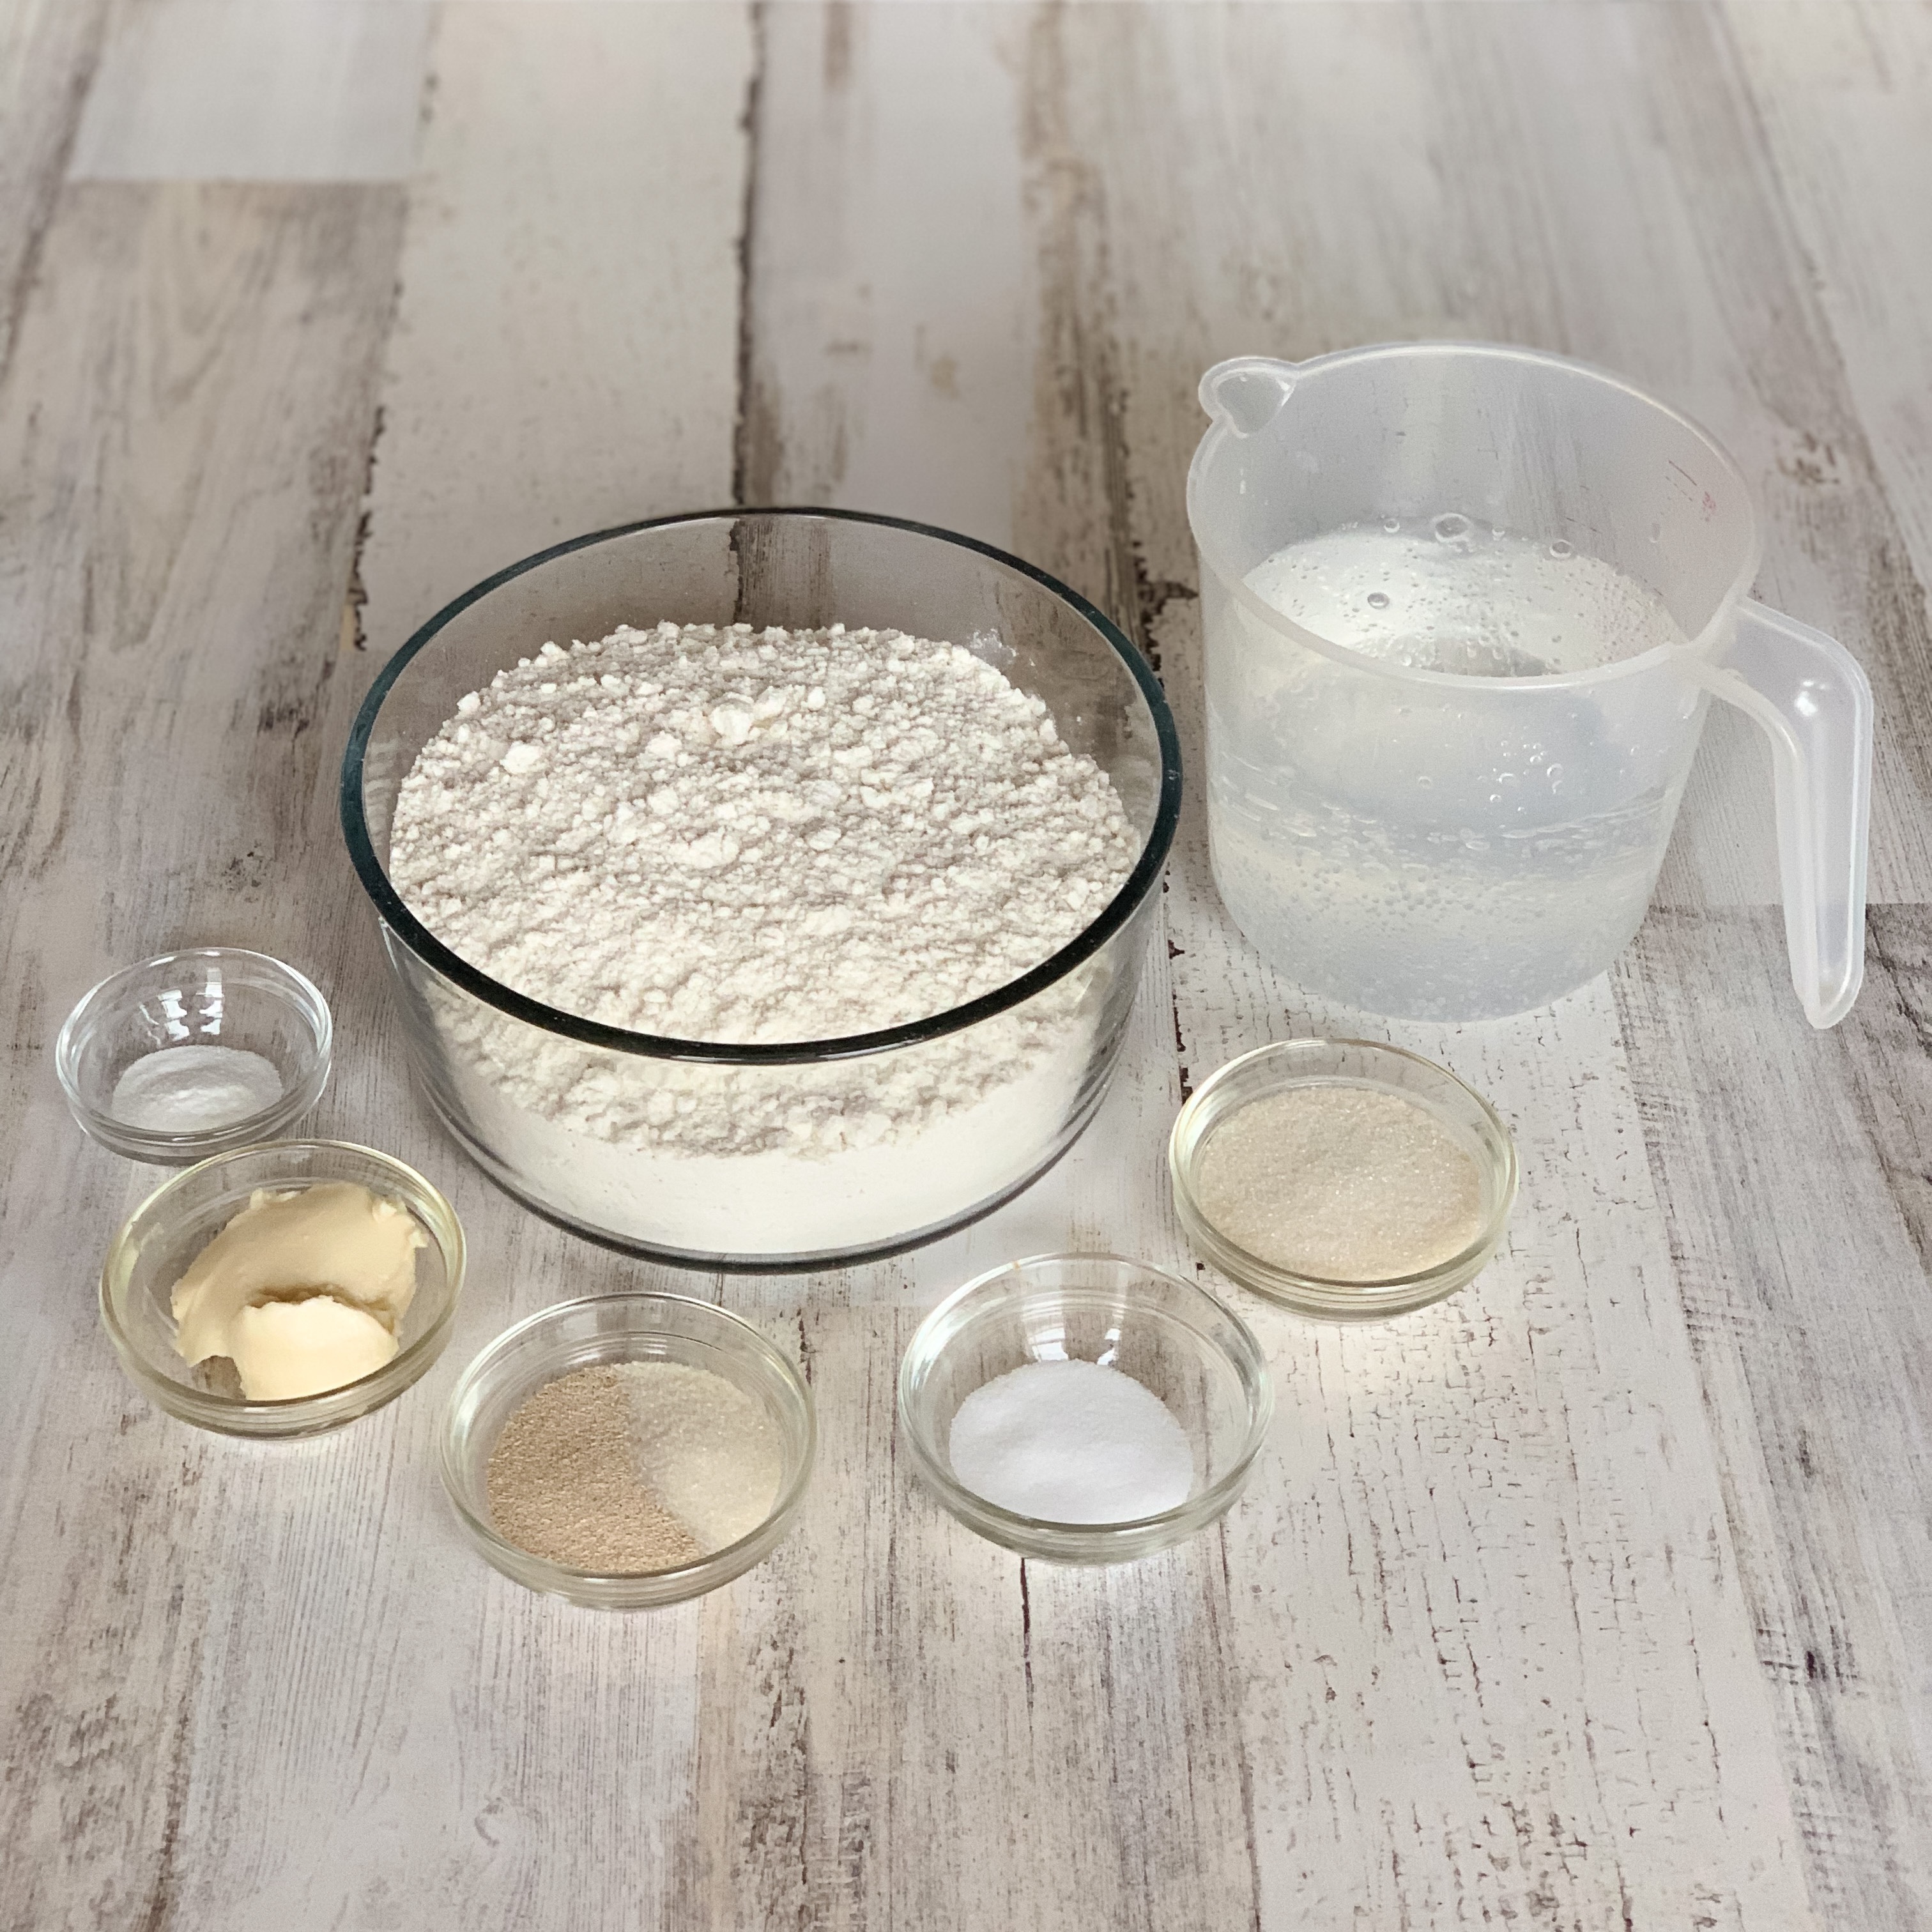
Here are all of the ingredients you will need to make your own white sandwich bread:
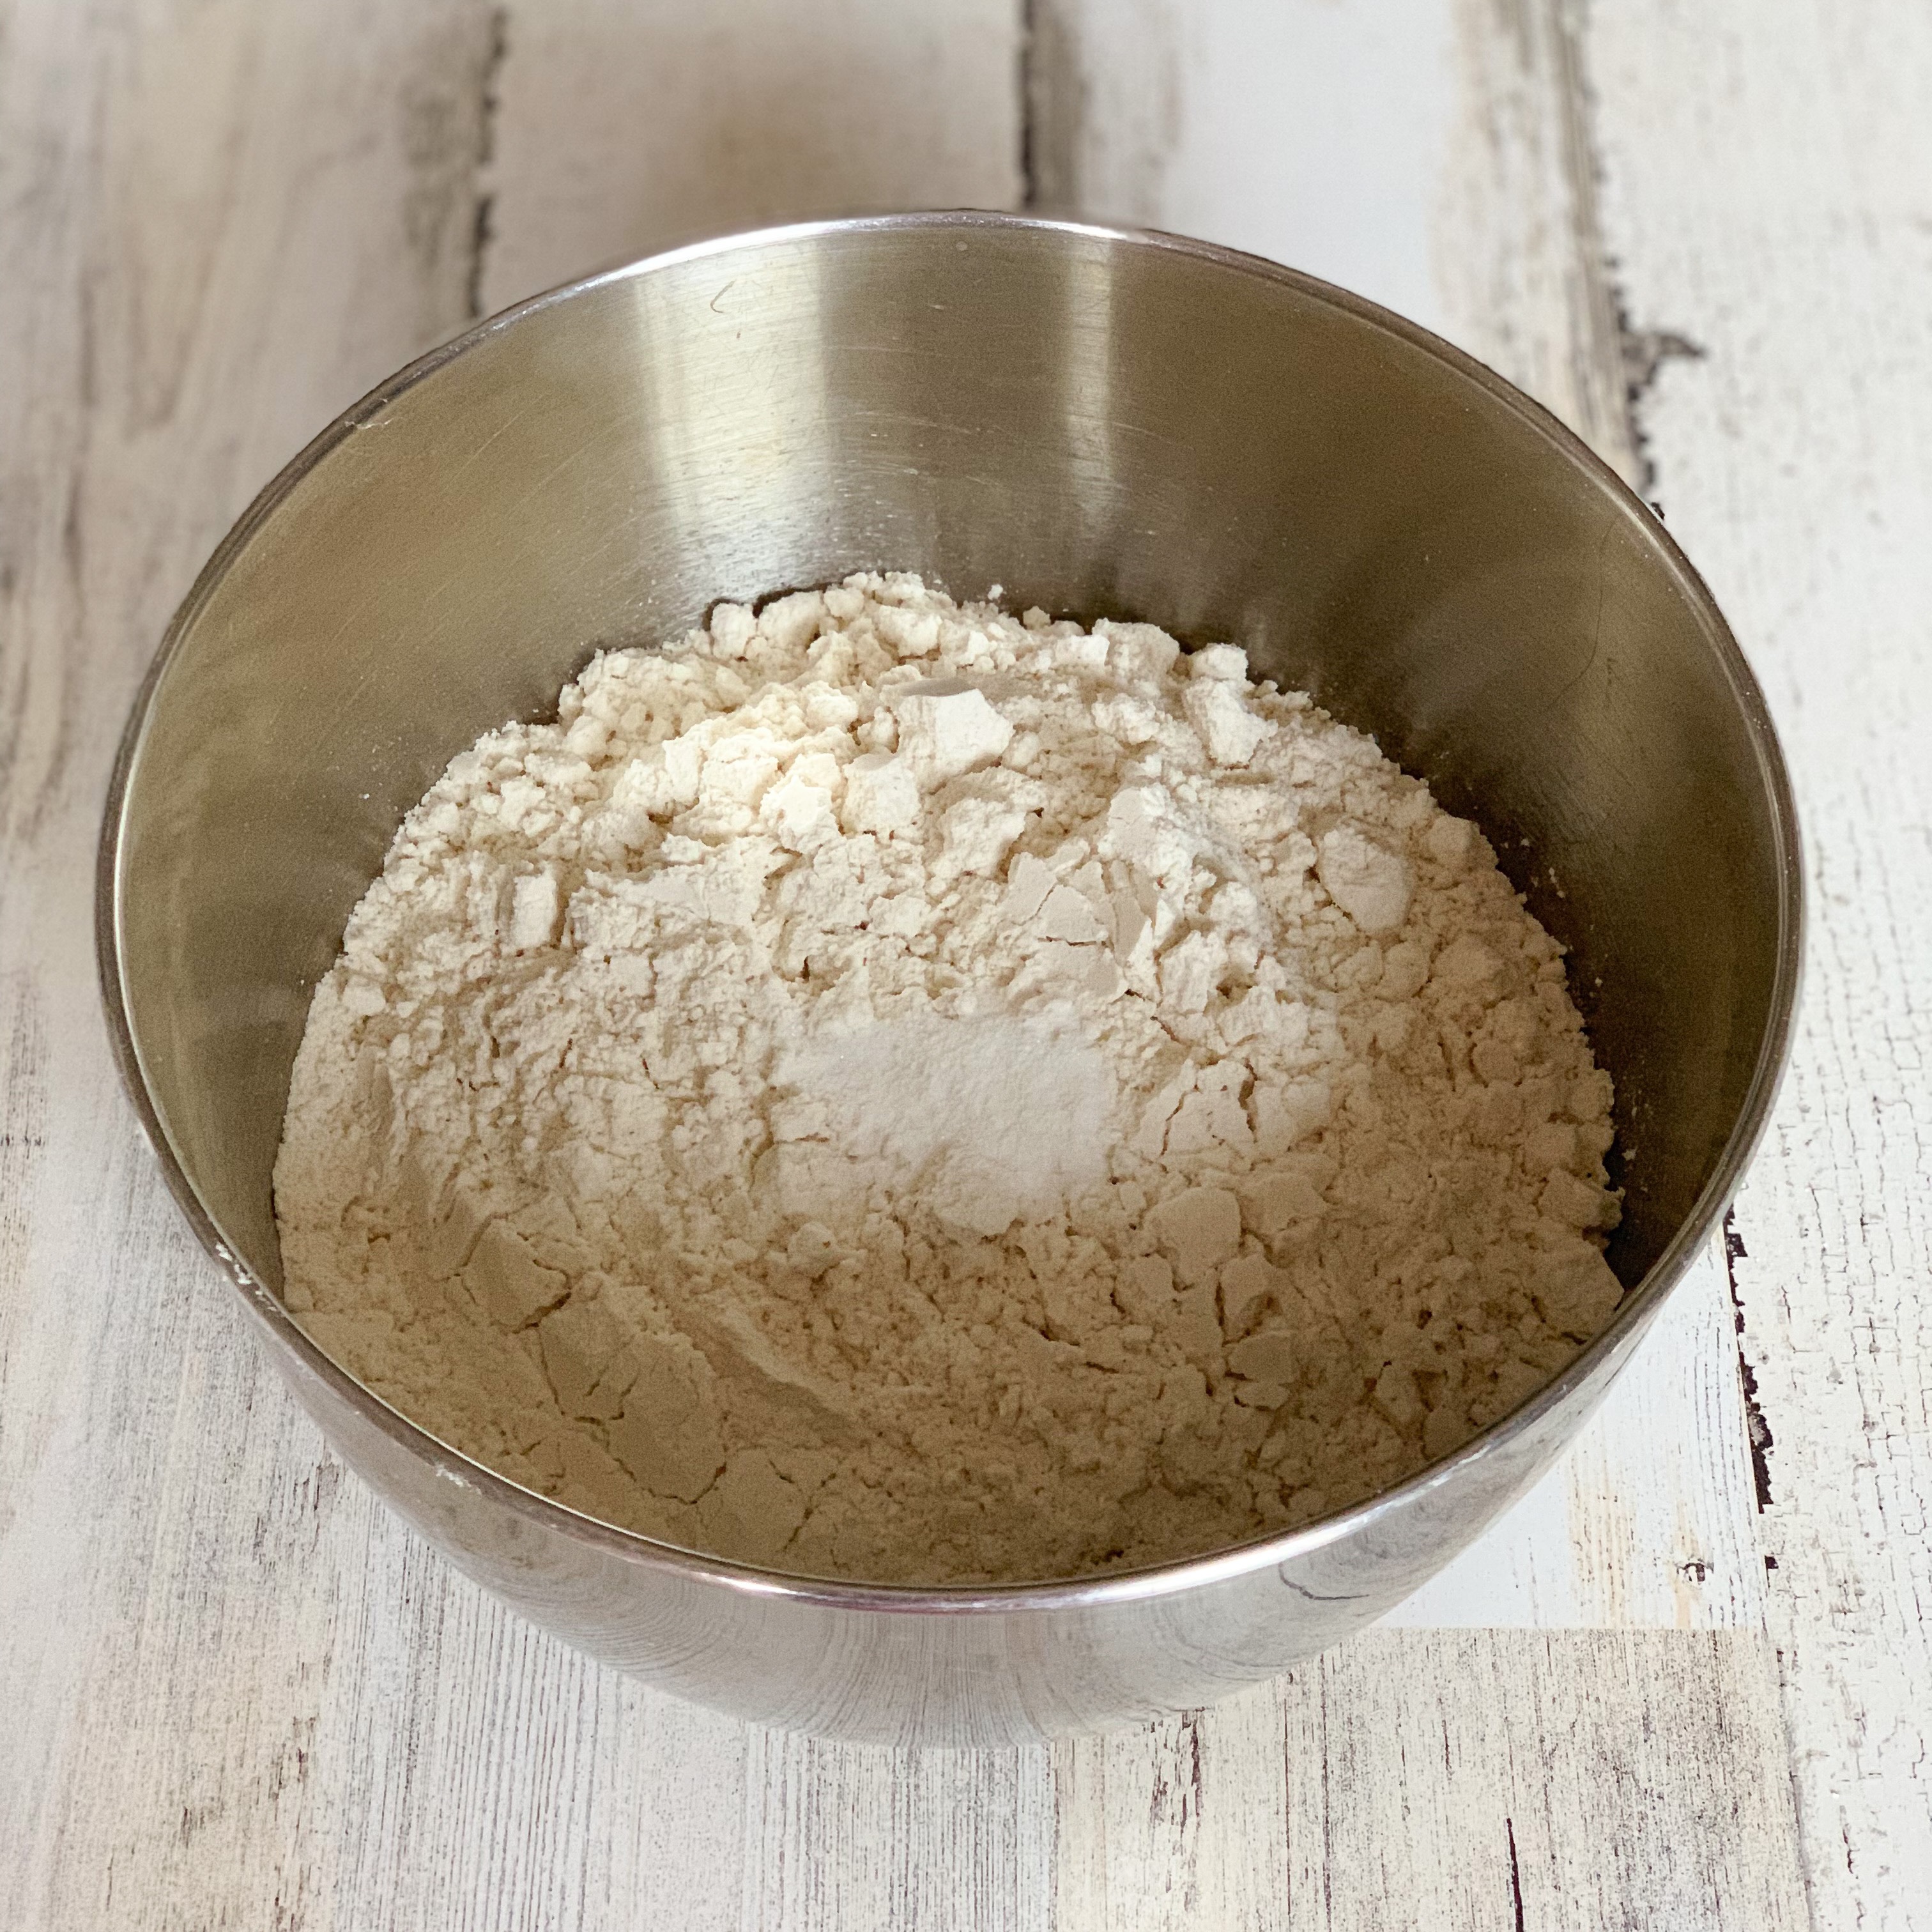
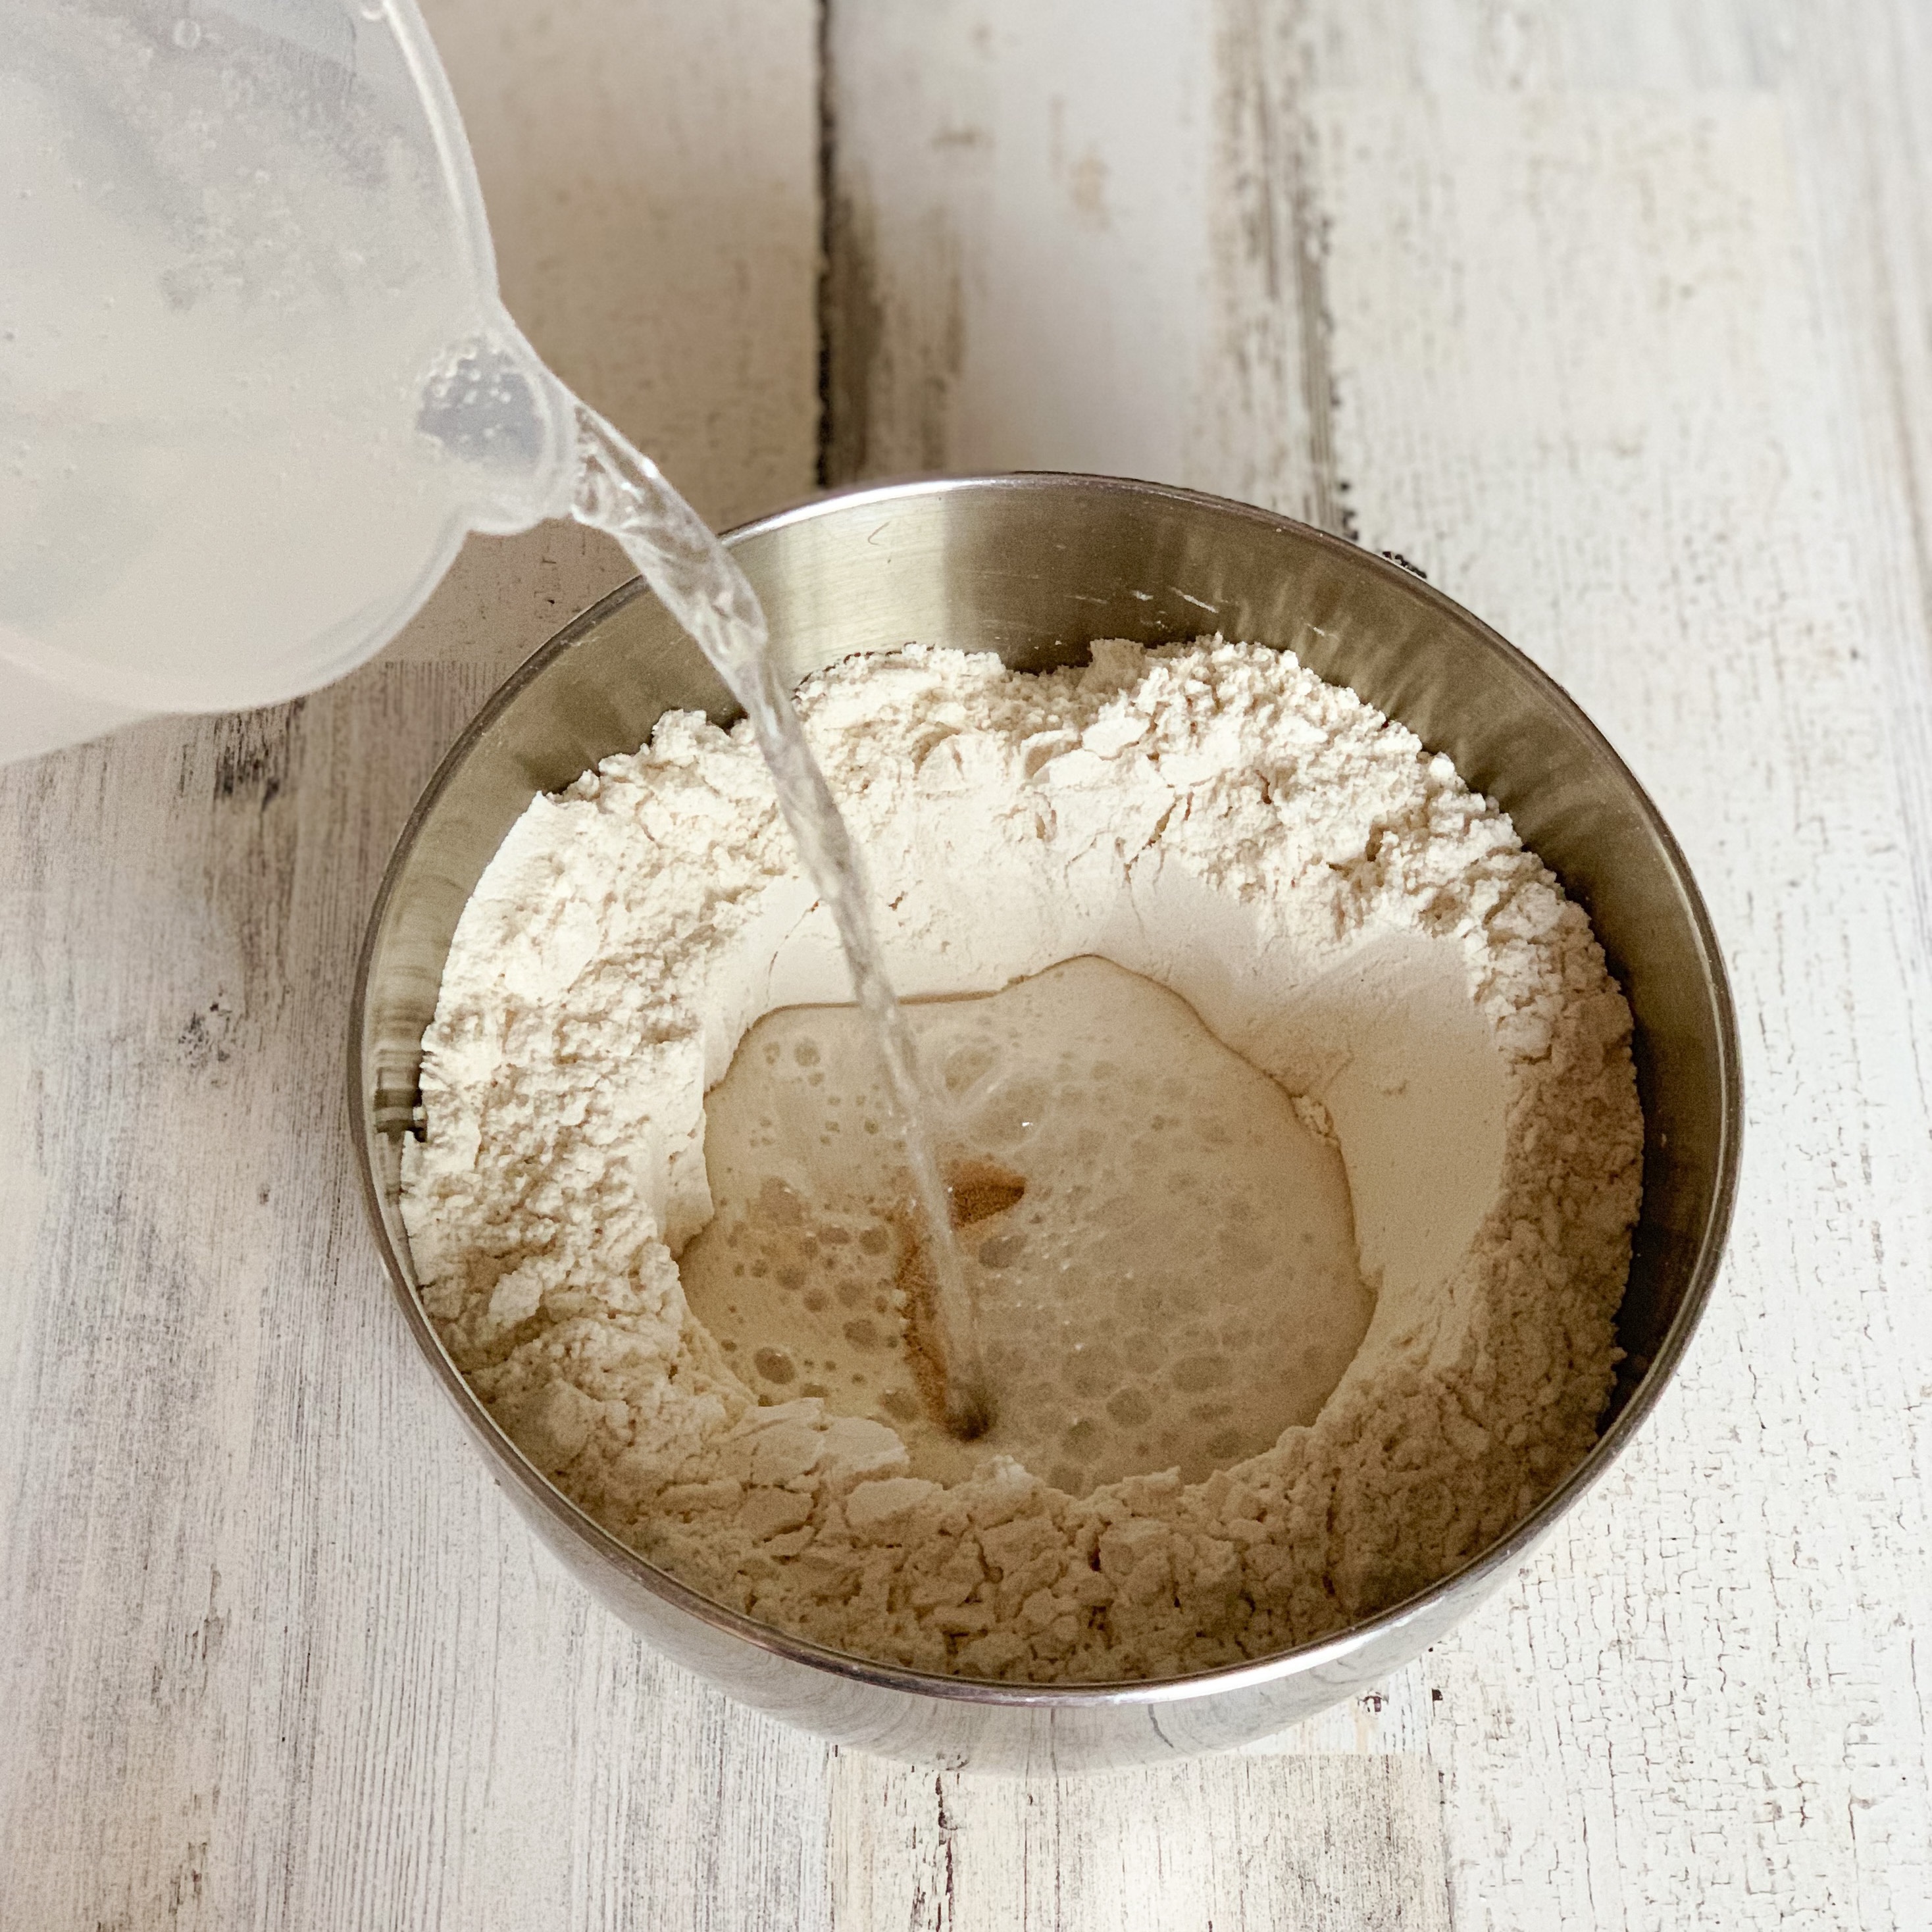
Add the vitamin C crystals and room-temperature flour to a mixing bowl that is the right size for your recipe, then whisk them together. (You can substitute a combination of lemon juice and distilled white vinegar for the vitamin C crystals, but you will need to decrease the amount of seltzer water if you do. Please see the recipe notes for the amounts and alternate directions for using vinegar.)
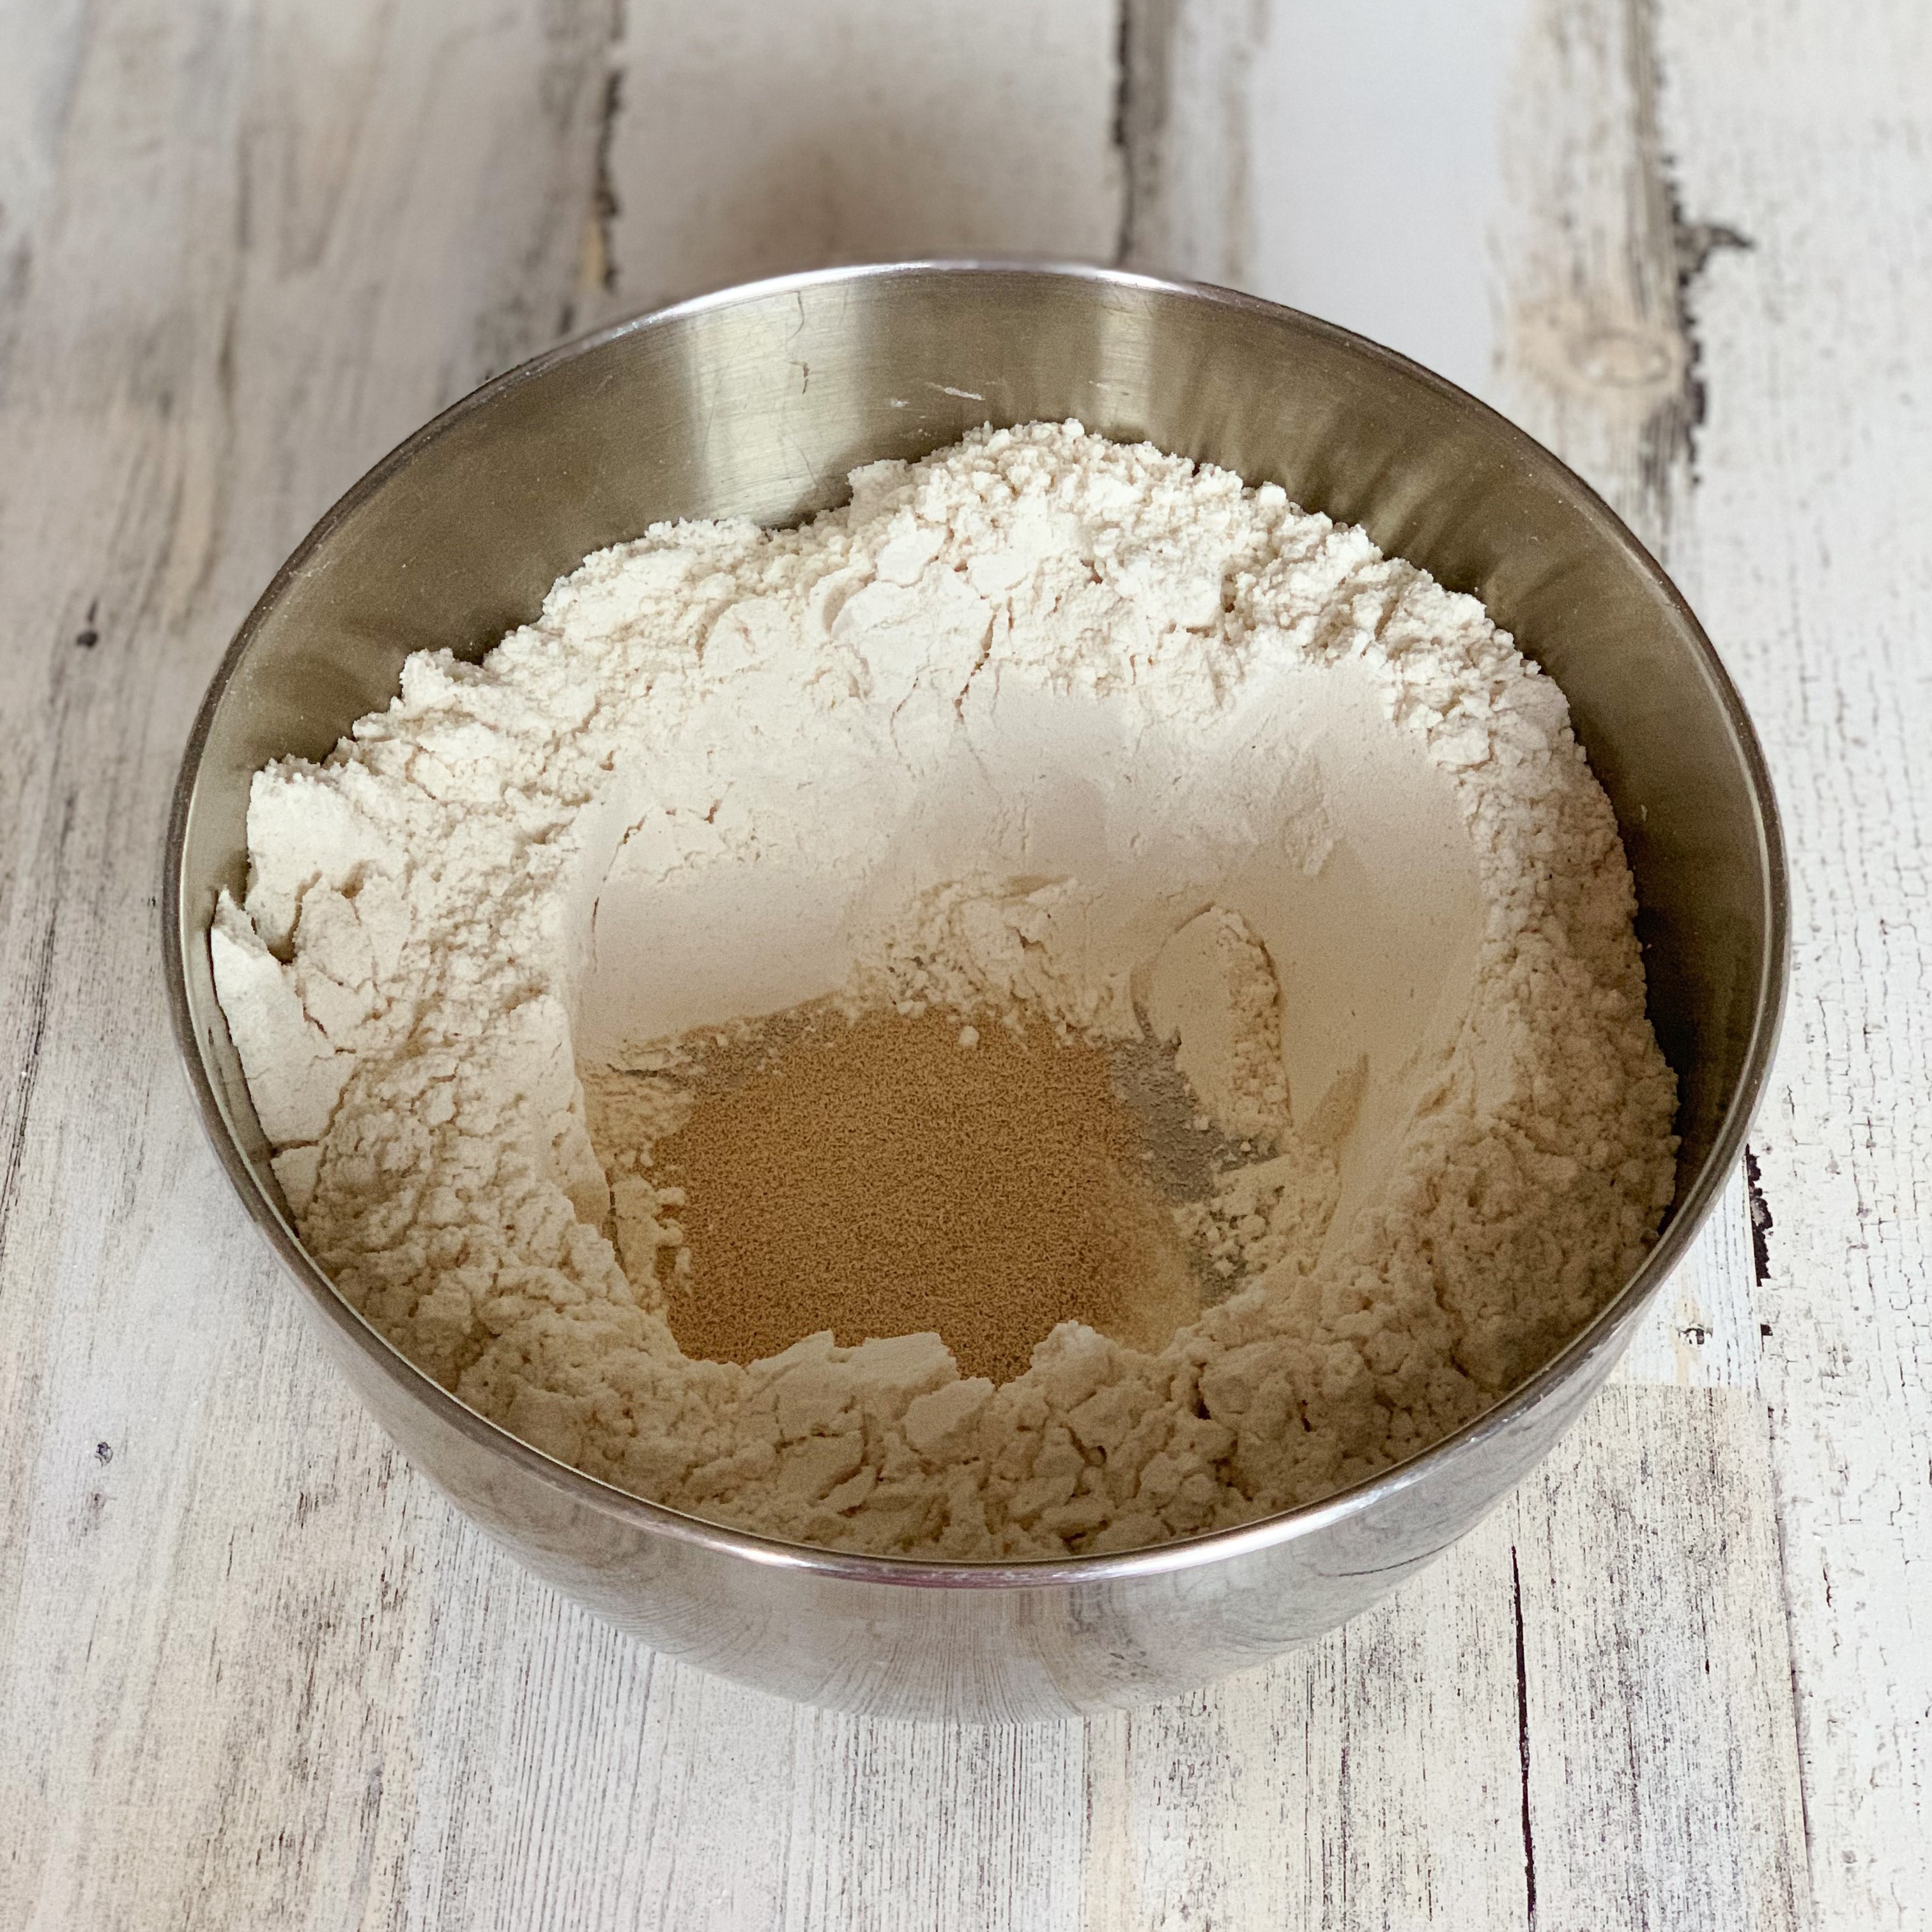
Make a well in the flour, then add the smaller amount of sugar and the yeast to the well. You can use either quick rise or active dry yeast in all of my bread recipes.
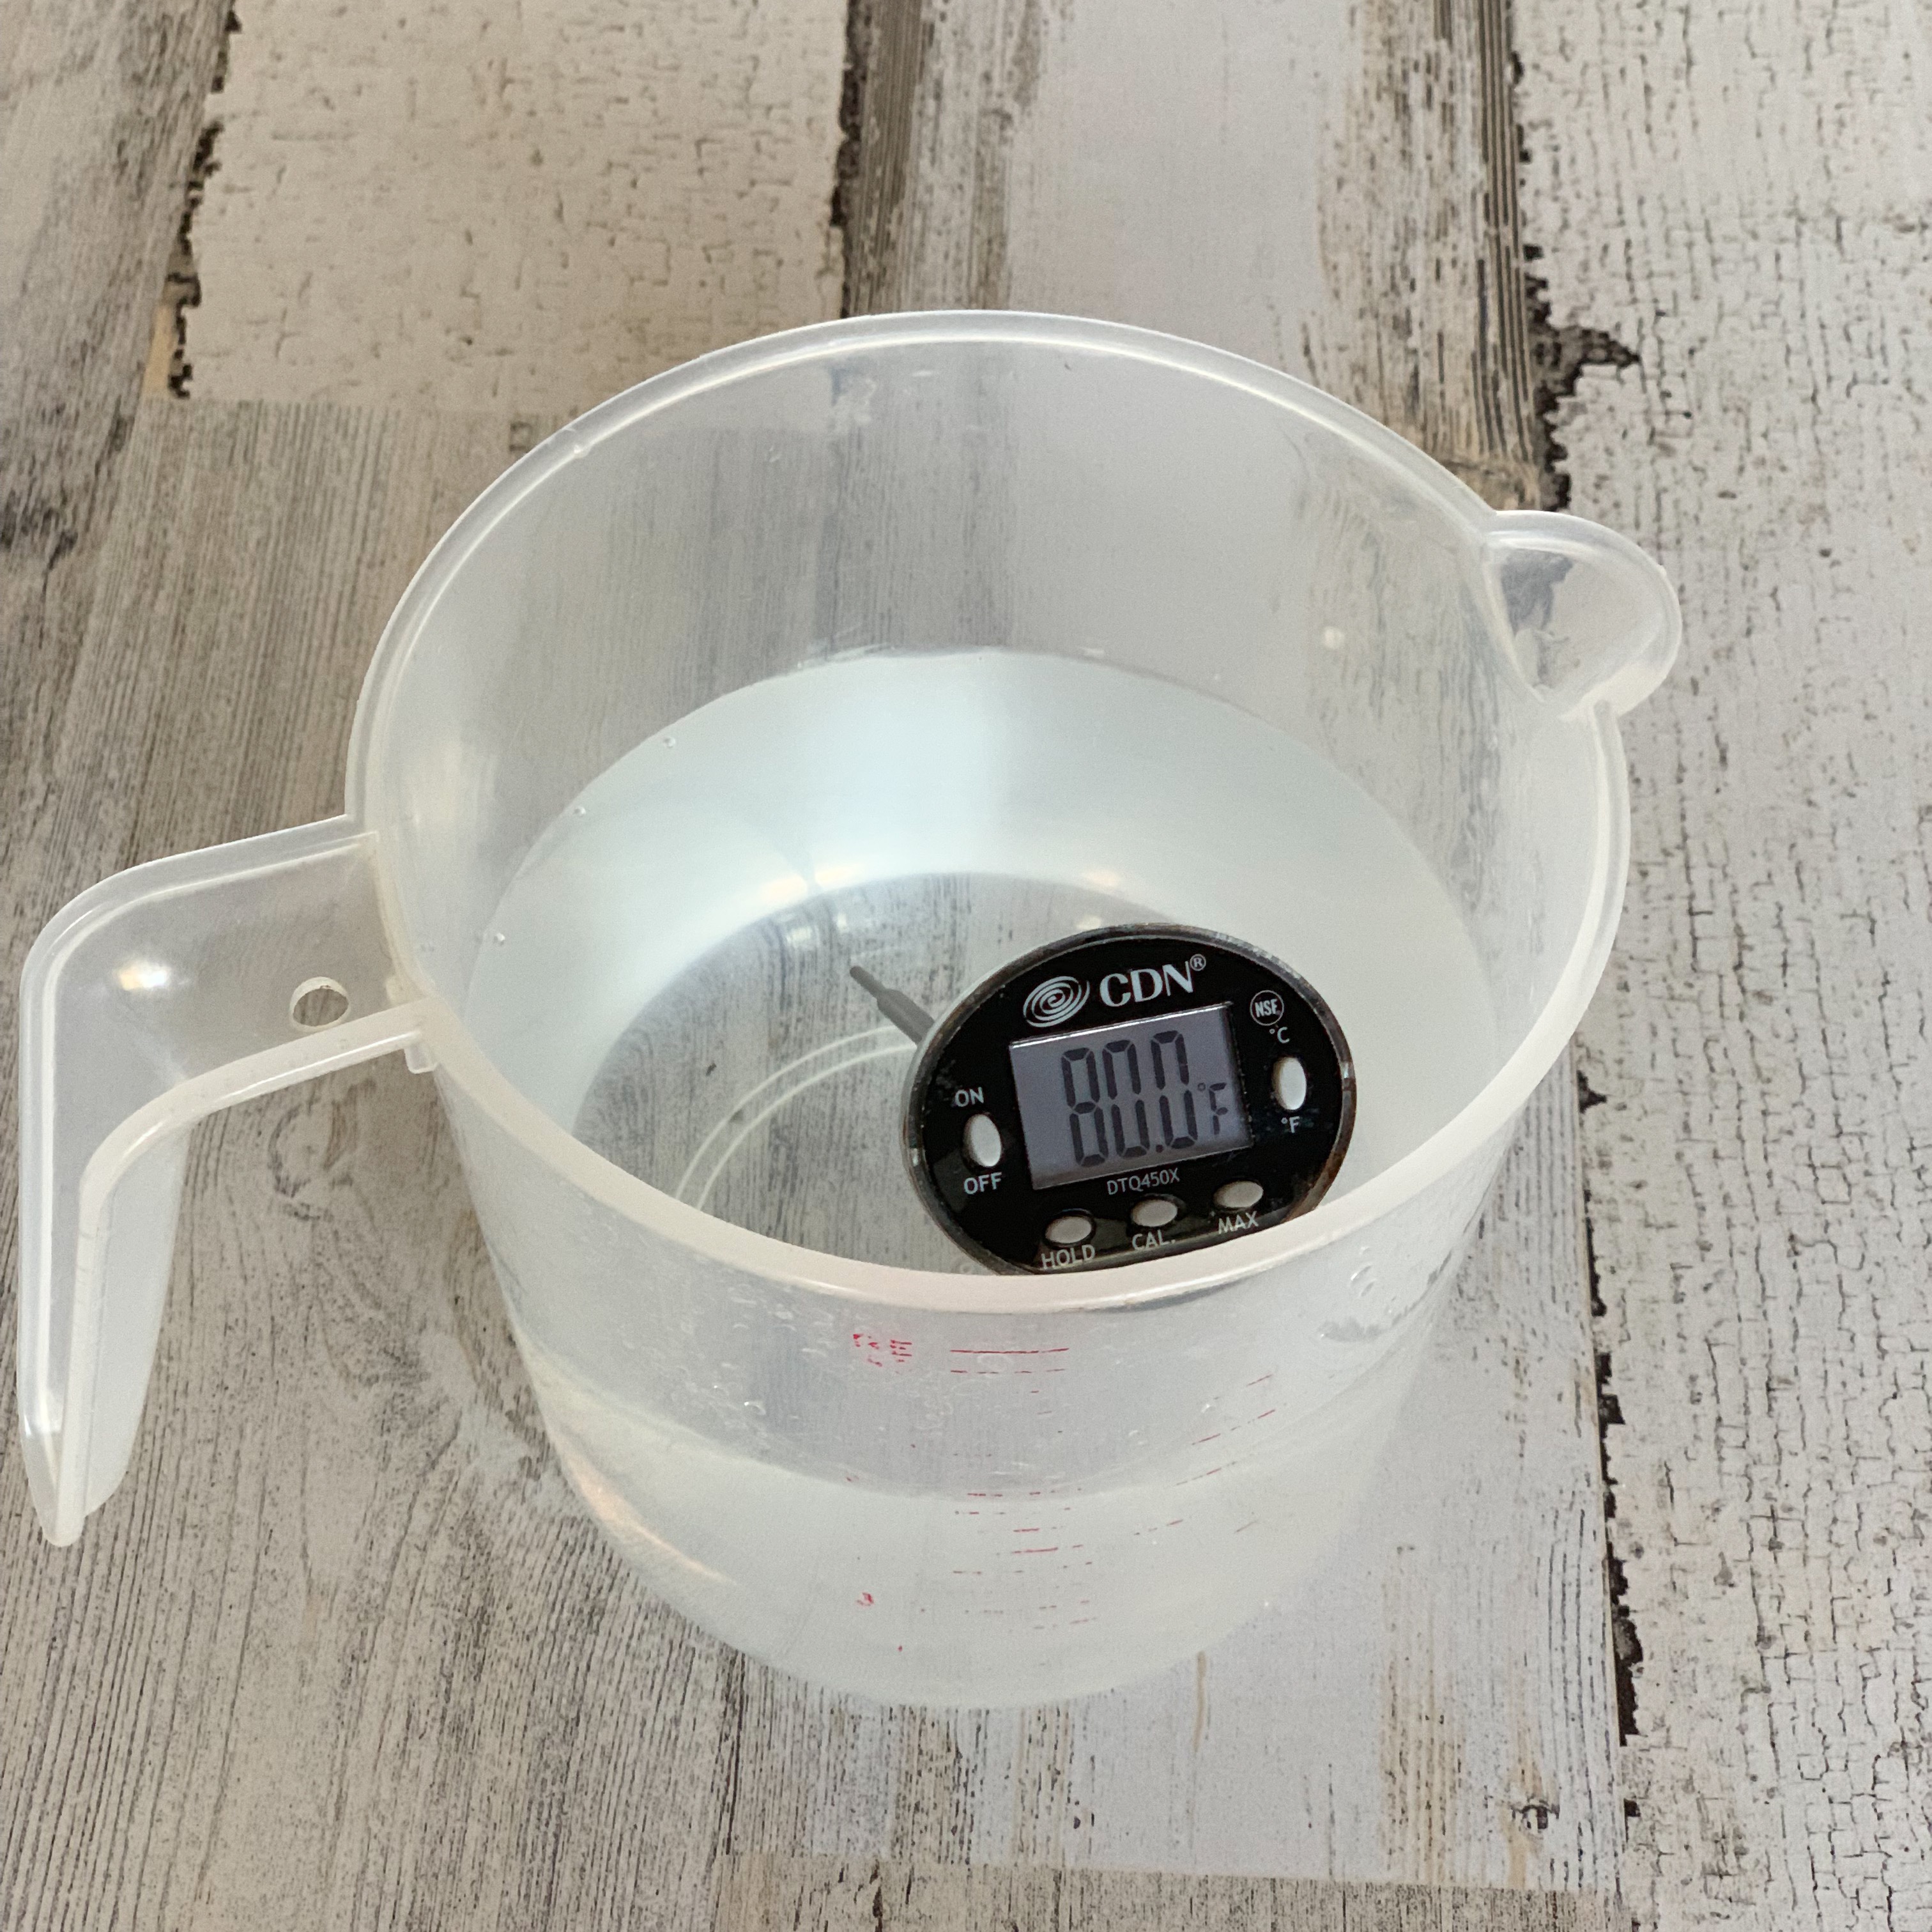
Warm your seltzer water to 80 degrees Fahrenheit. Use a thermometer to verify the temperature. If it is very warm (74 degrees or more) in your kitchen, just use room temperature seltzer water.
Pour the seltzer water into the well, then set a timer and wait five minutes to let the yeast get bubbly:
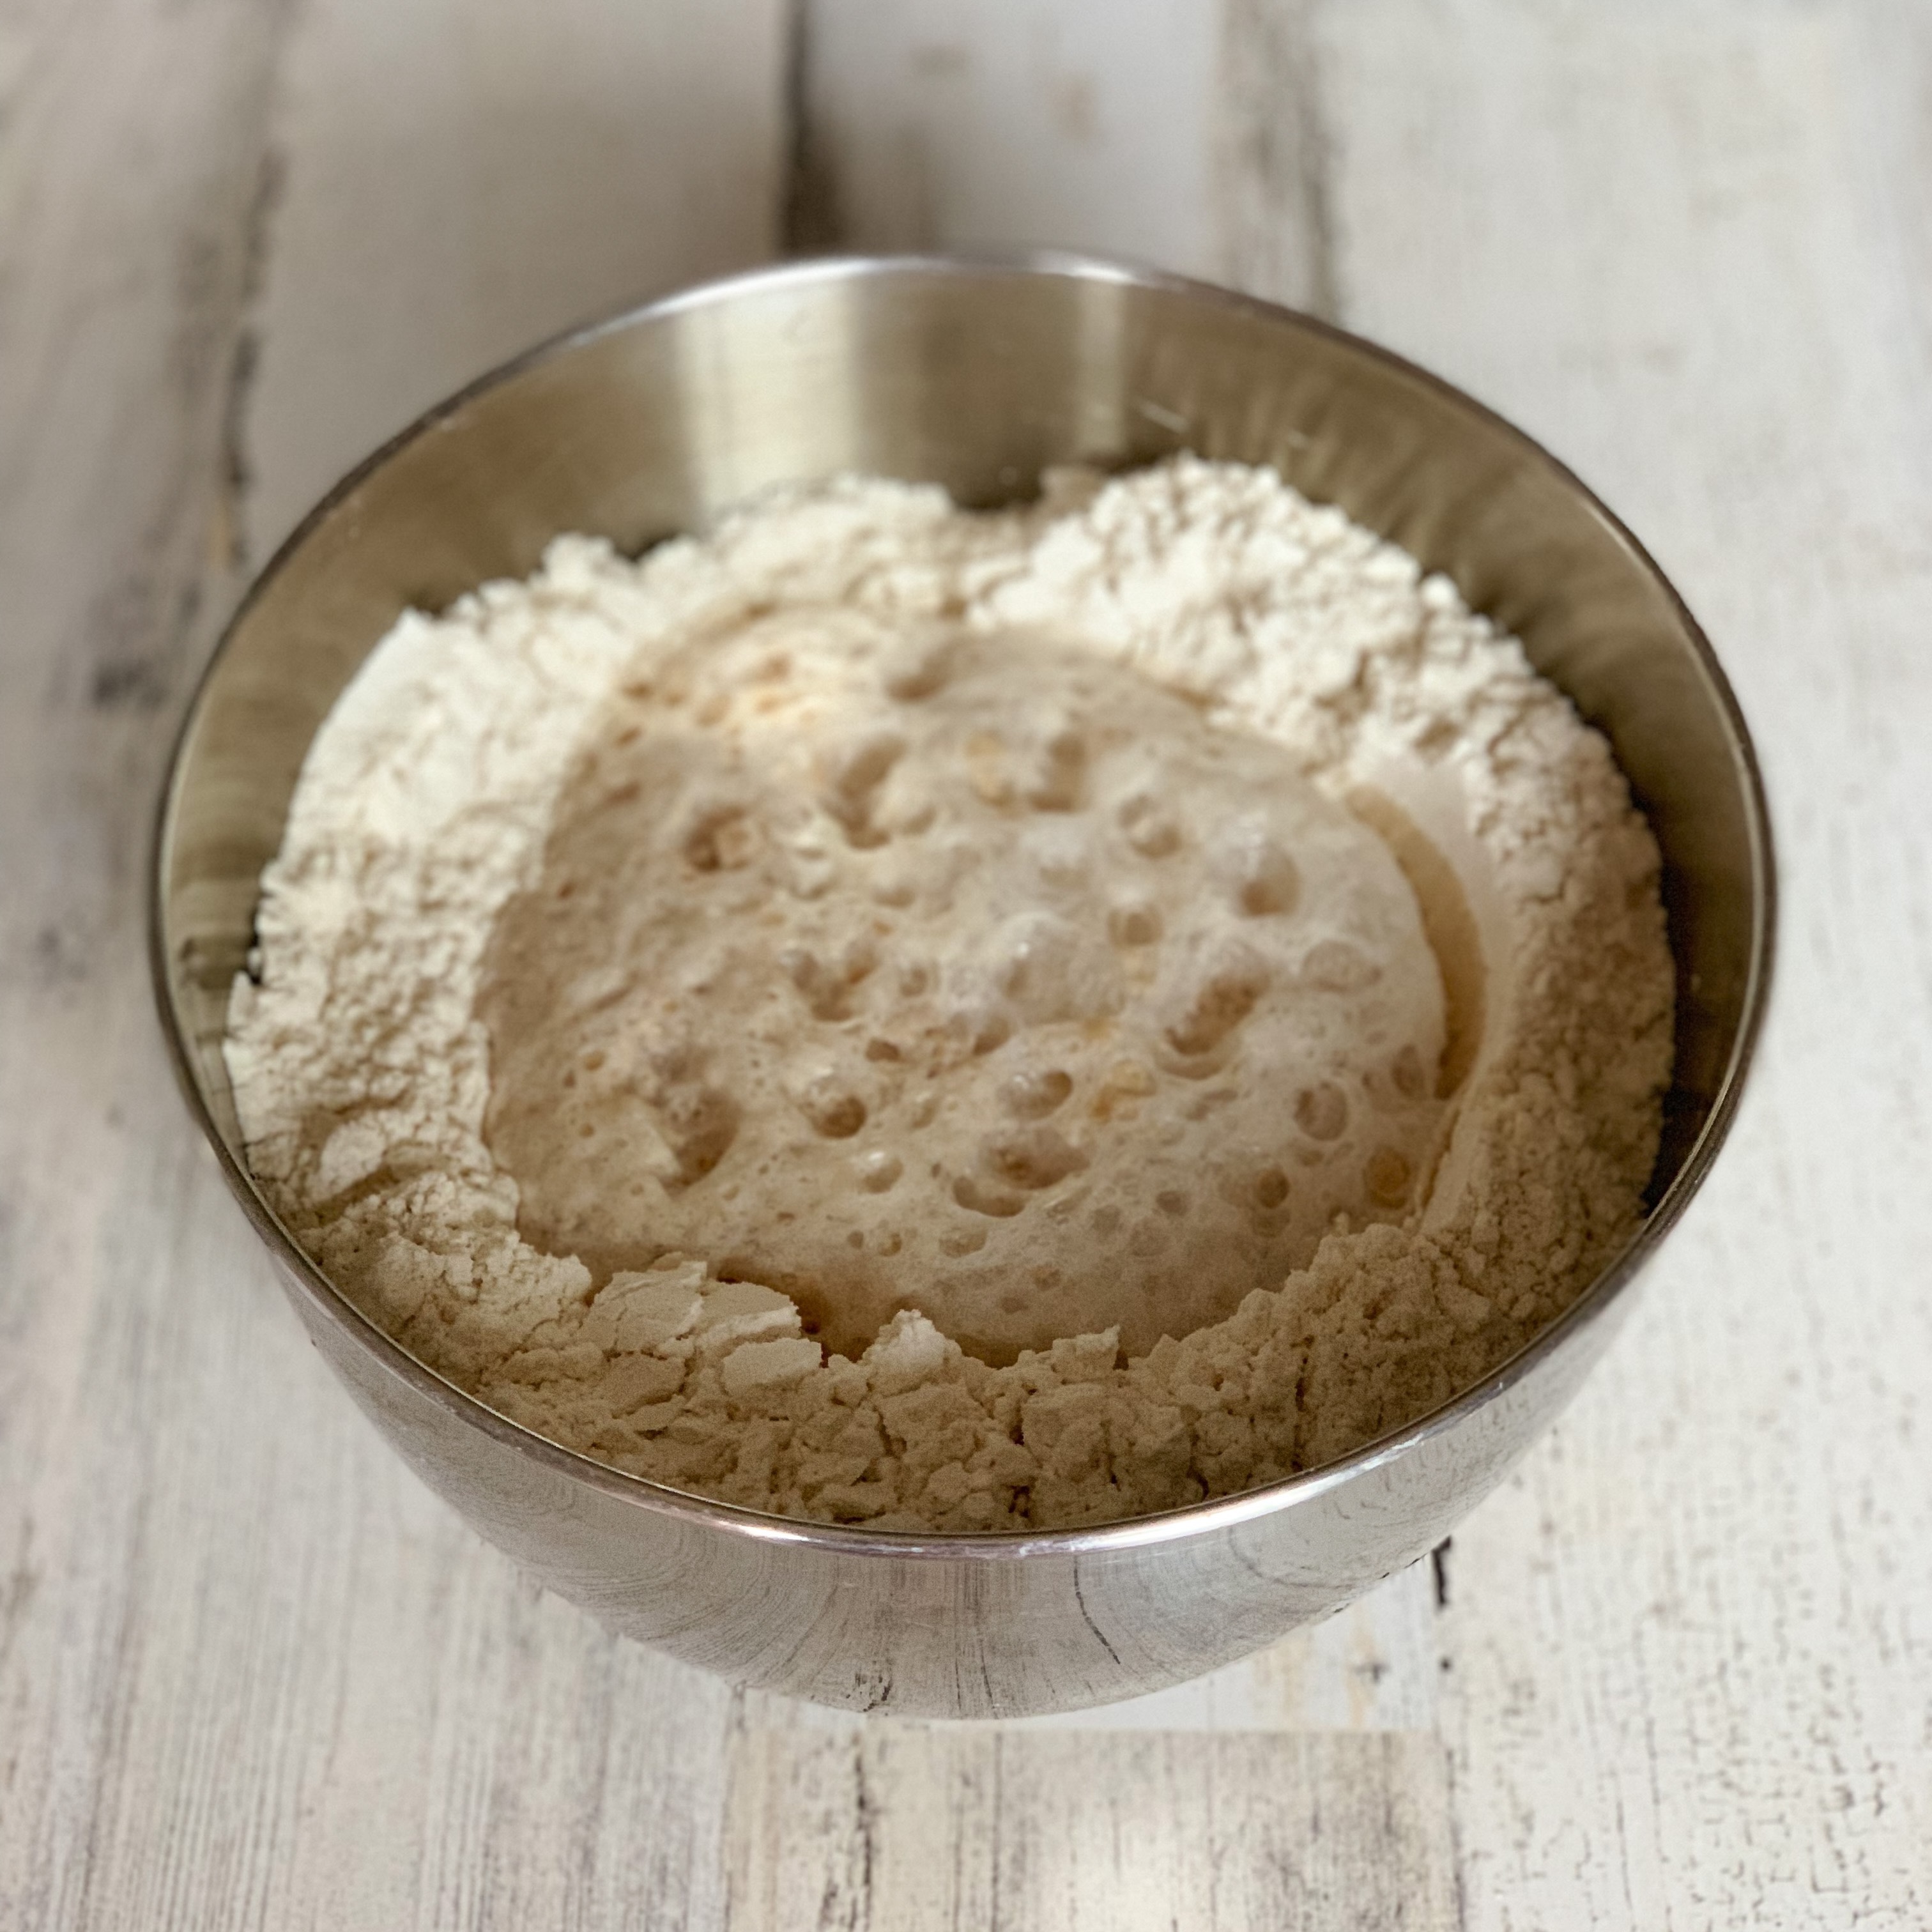
Stir the liquid into the flour until you have a uniform dough:
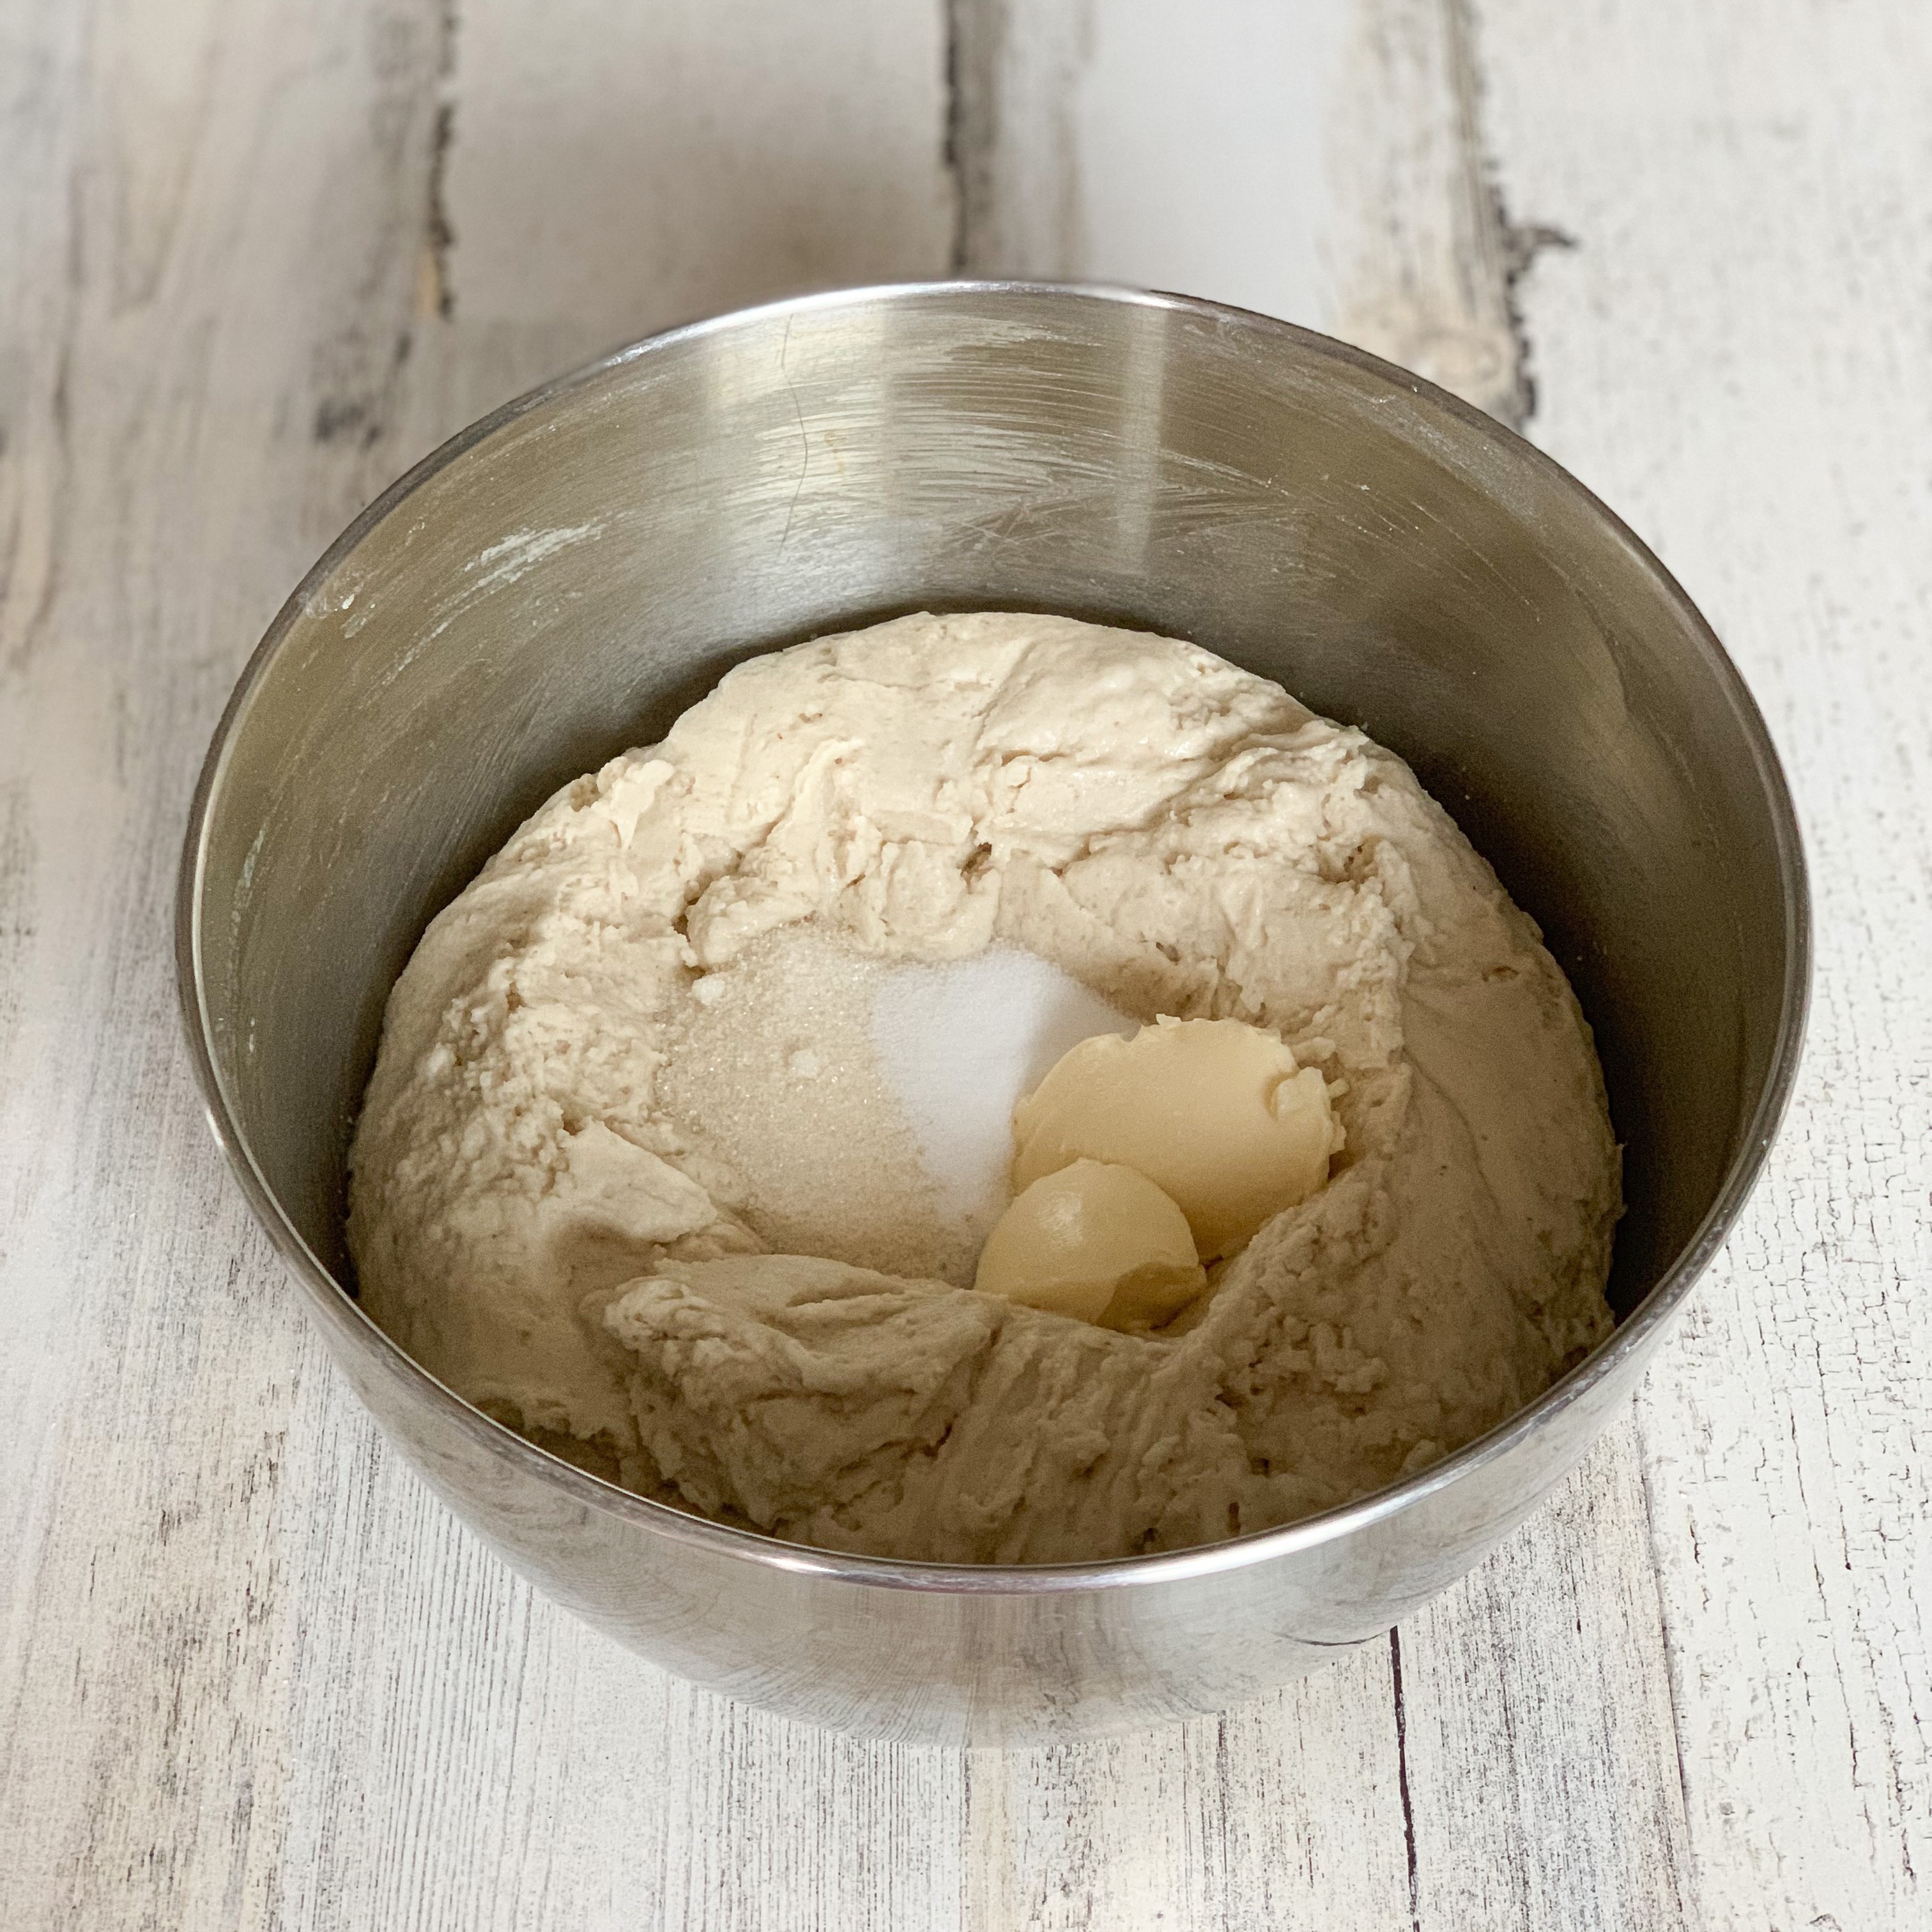
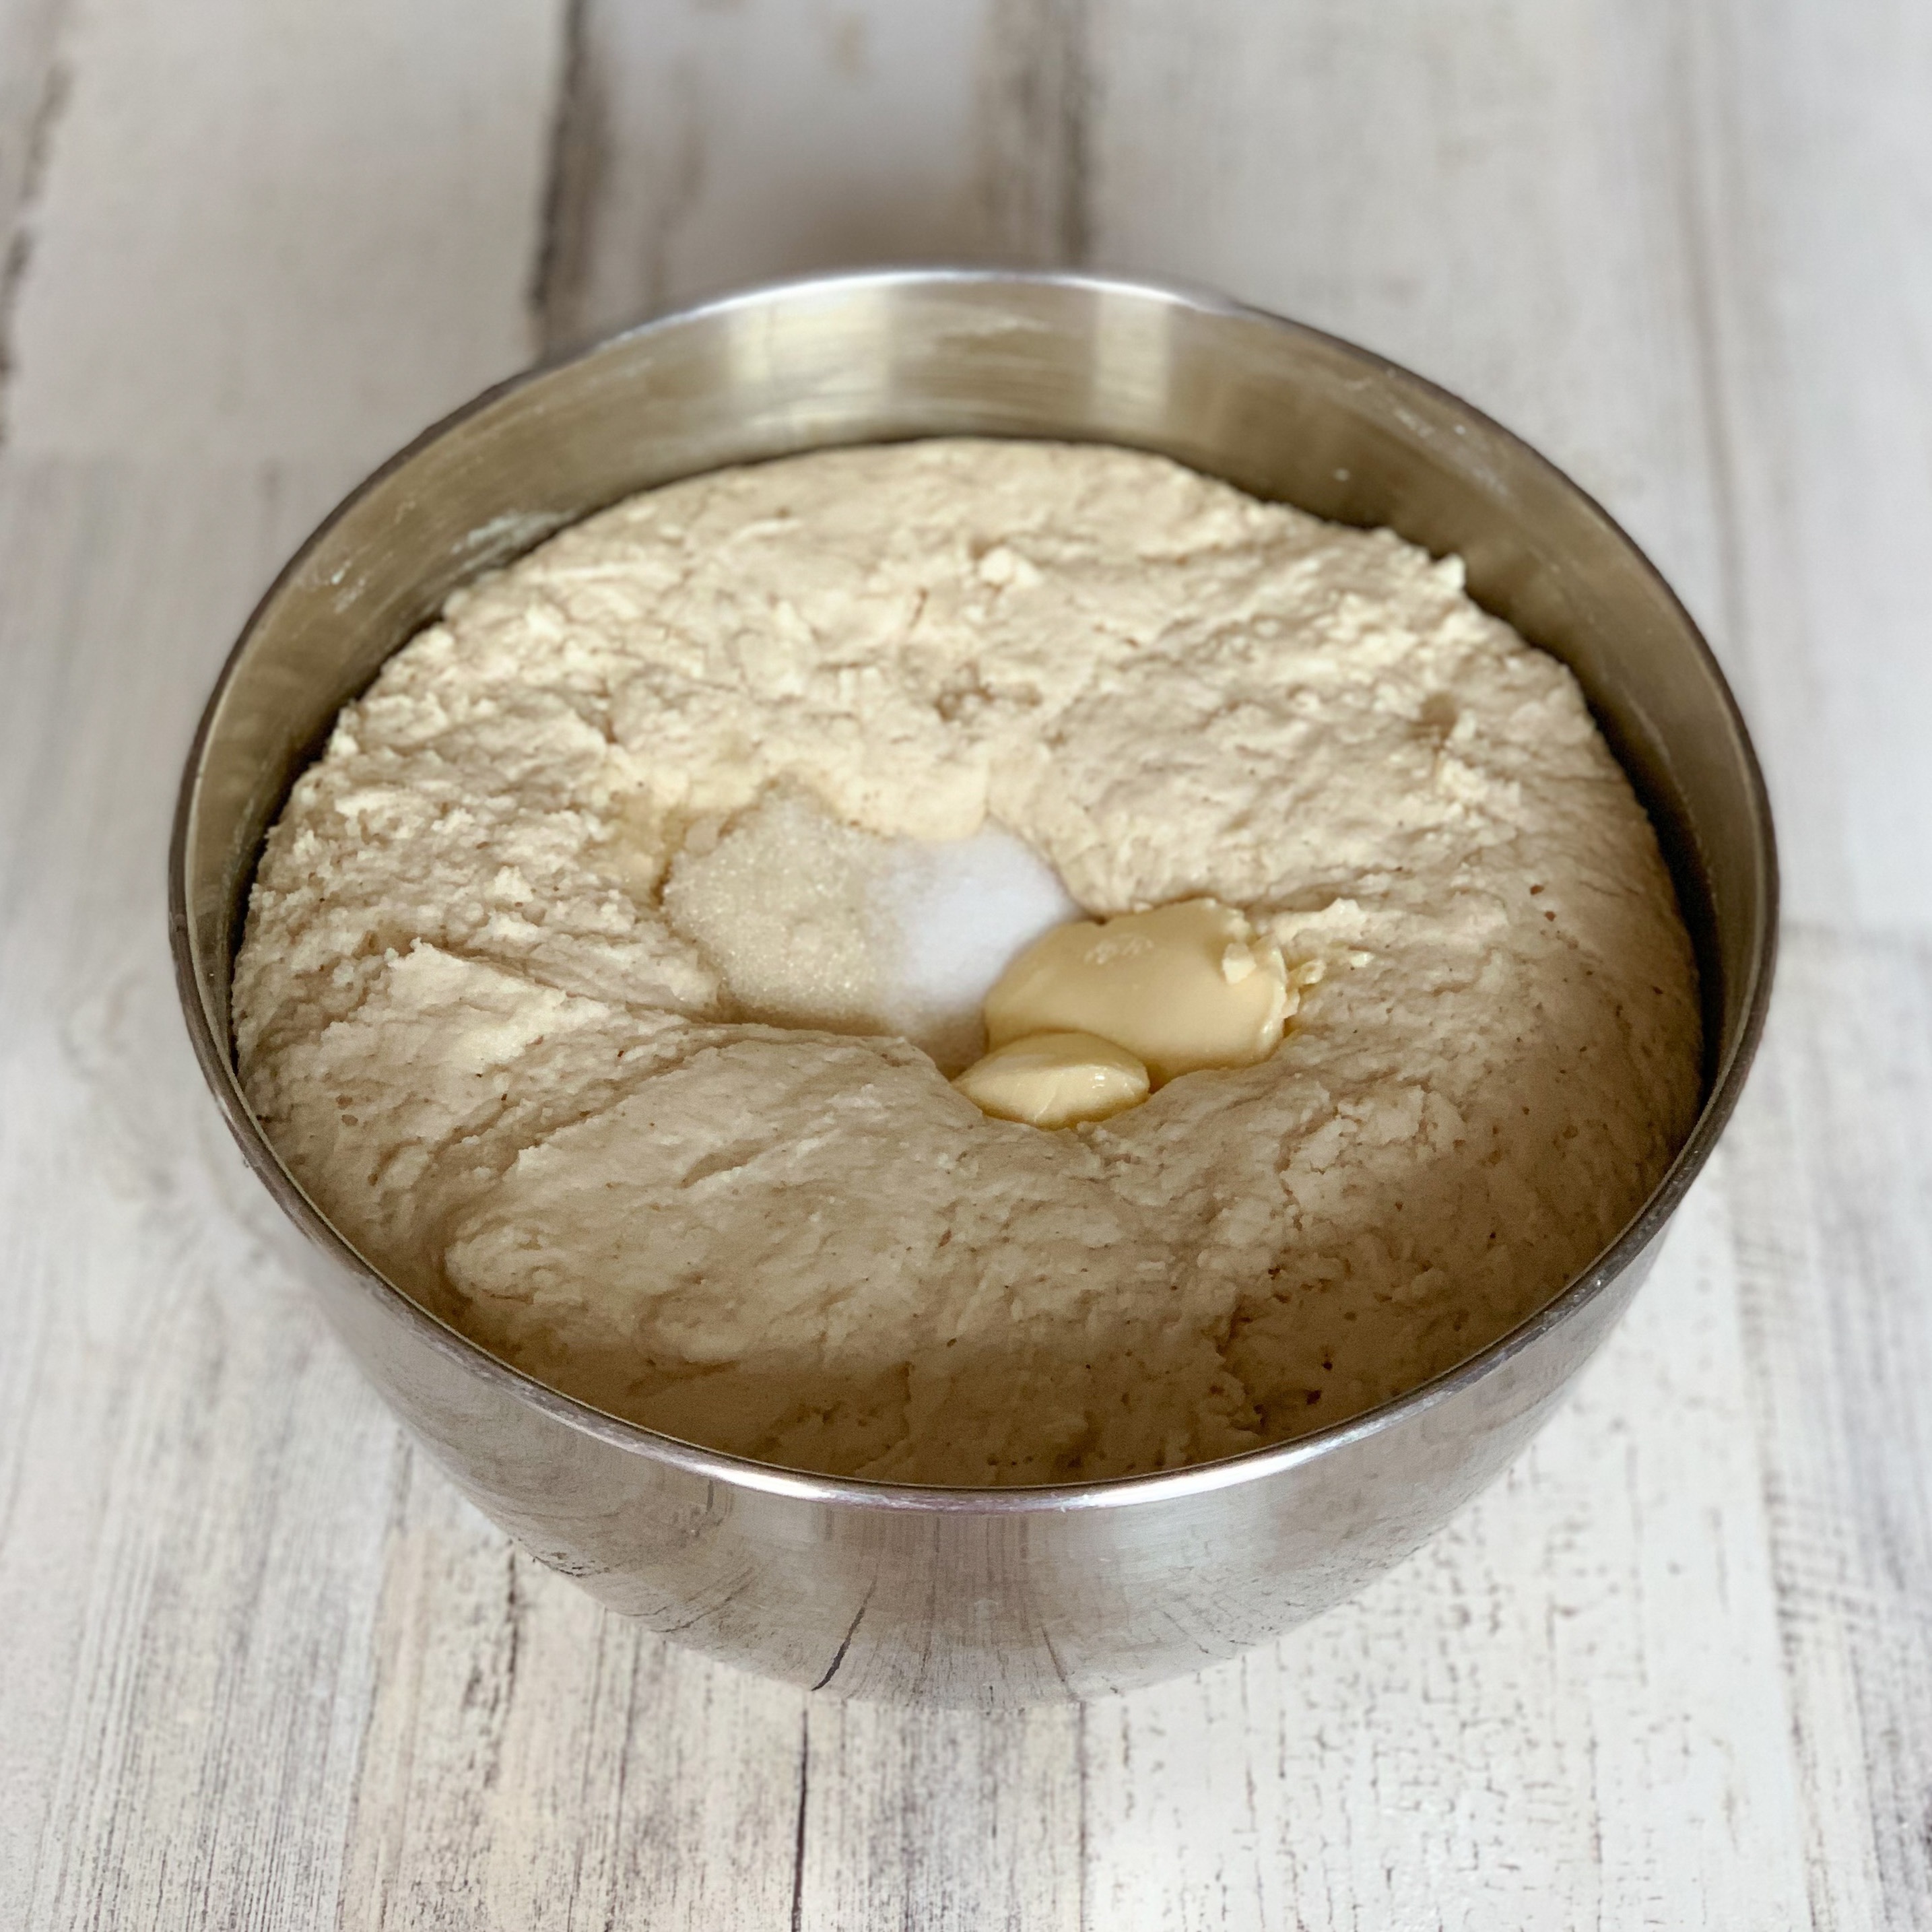
Make a well in the dough, then add the larger amount of sugar, the salt, and the vegan butter to the well. DO NOT stir them in yet!
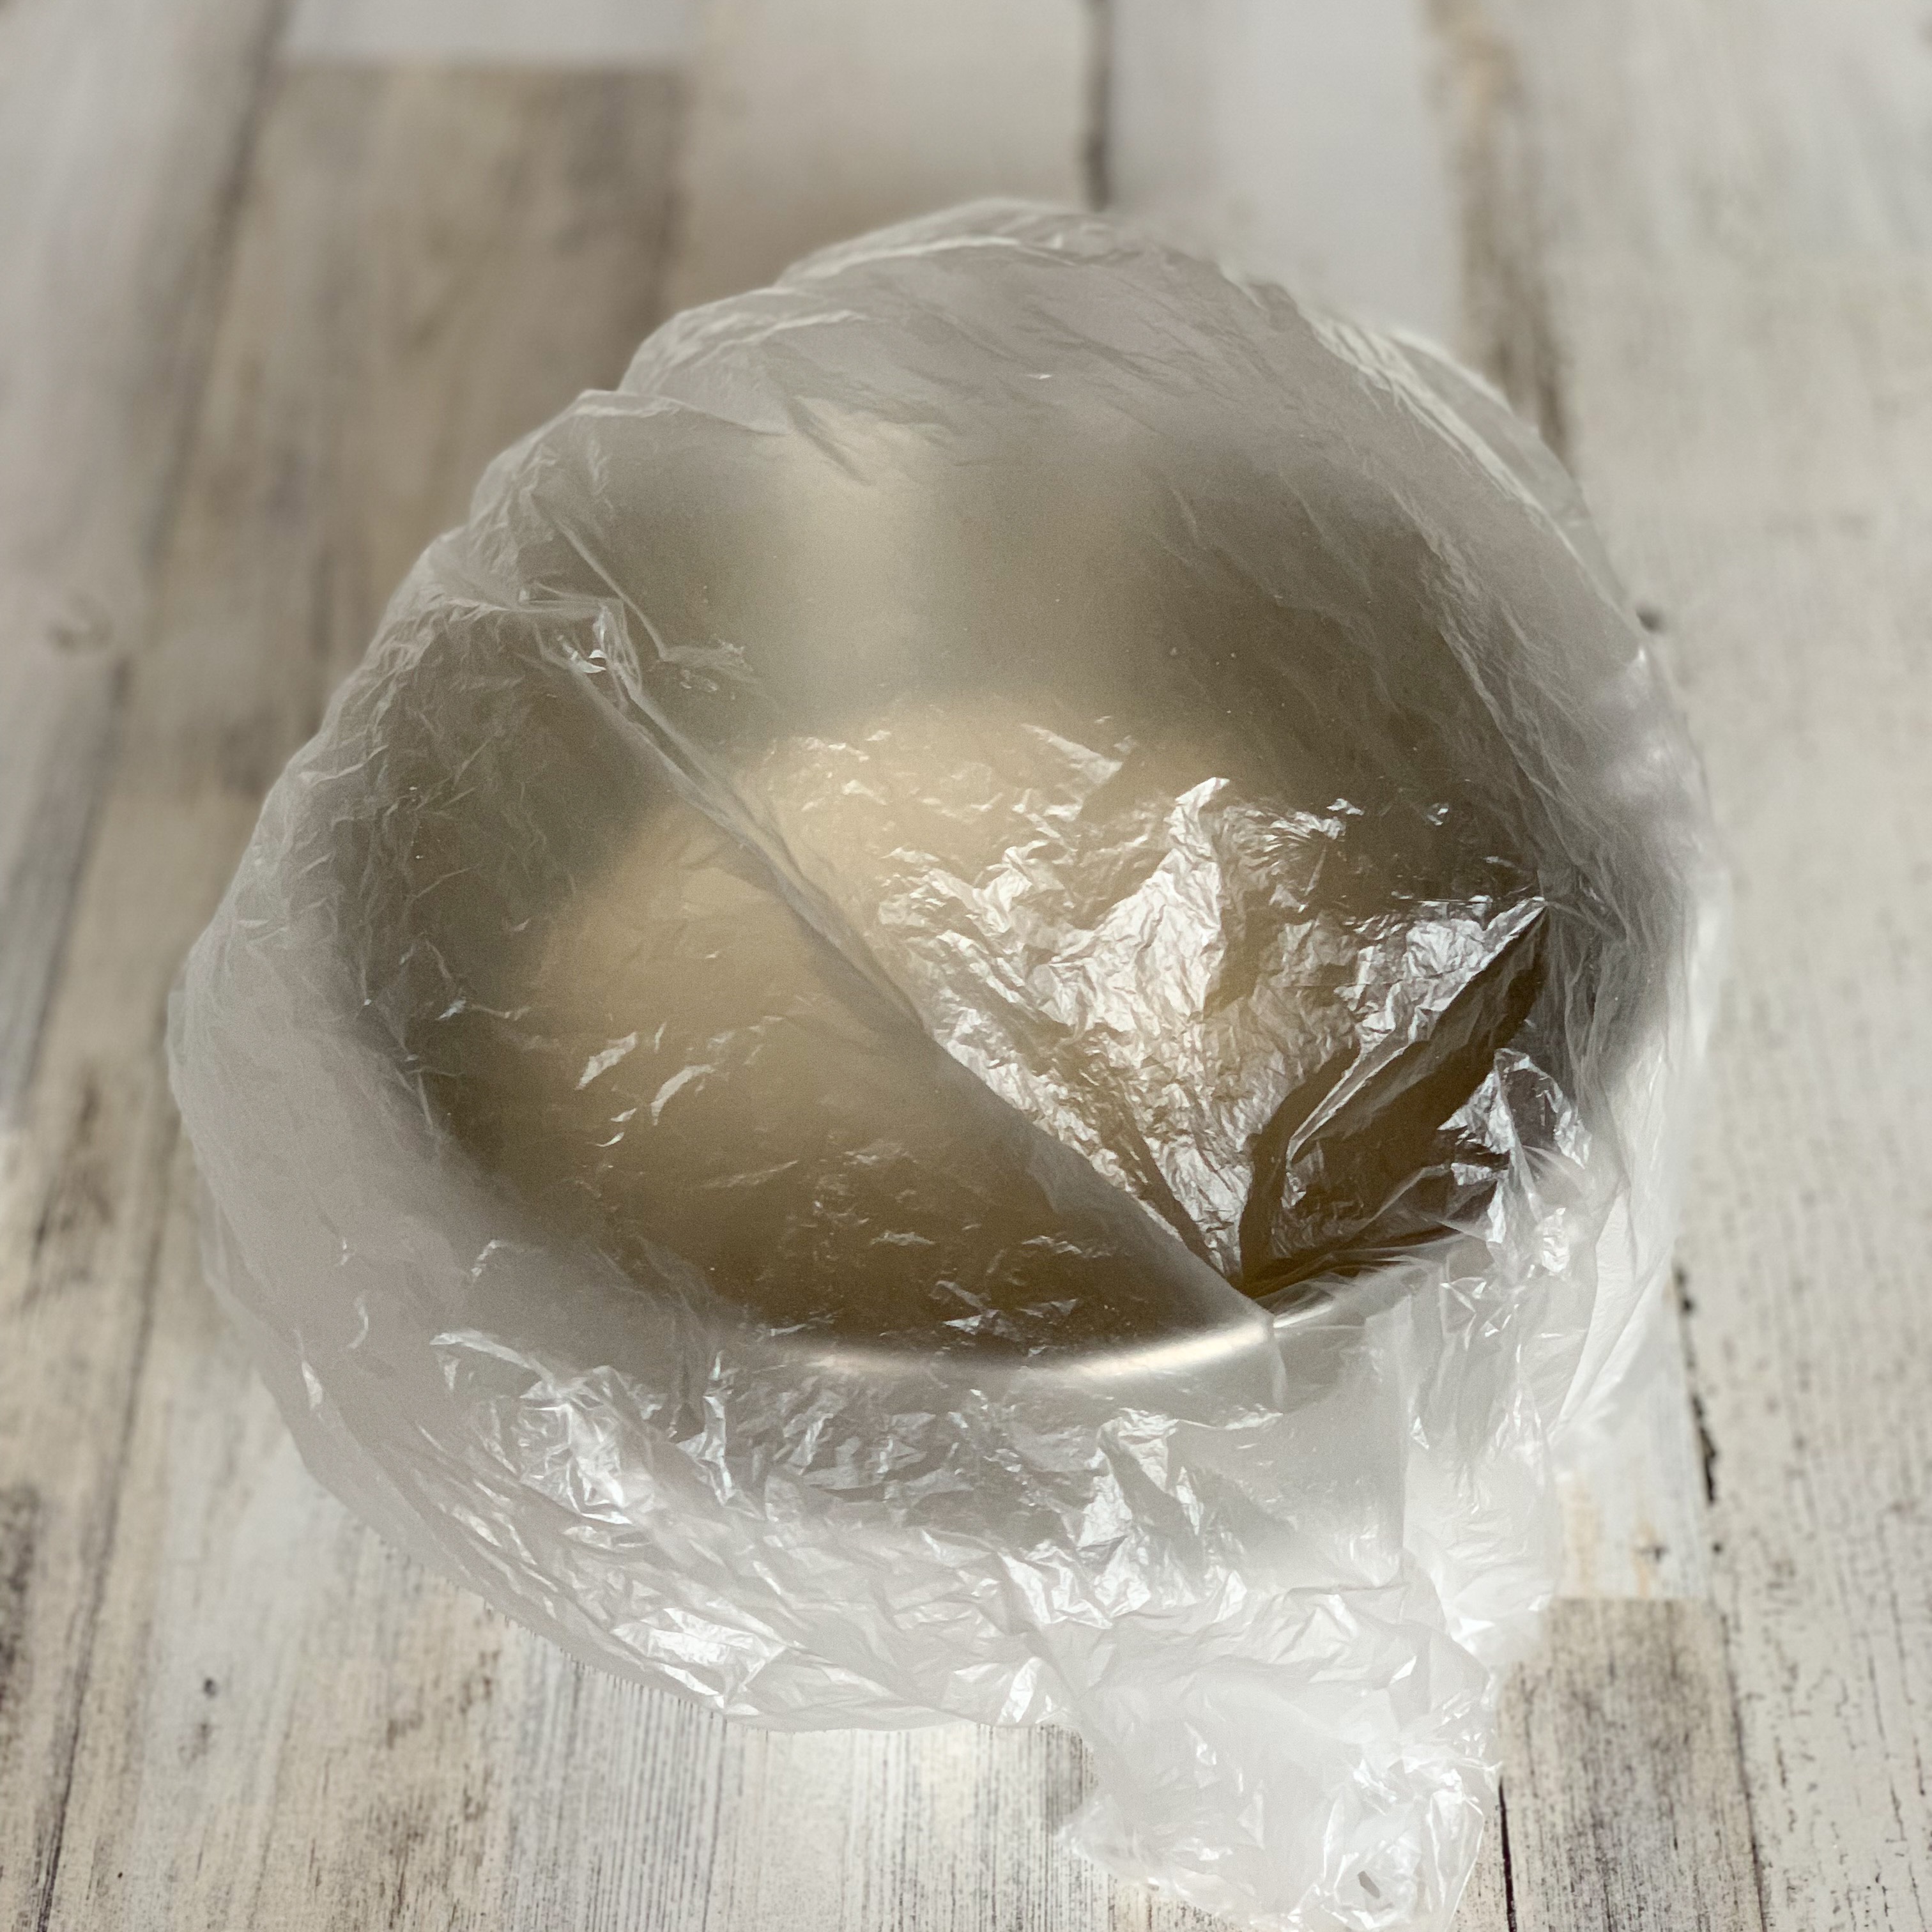
Place the bowl into a clean trash bag, twist the end, and tuck it under the bowl. Set a timer for one hour. Grease and flour your loaf pan while you wait. This is an essential step, even with pans that are supposed to be non-stick. You want your loaf of bread to turn out of the pan easily, and the flour really helps the dough to rise up the sides of the pan properly.
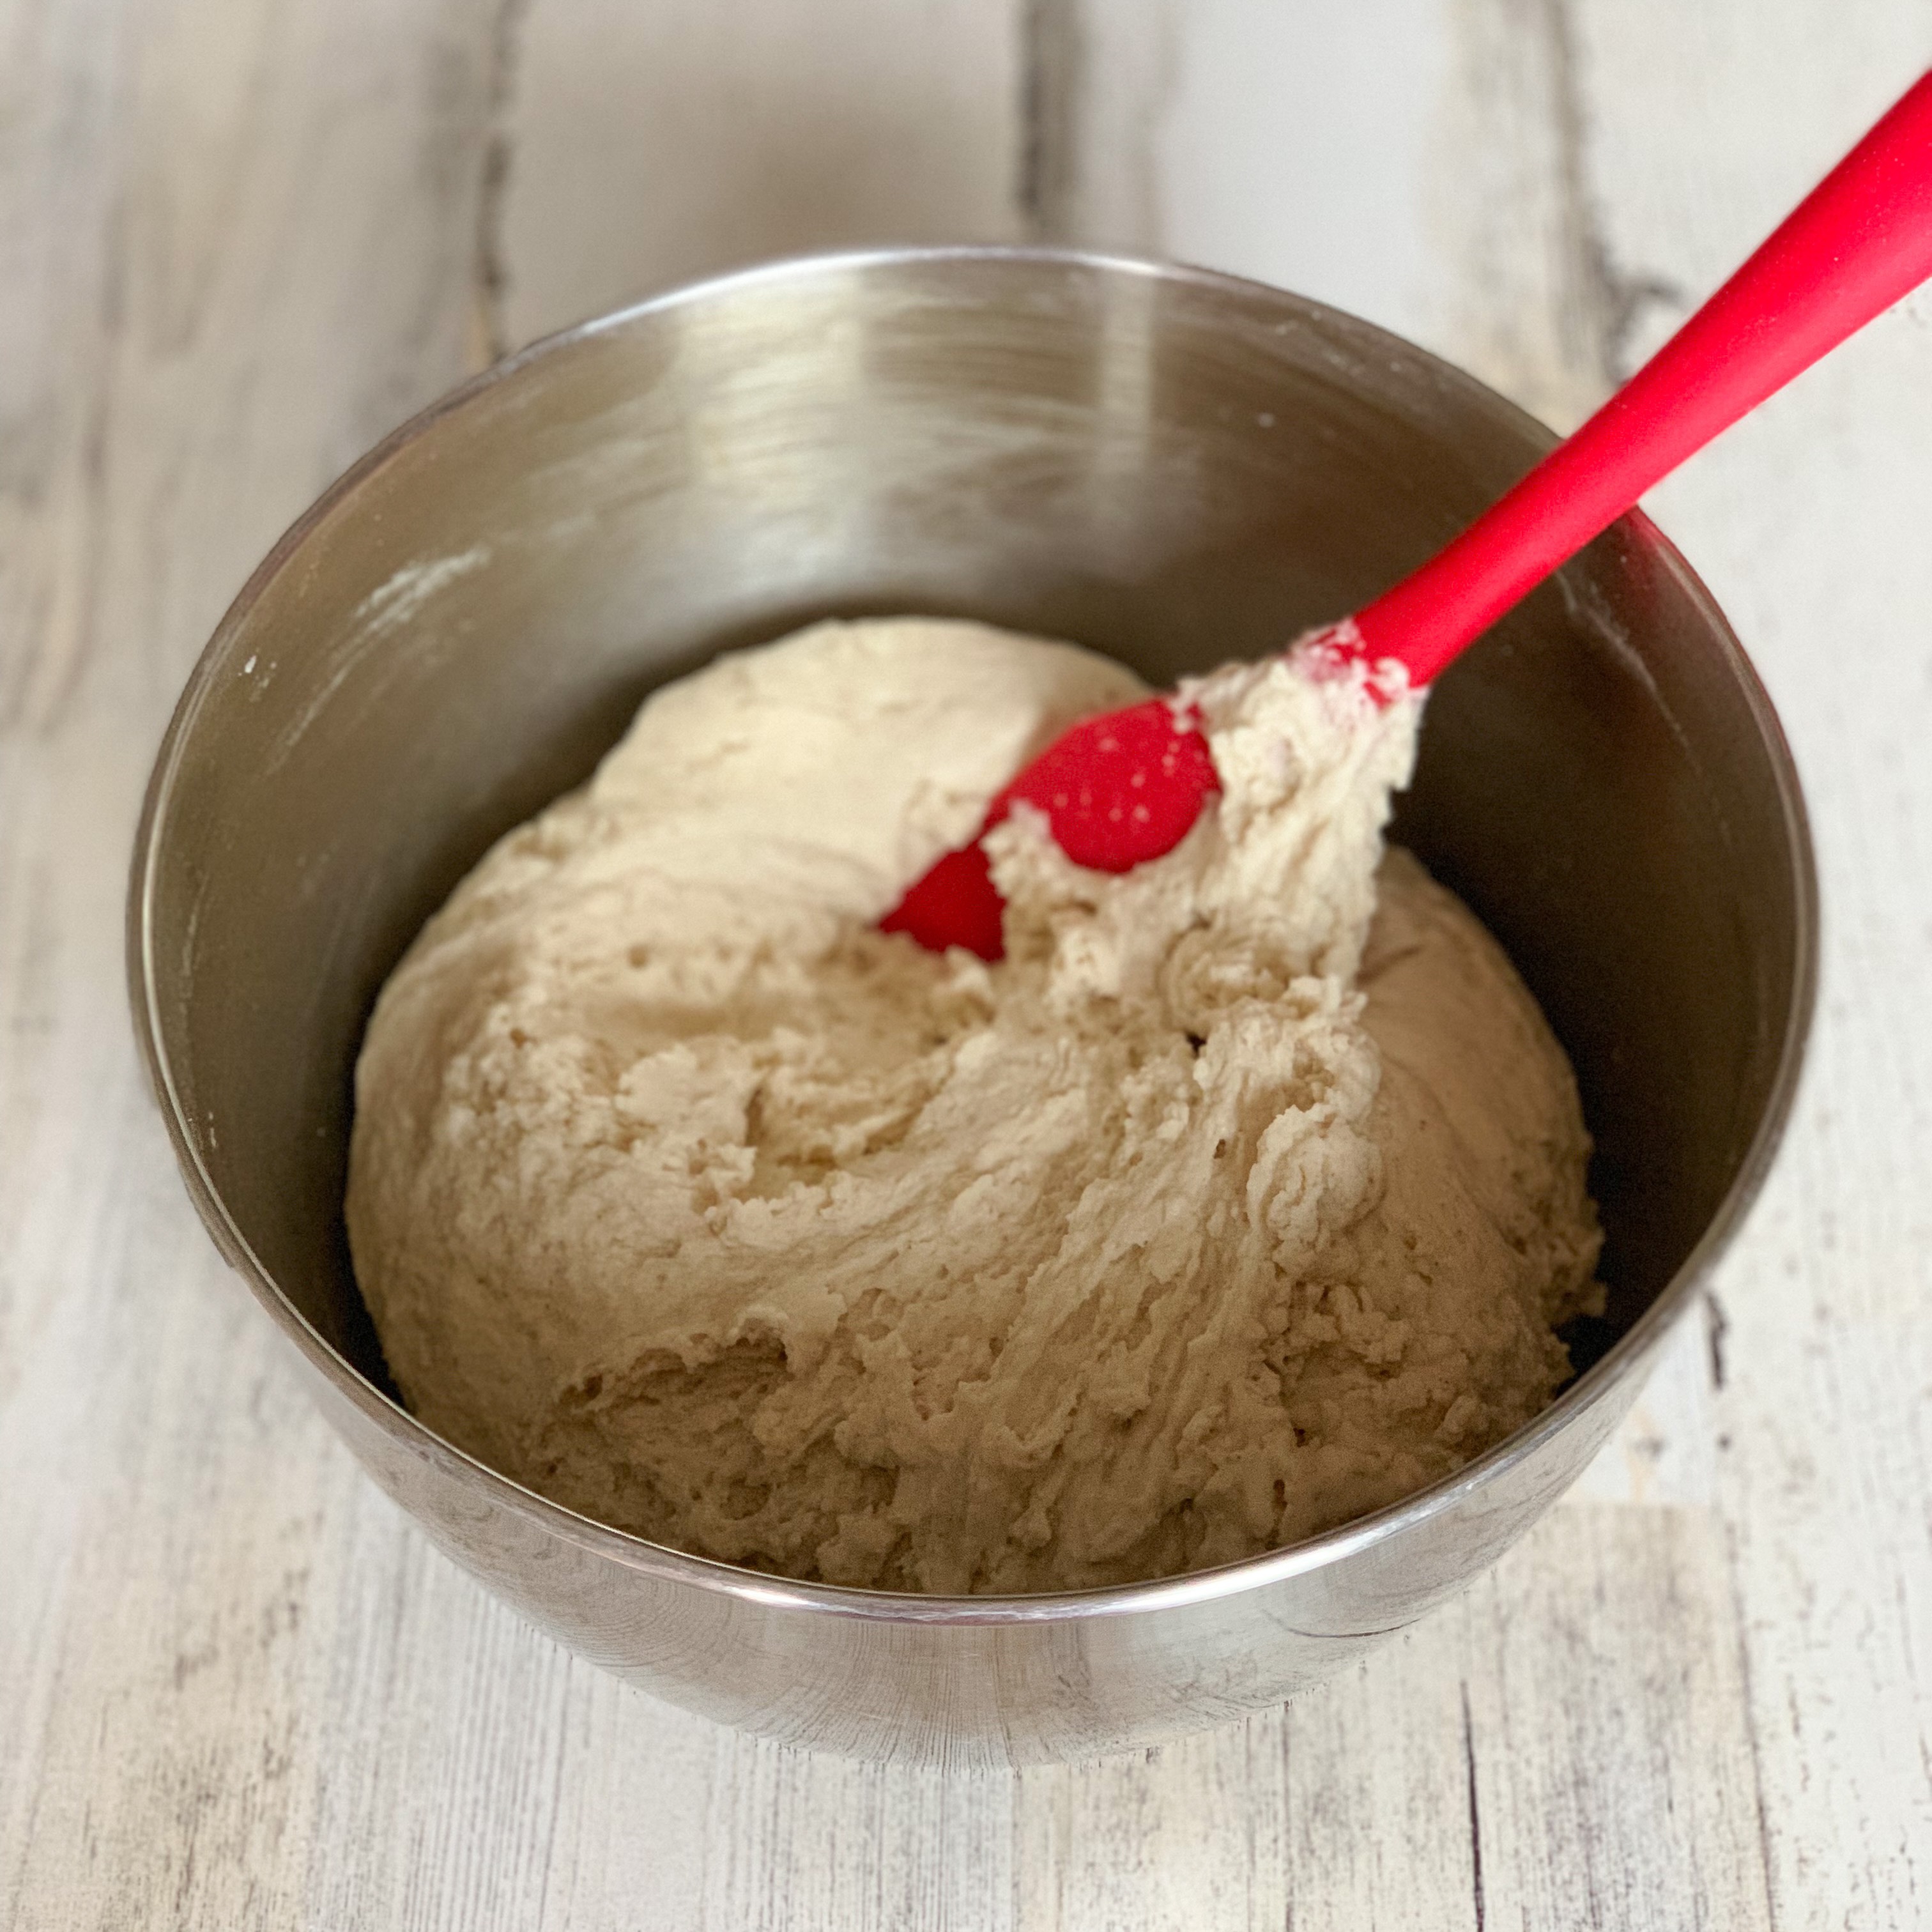
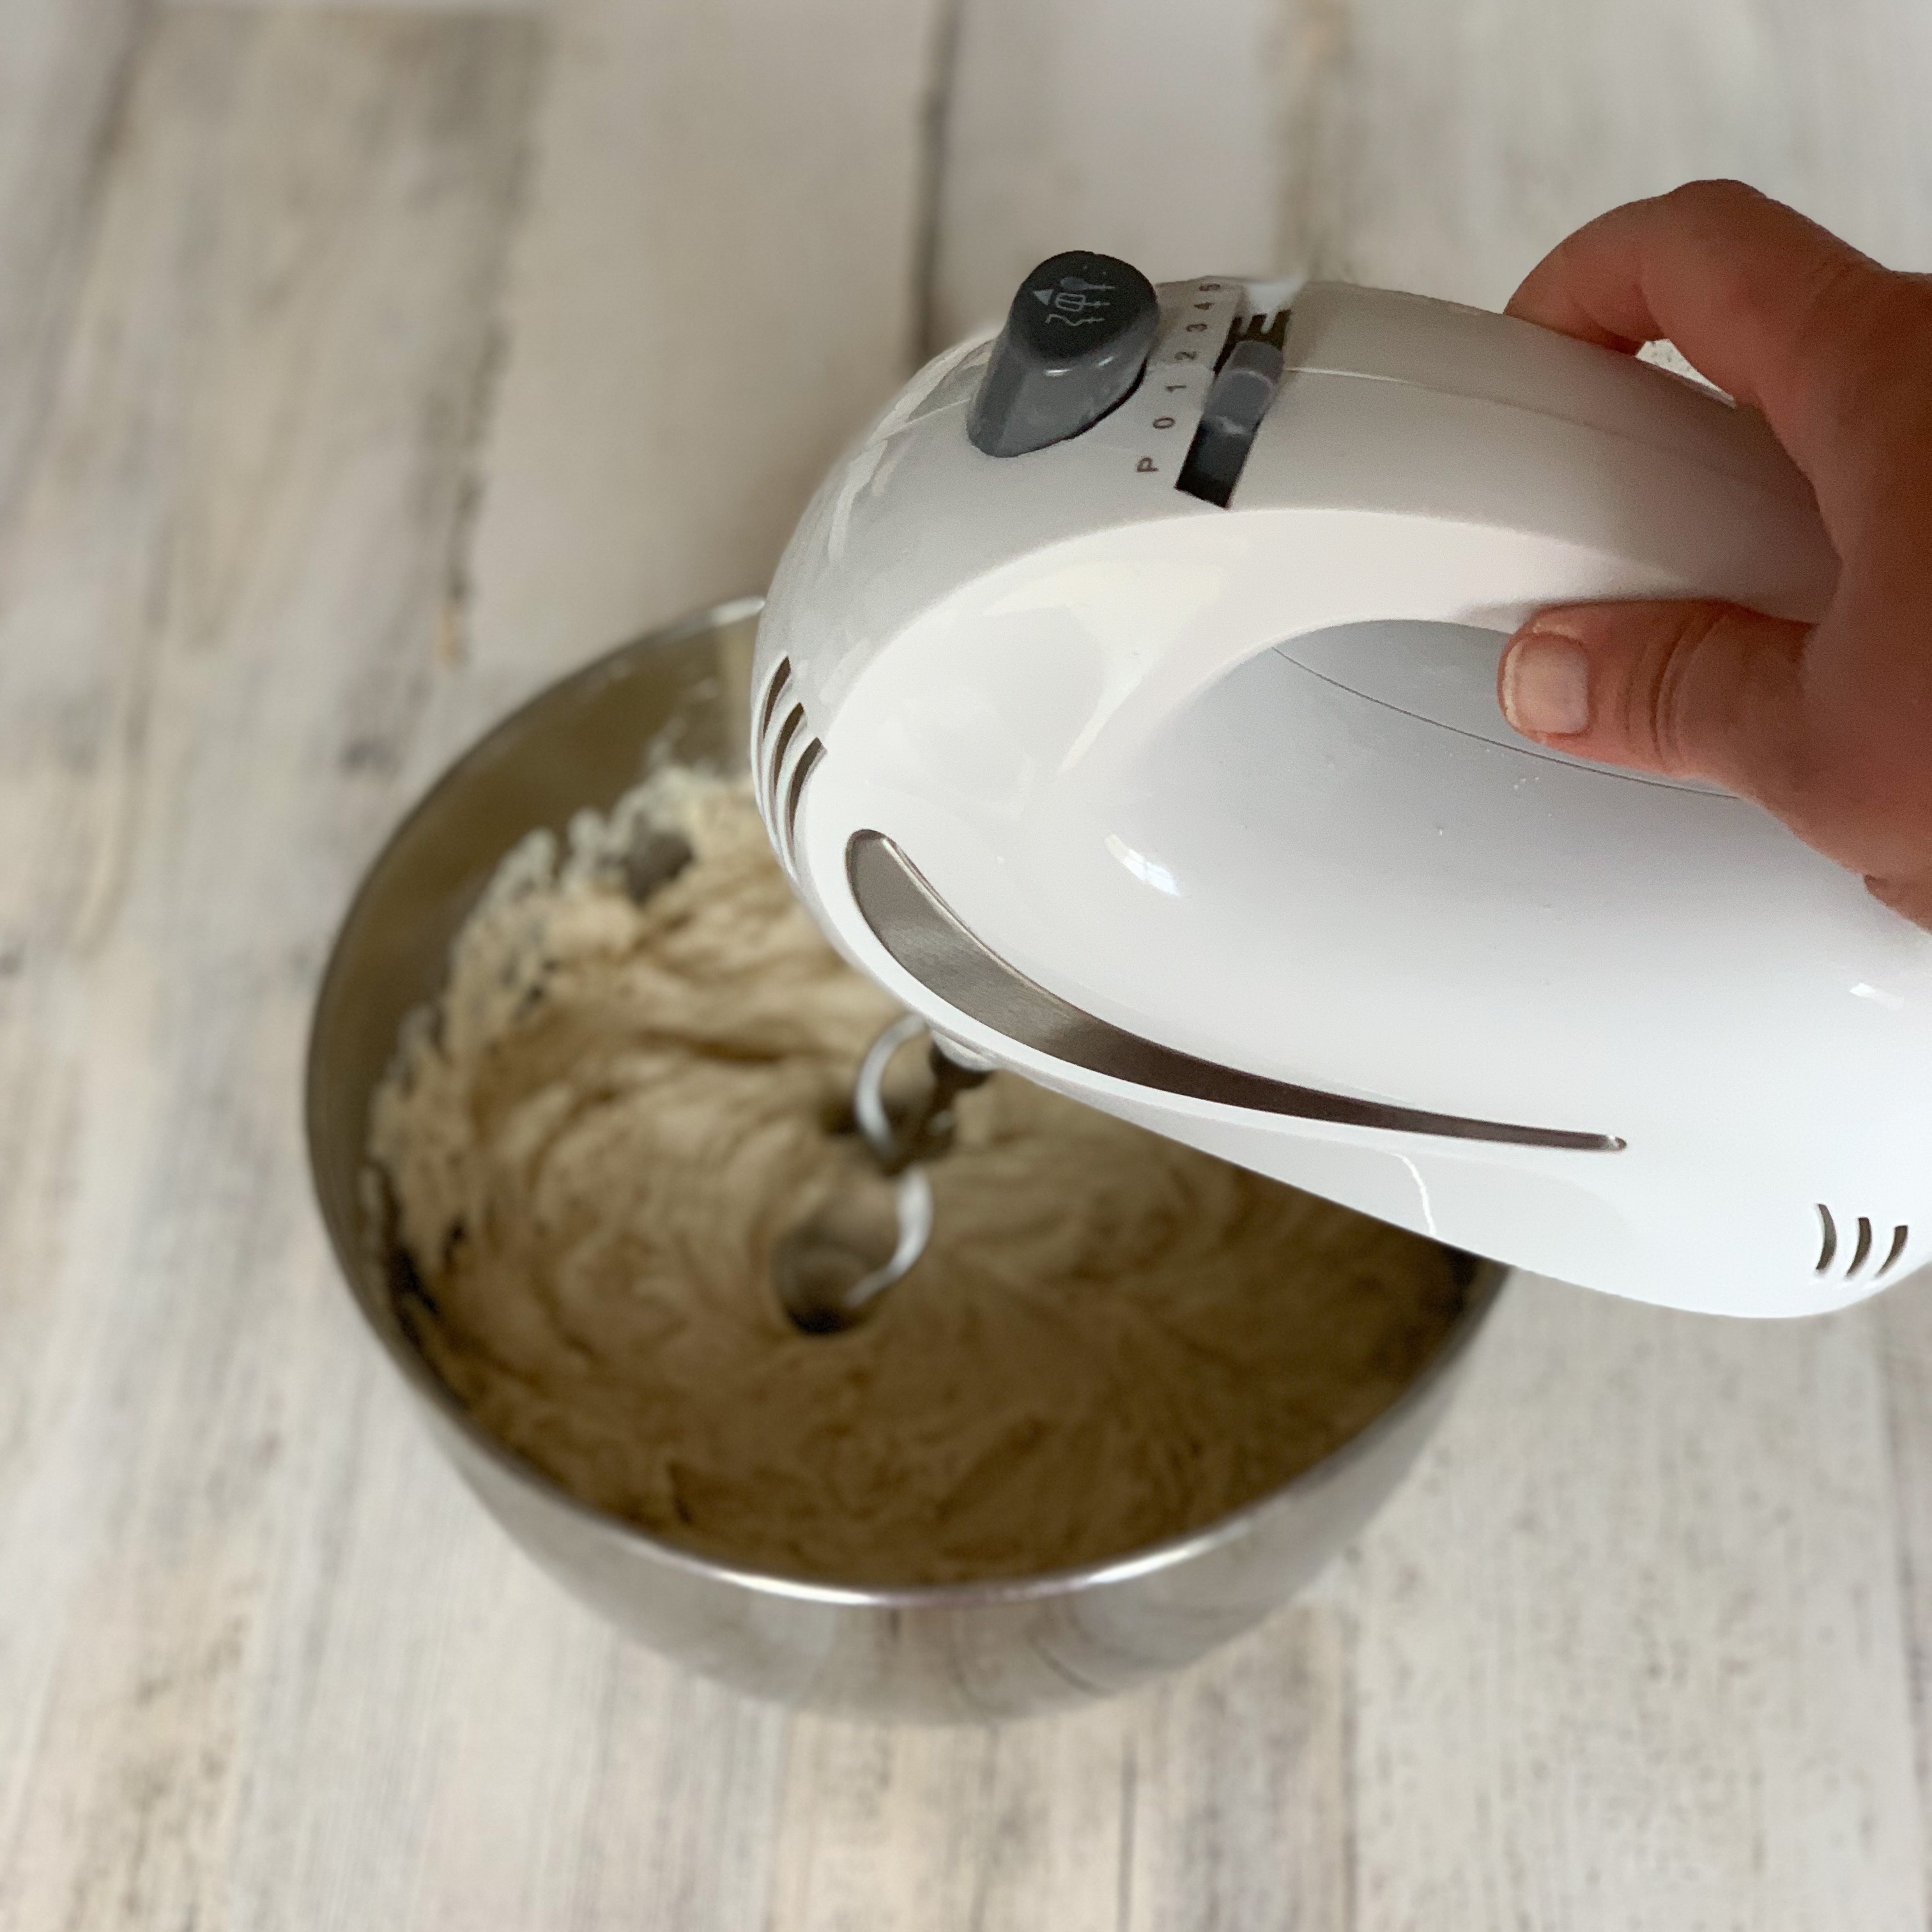
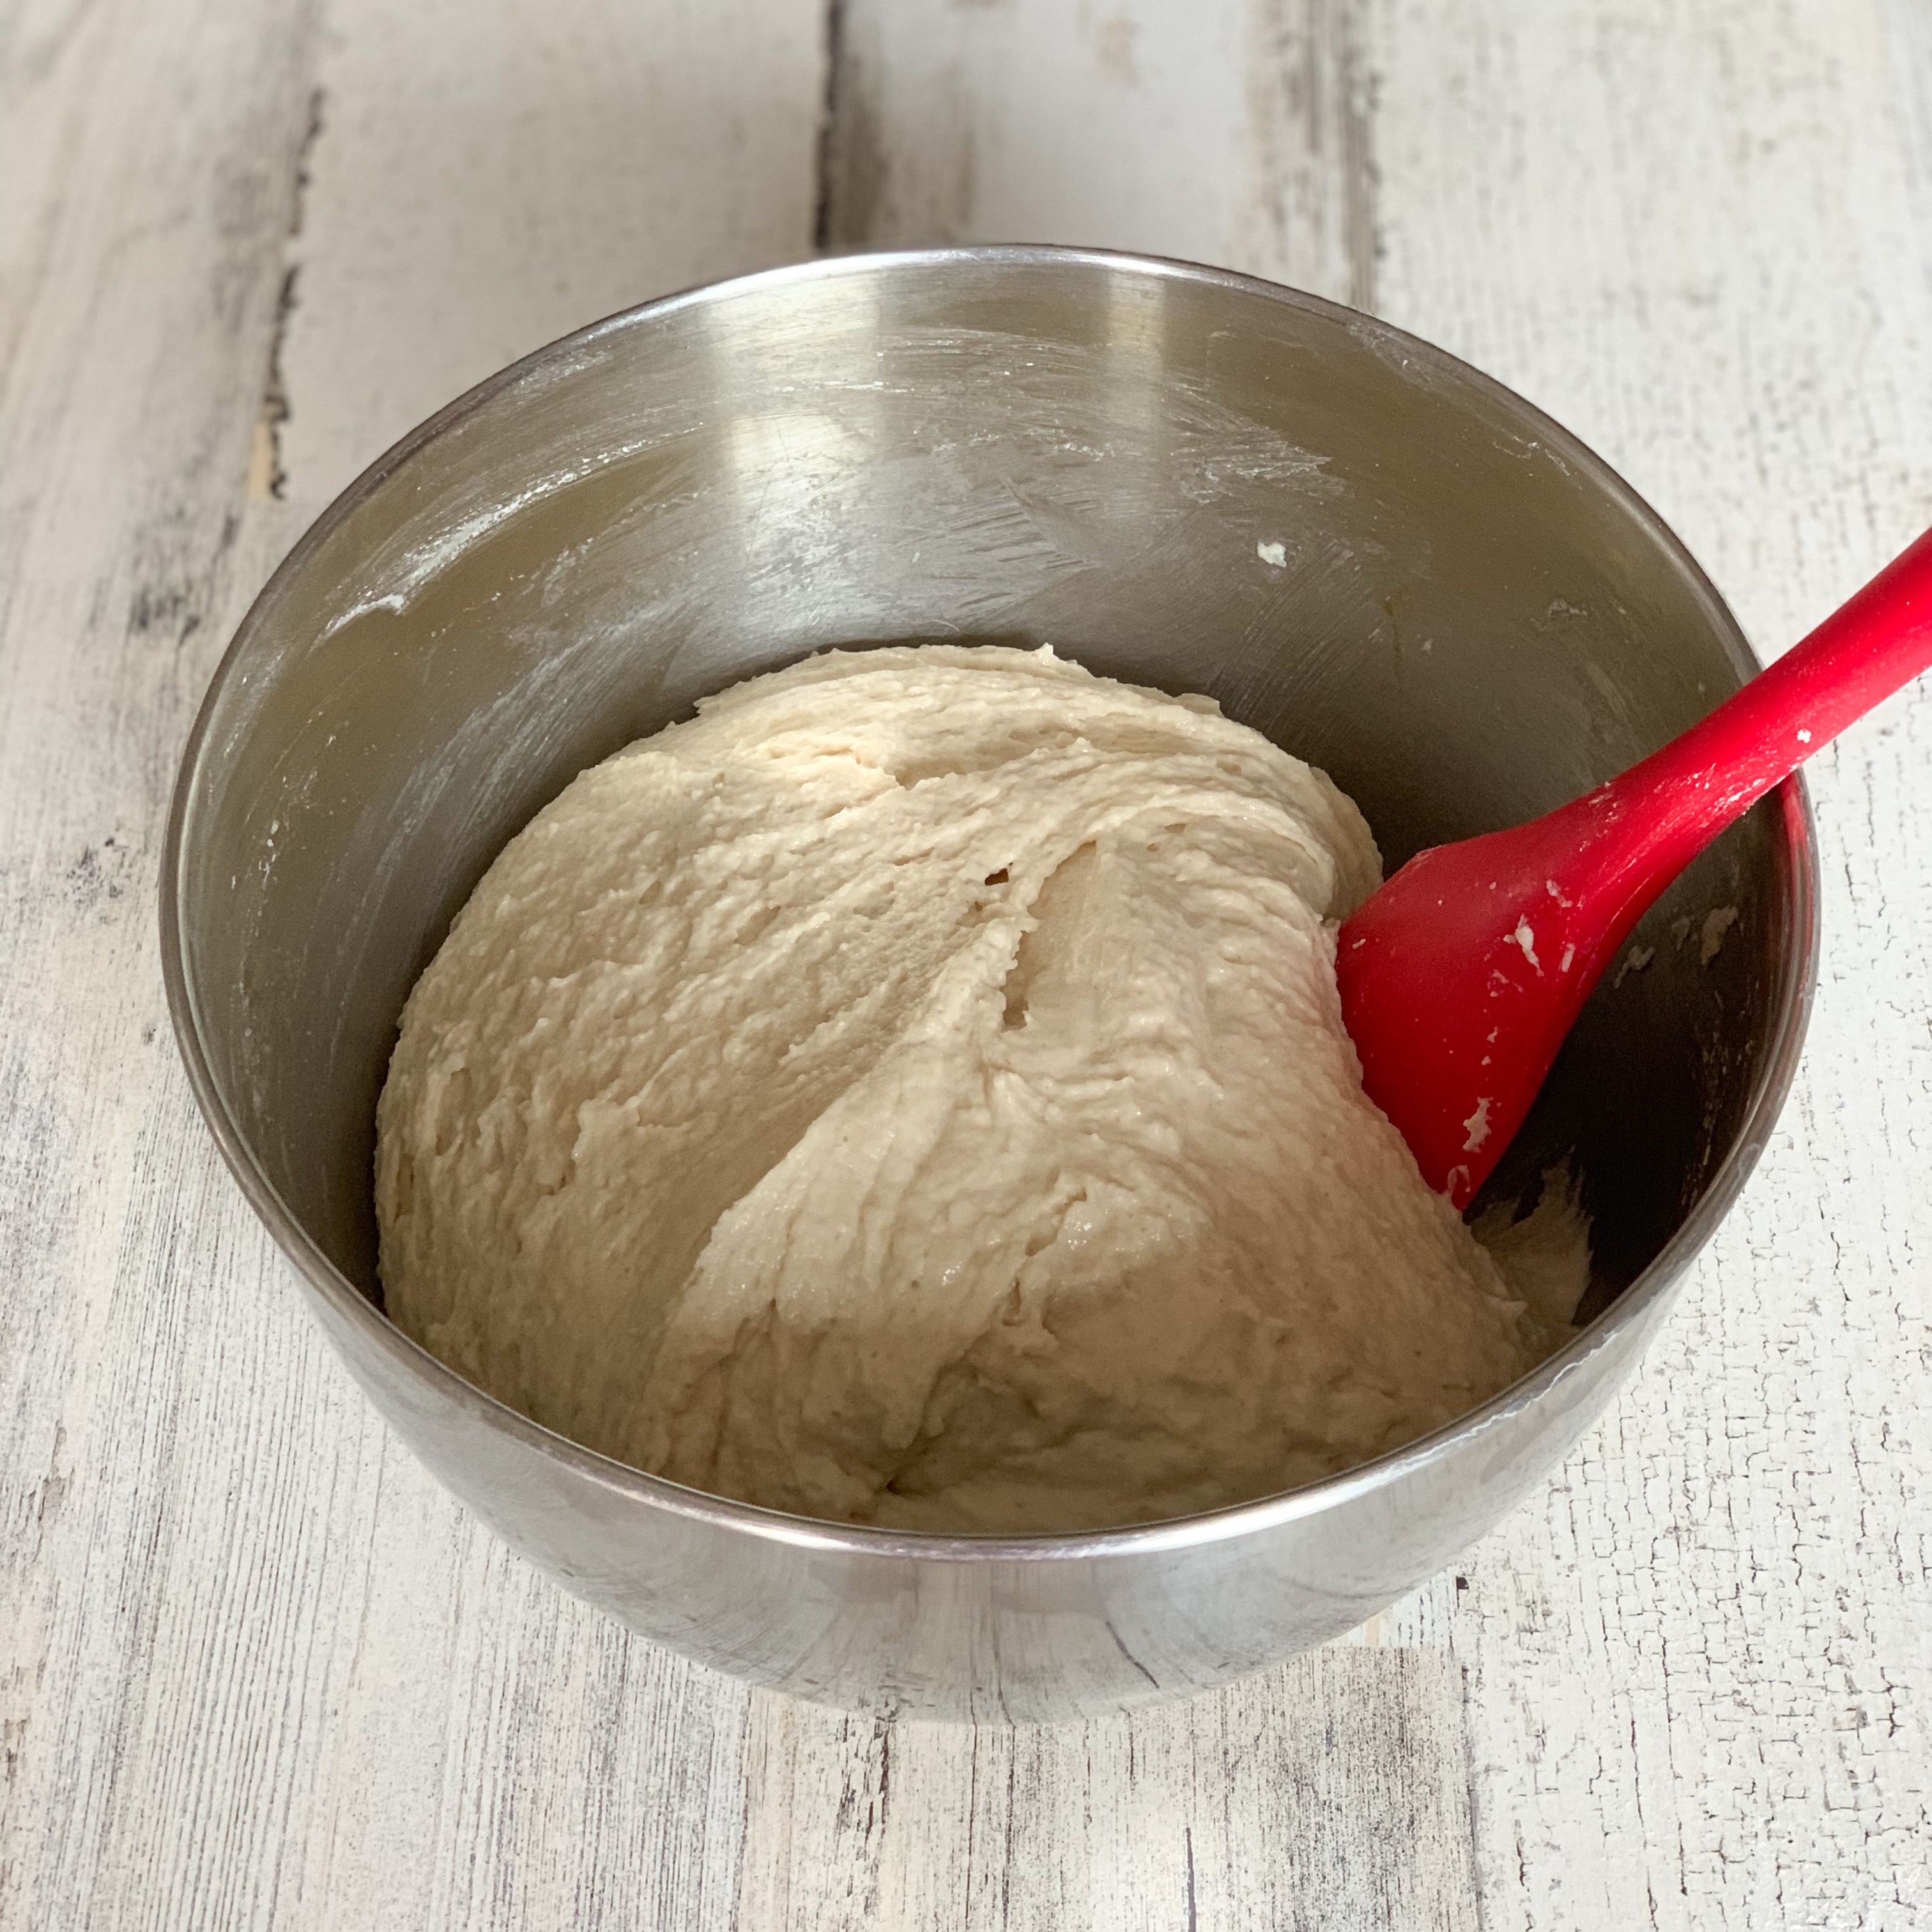
When your timer goes off, mix the dough for one to two minutes on medium speed just until the sugar, salt, and vegan butter are incorporated:
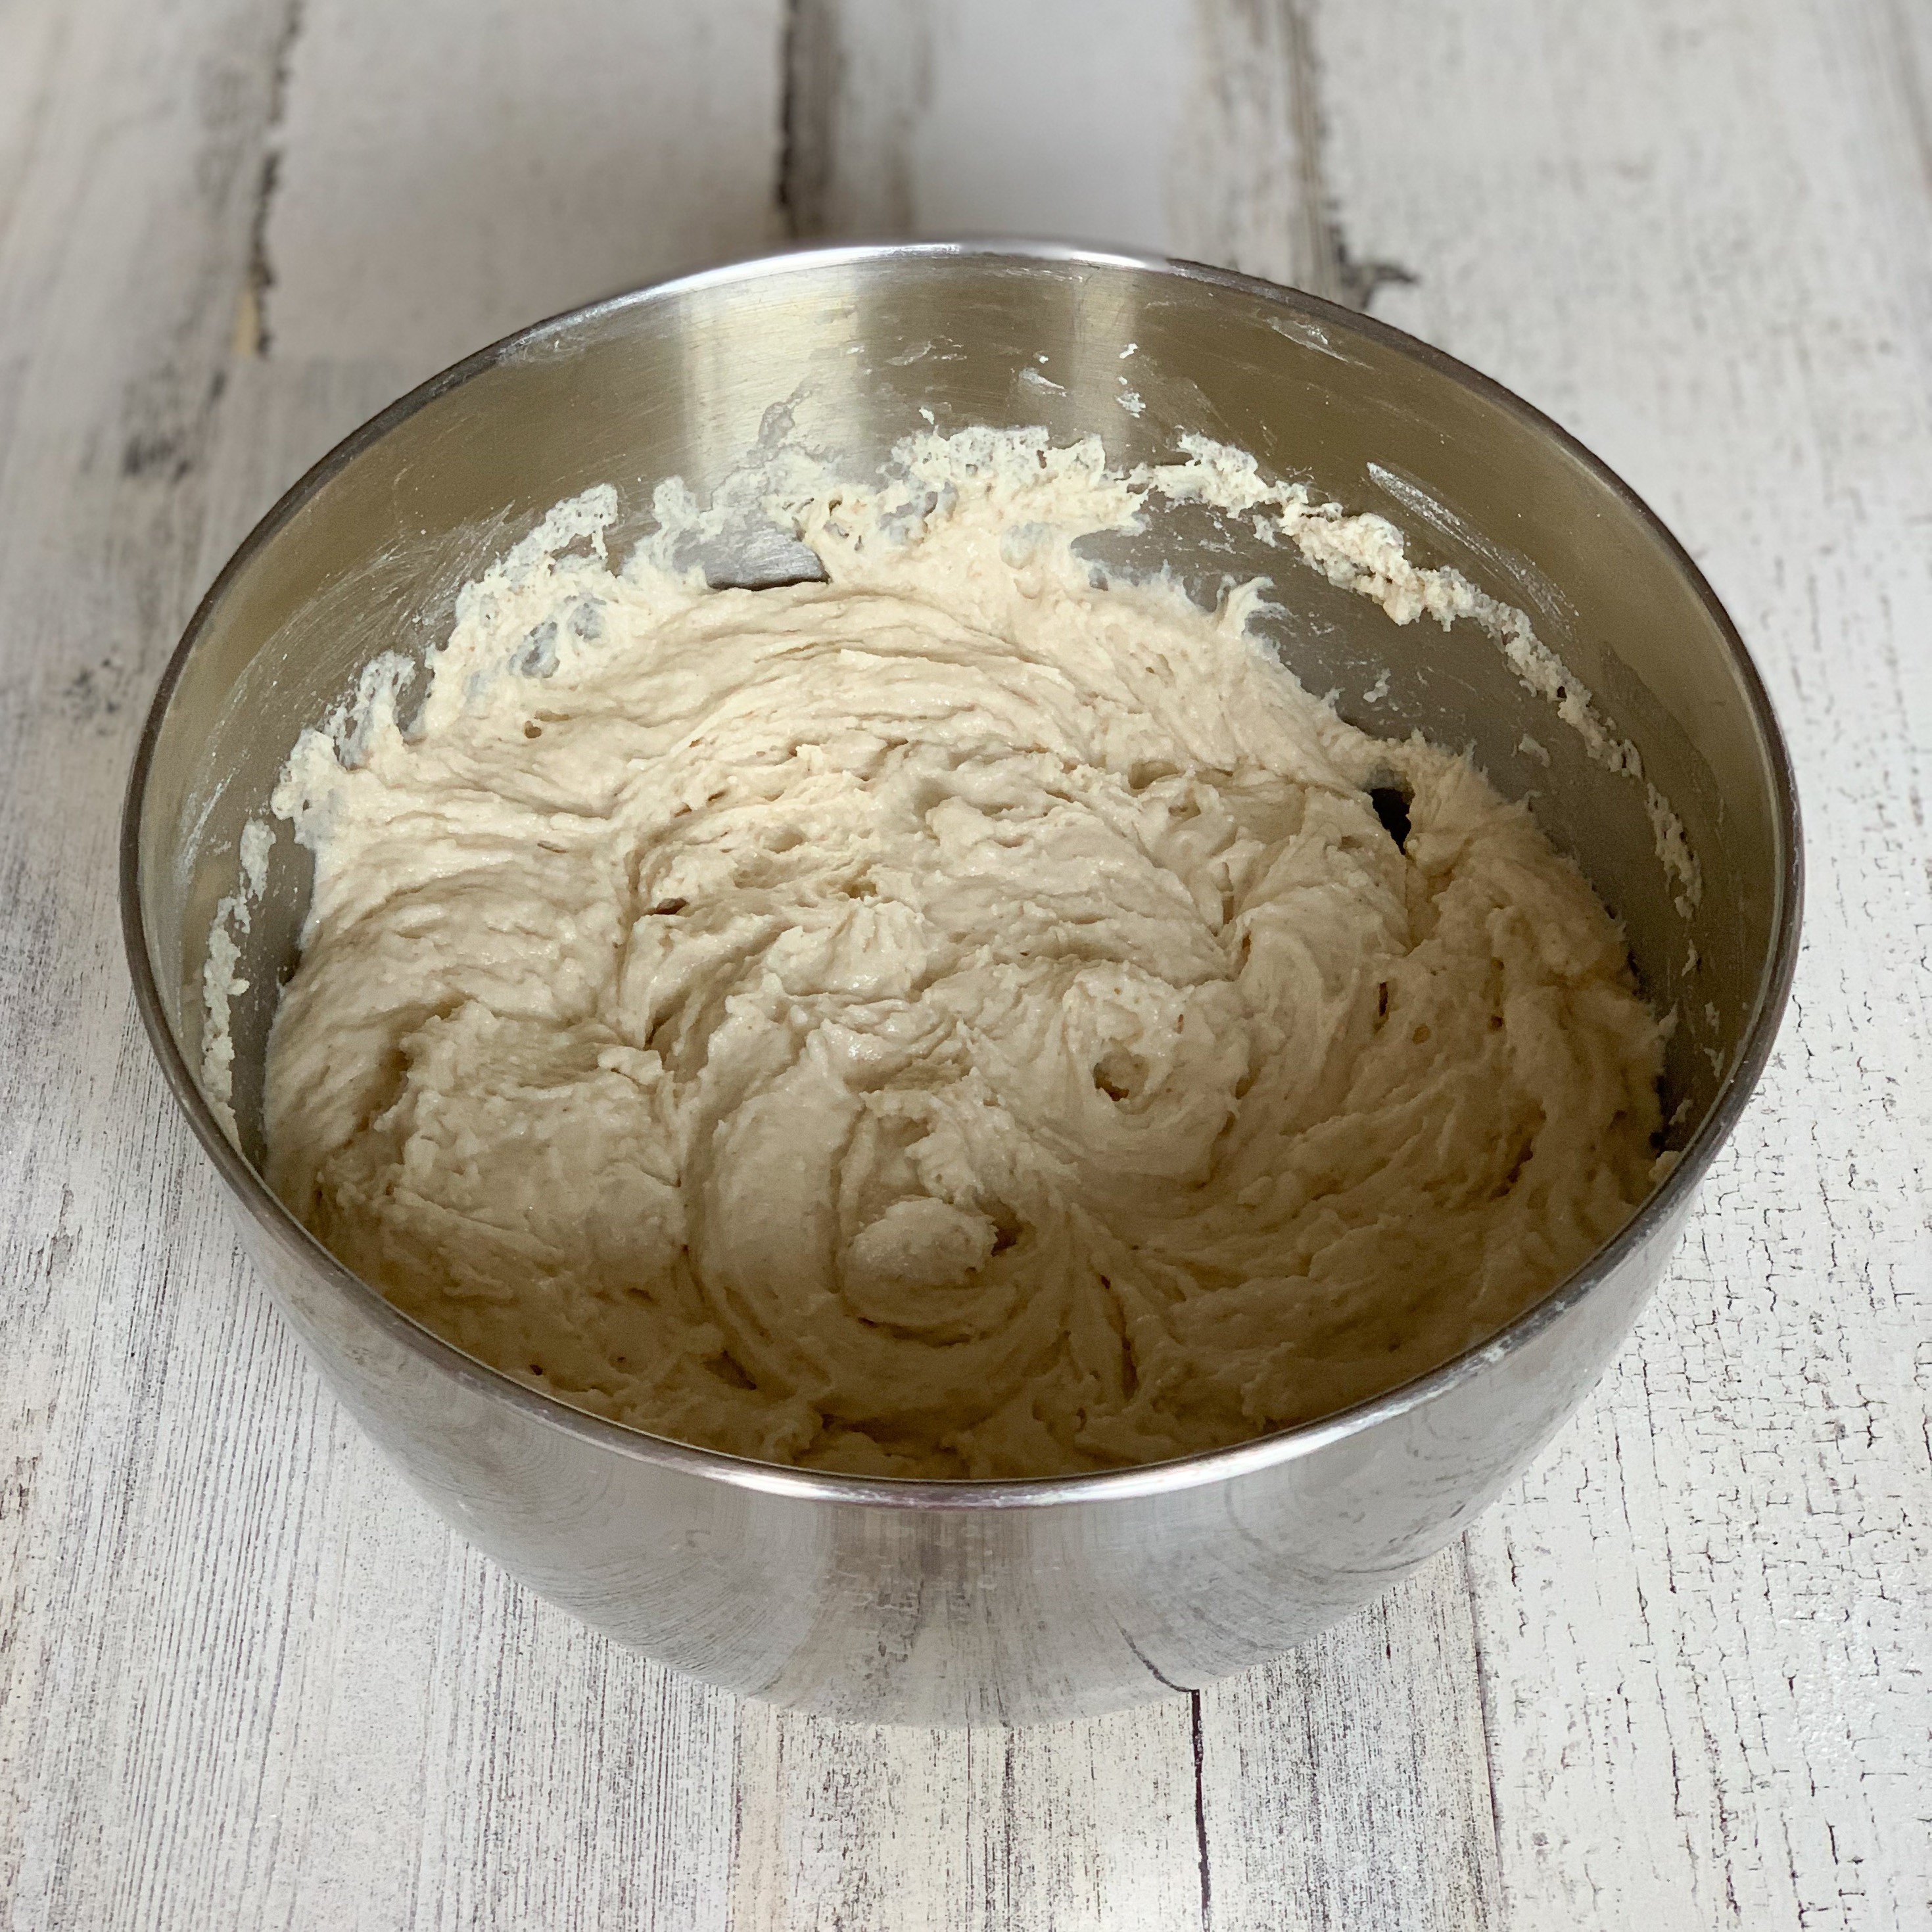
Use a sturdy spatula to scrape the bottom and sides of the bowl. Mix the dough by hand with a sturdy spatula several times to be sure you adequately mix in the dough that was on the sides and the bottom of the bowl:
Scrape the dough into your prepared pan. Spread it out evenly, being sure to press it into the corners. This is what the dough looks like in the large, medium, and small recipe sizes in the corresponding correctly sized pans:
Place the filled loaf pan into your plastic bag. Set a timer for 20 minutes so you can check the rise.
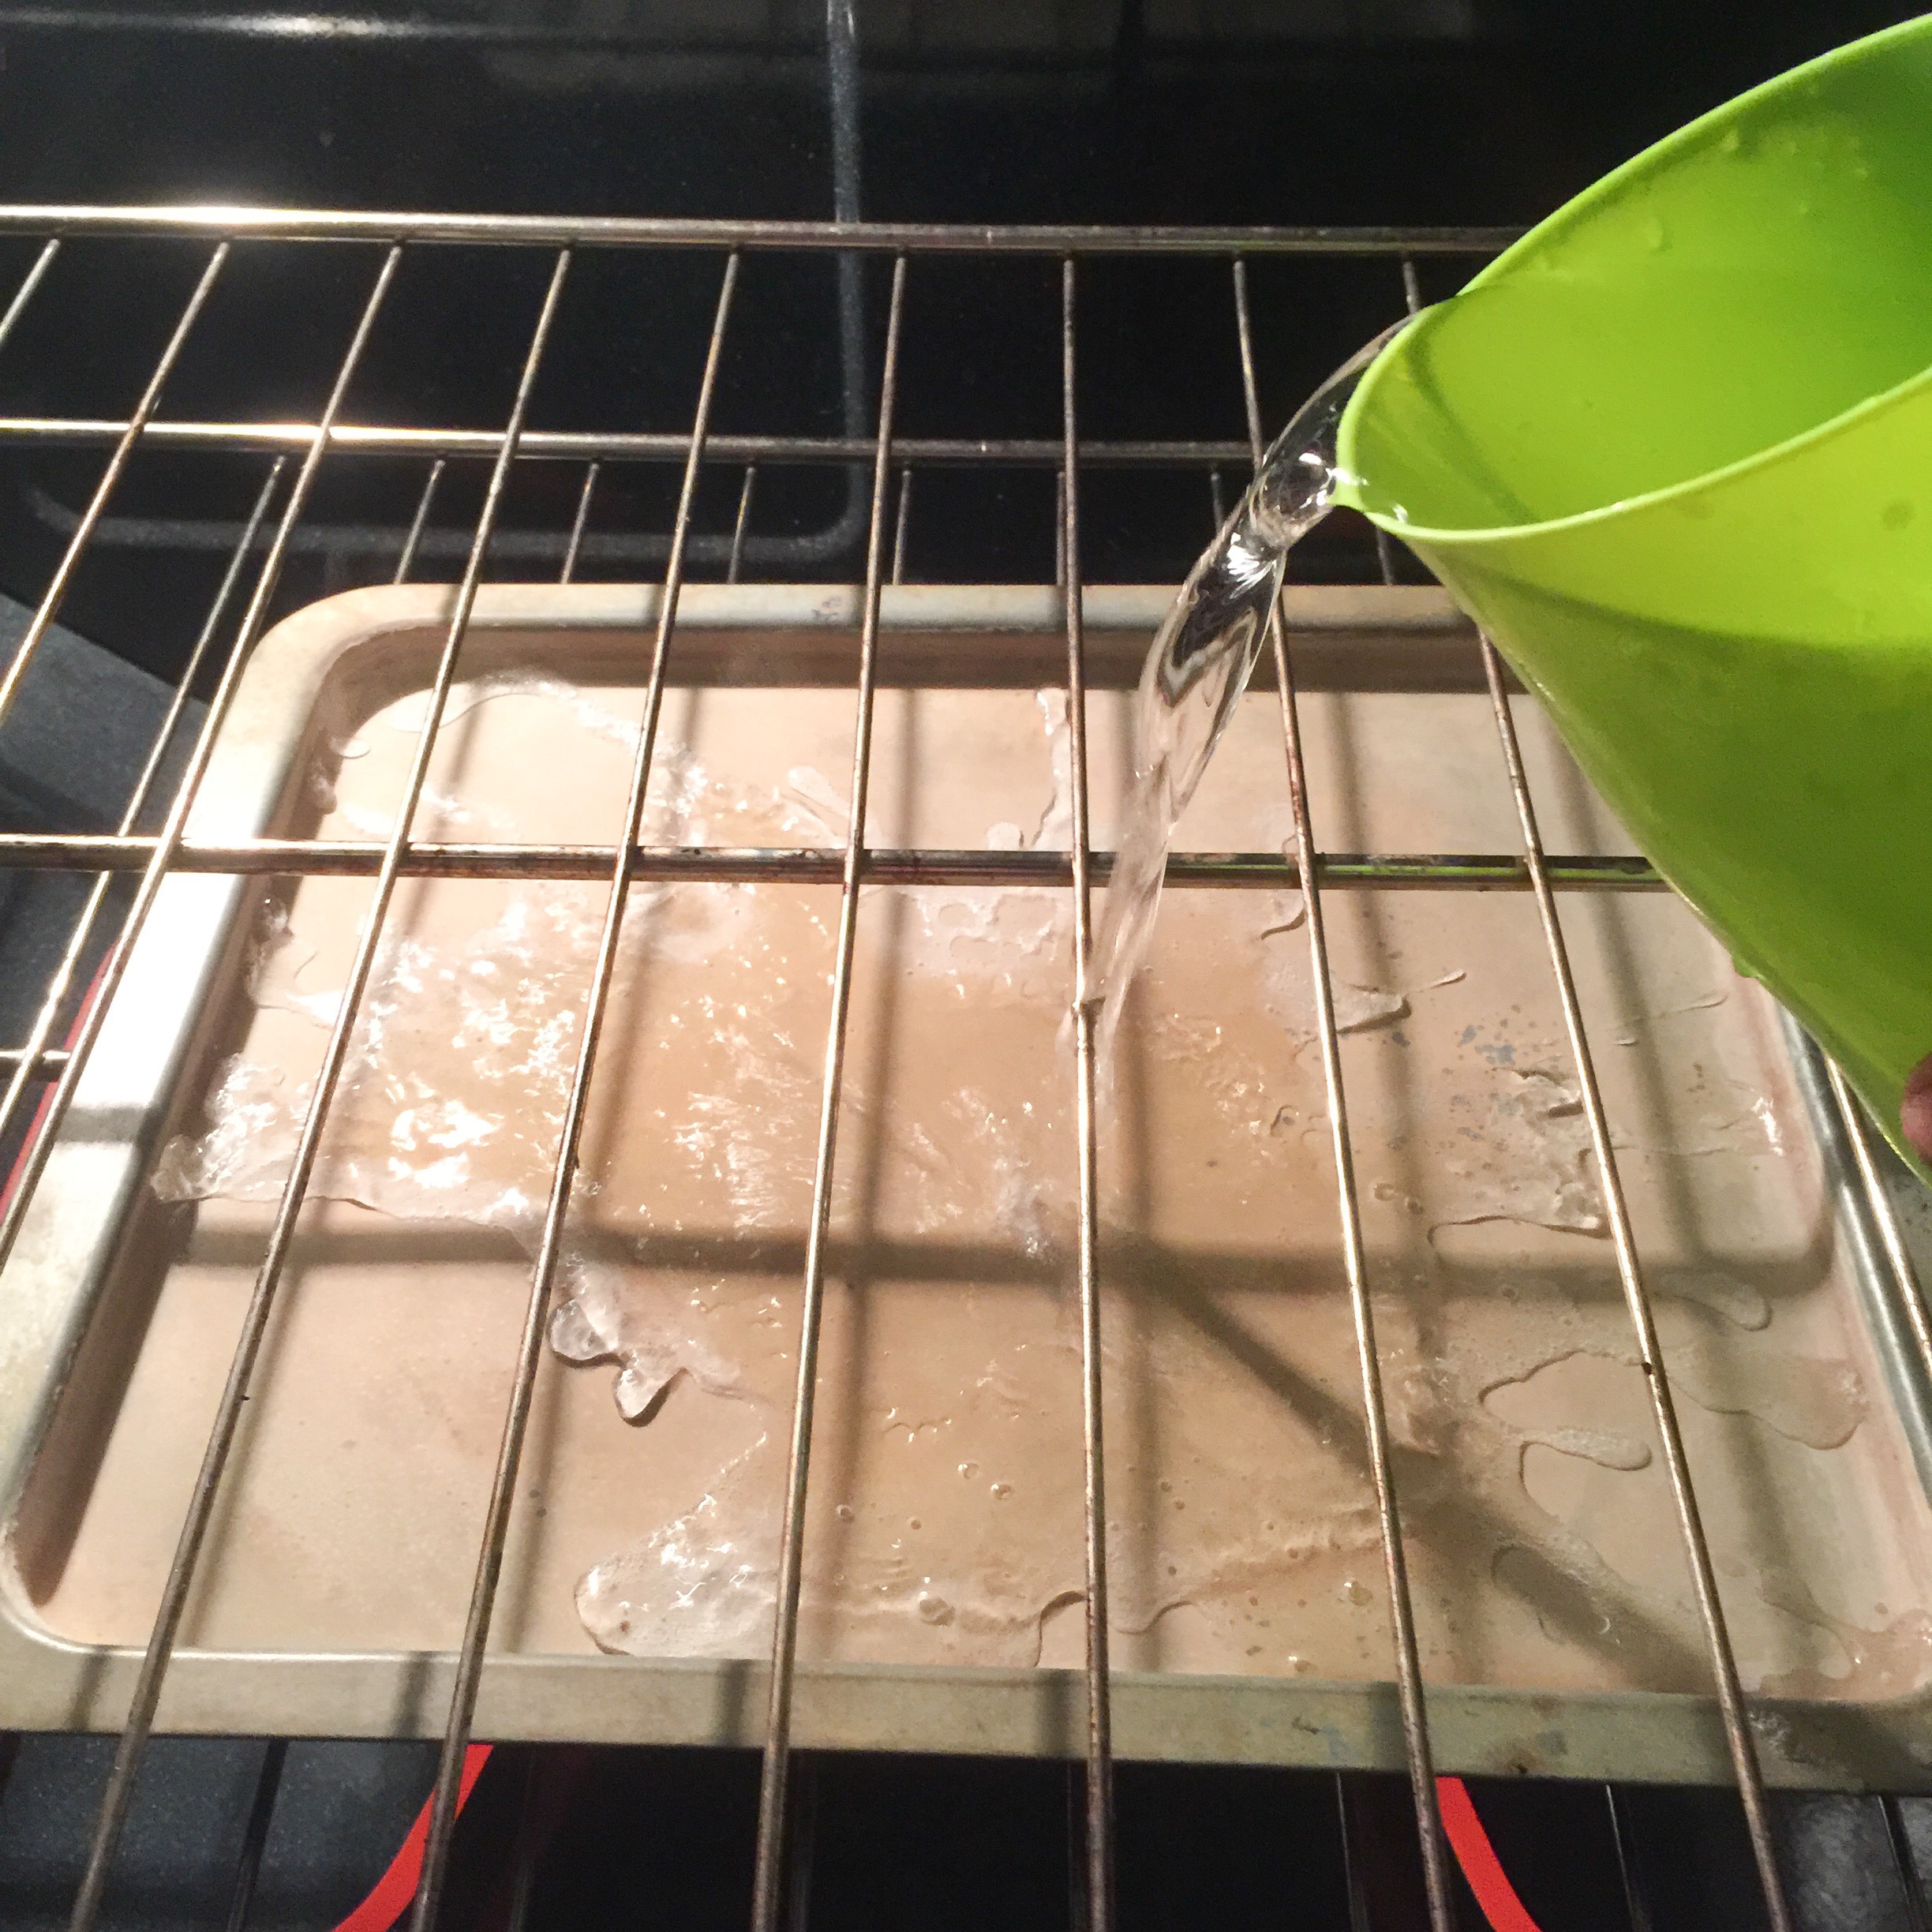
As soon as the pan is in the bag, pour water into the pan you should already have on the bottom rack of your oven for this purpose. Turn your oven on to 400 degrees Fahrenheit to preheat while your dough is rising. If your dough takes more than 25 to 30 minutes to rise, top off the water level in the pan. The water needs to be at least a 1/4″ deep when you put the bread in the oven.
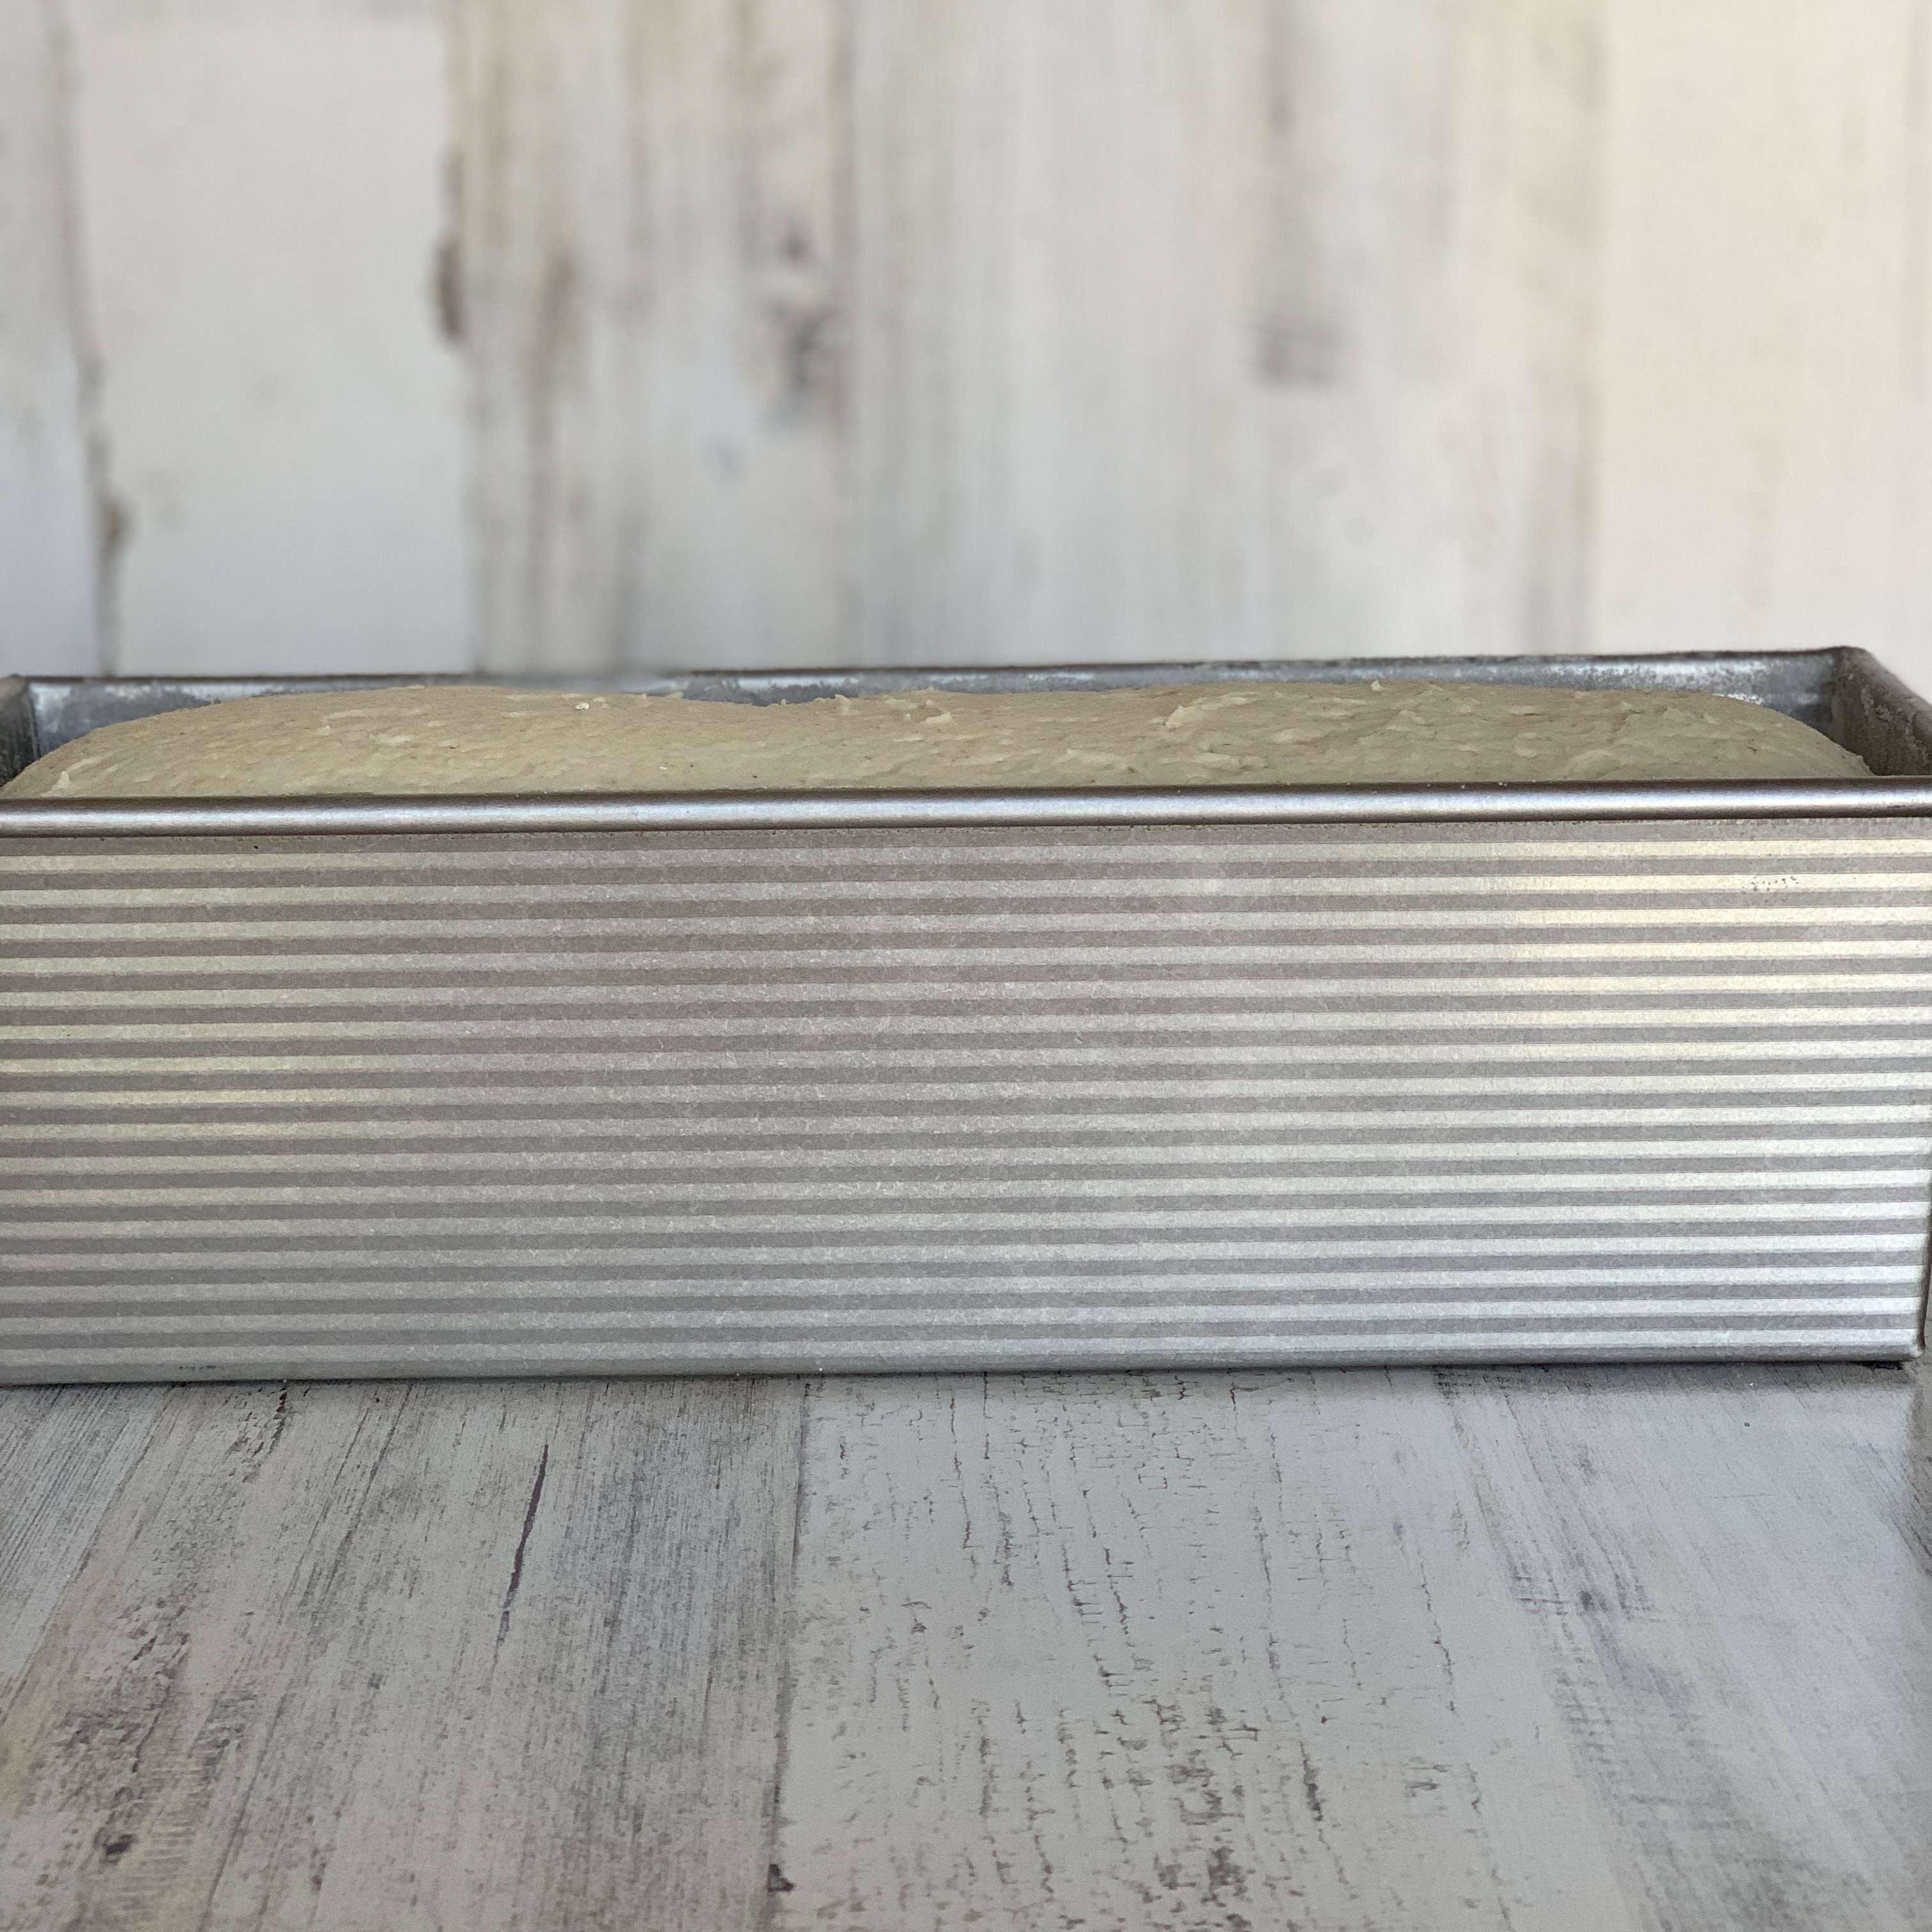
Your dough has sufficiently risen when it looks like this:
There should be just a few small bubbles starting to pop on the surface:

For the large recipe in a 13″ x 4″ x 4″ Pullman pan, or the medium recipe in a 9″ x 4″ x 4″ Pullman pan, the middle of the dough should just be even with the top of the pan when viewed from eye level. With standard pans that are only 2 3/4″ to 3″ tall, the middle of the dough should be about 1/2″ above the top of the pan.
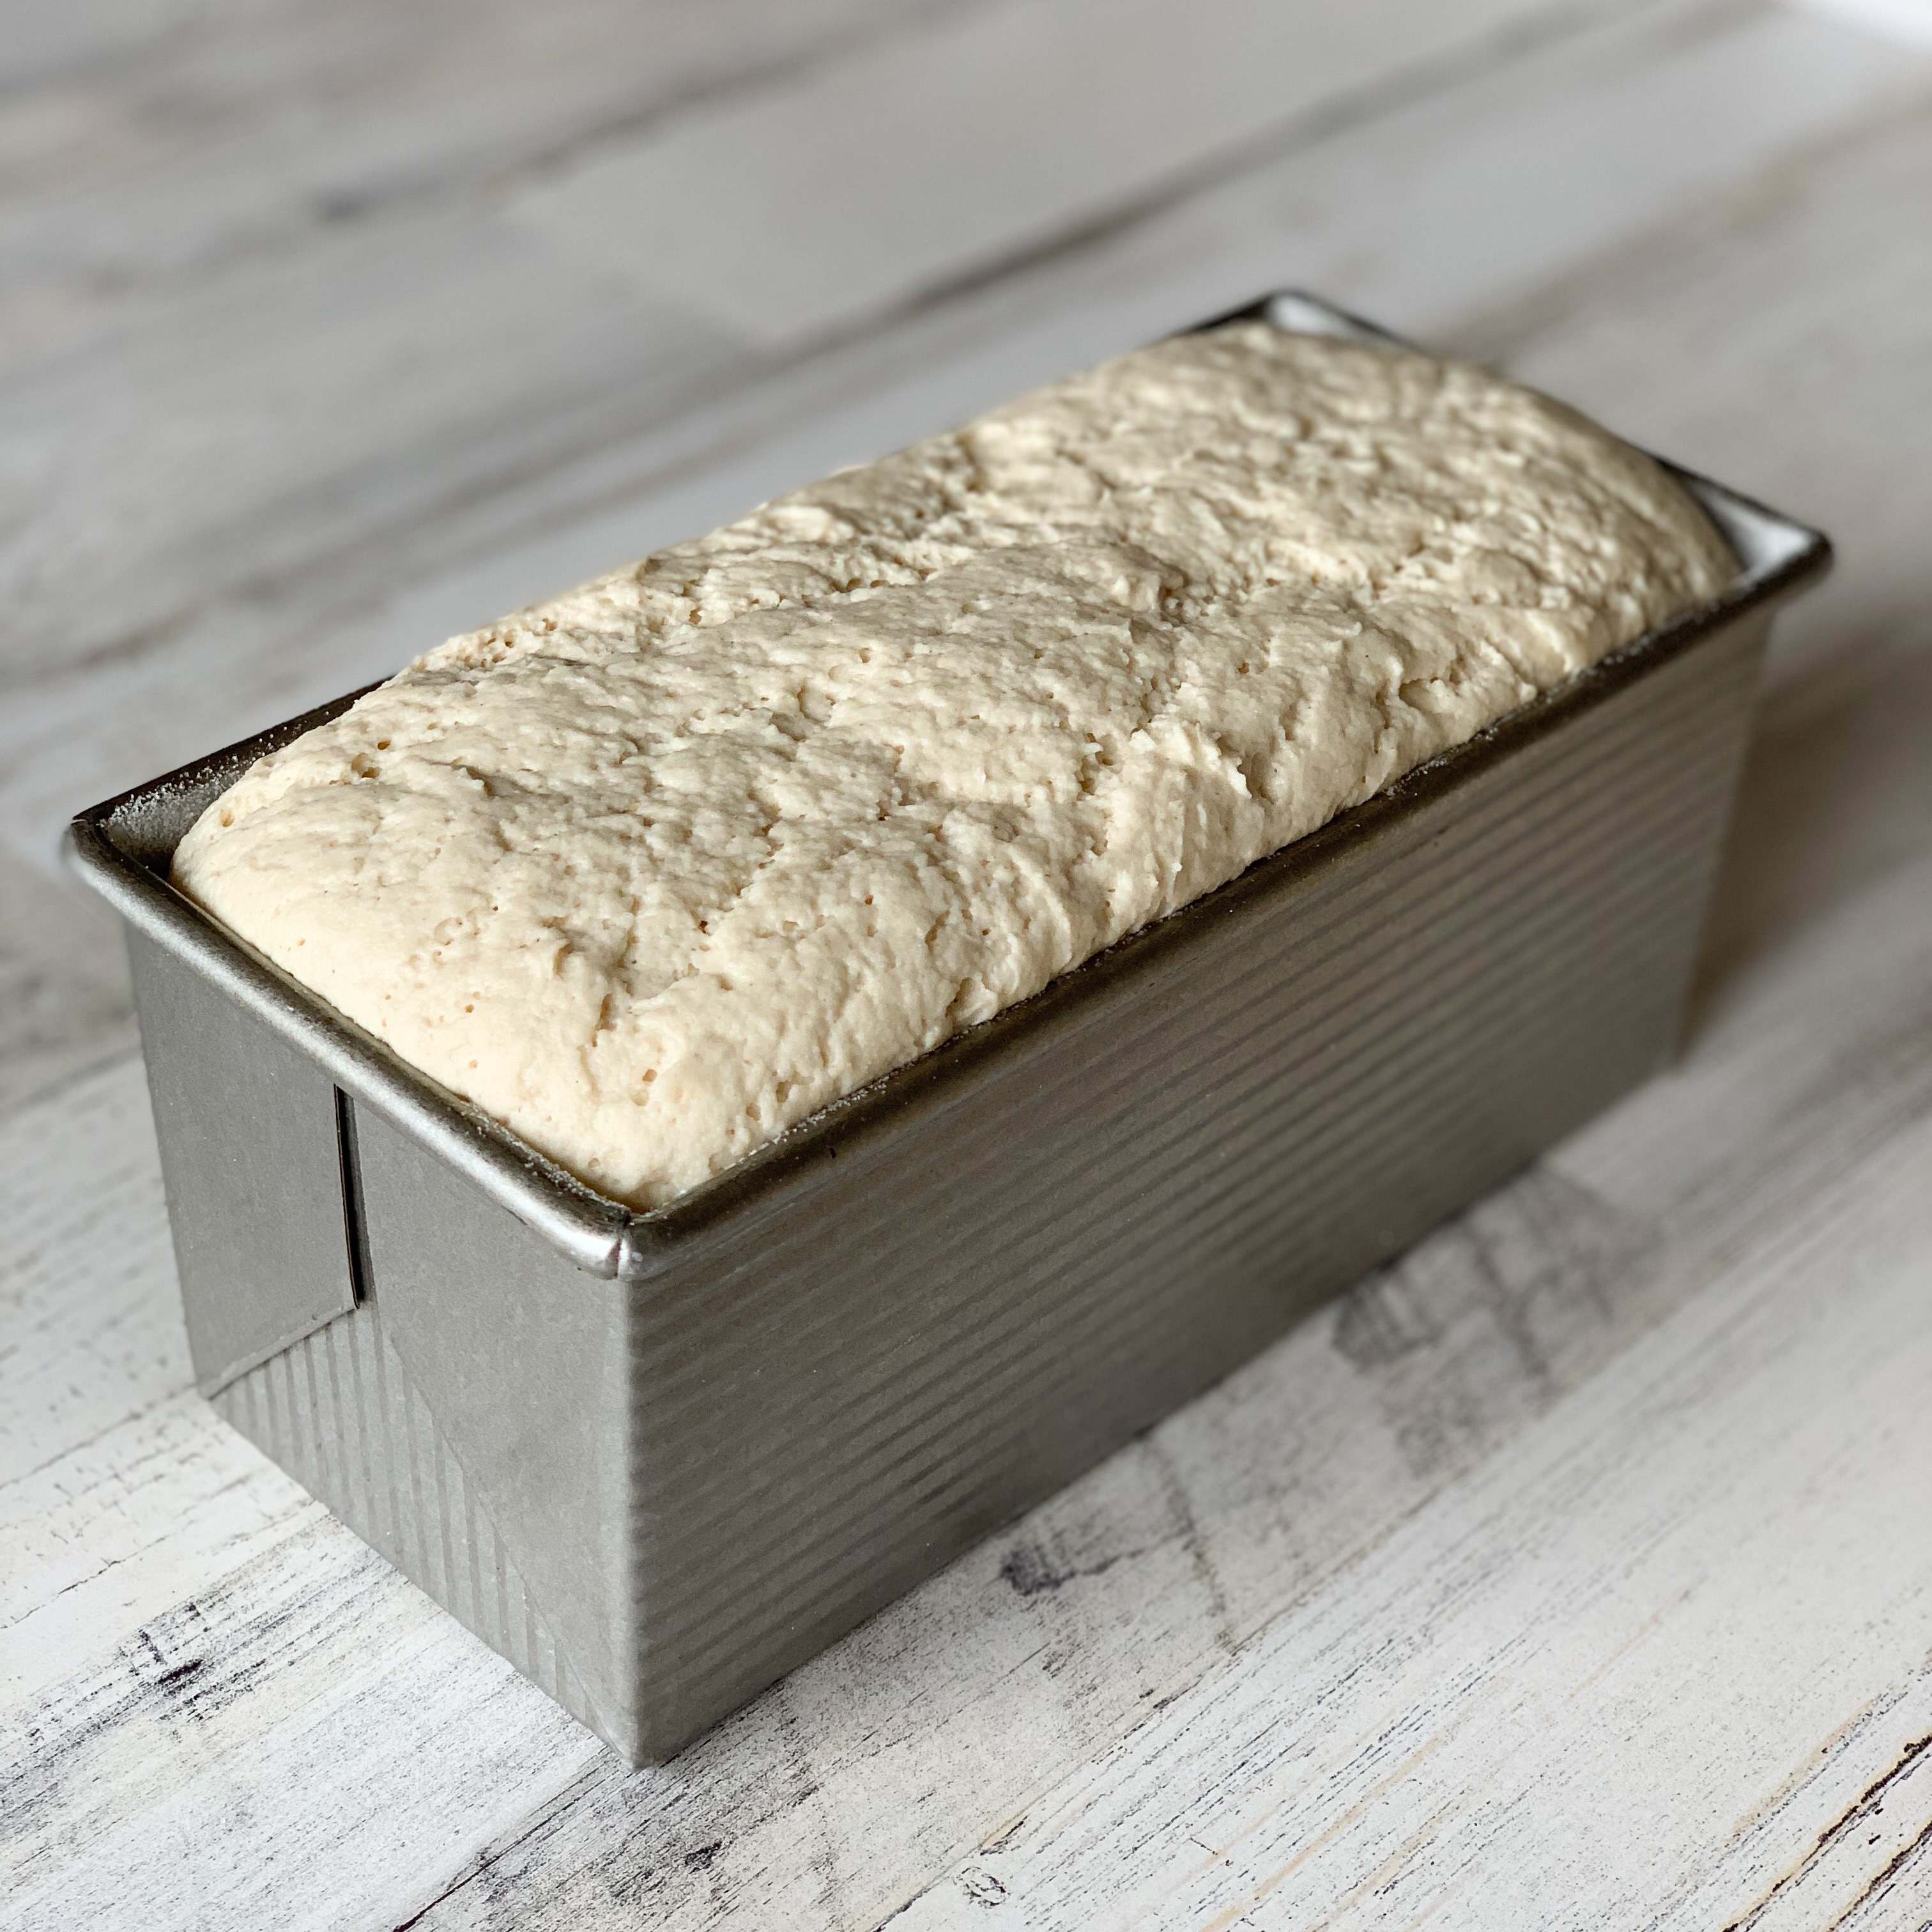
This dough is over-proved and will not have a lovely domed top when baked. It will still be delicious, but keep a close eye on your dough after 20 minutes to avoid this problem.
Place your pan in the middle of your hot, steamy oven. Immediately reduce the oven temperature to 375 degrees Fahrenheit, and set a timer for the correct amount for the size of your loaf. This is 70 minutes for a small recipe, 80 minutes for medium, and 90 minutes for large. Keep the oven door closed until there are only 10 to 15 minutes left on your timer. Then, you can check how brown your loaf is getting. Cover very loosely with foil for those last minutes if your loaf is getting too dark.
When your timer goes off, remove your bread from the oven. This is what the over-proved loaf looked like:
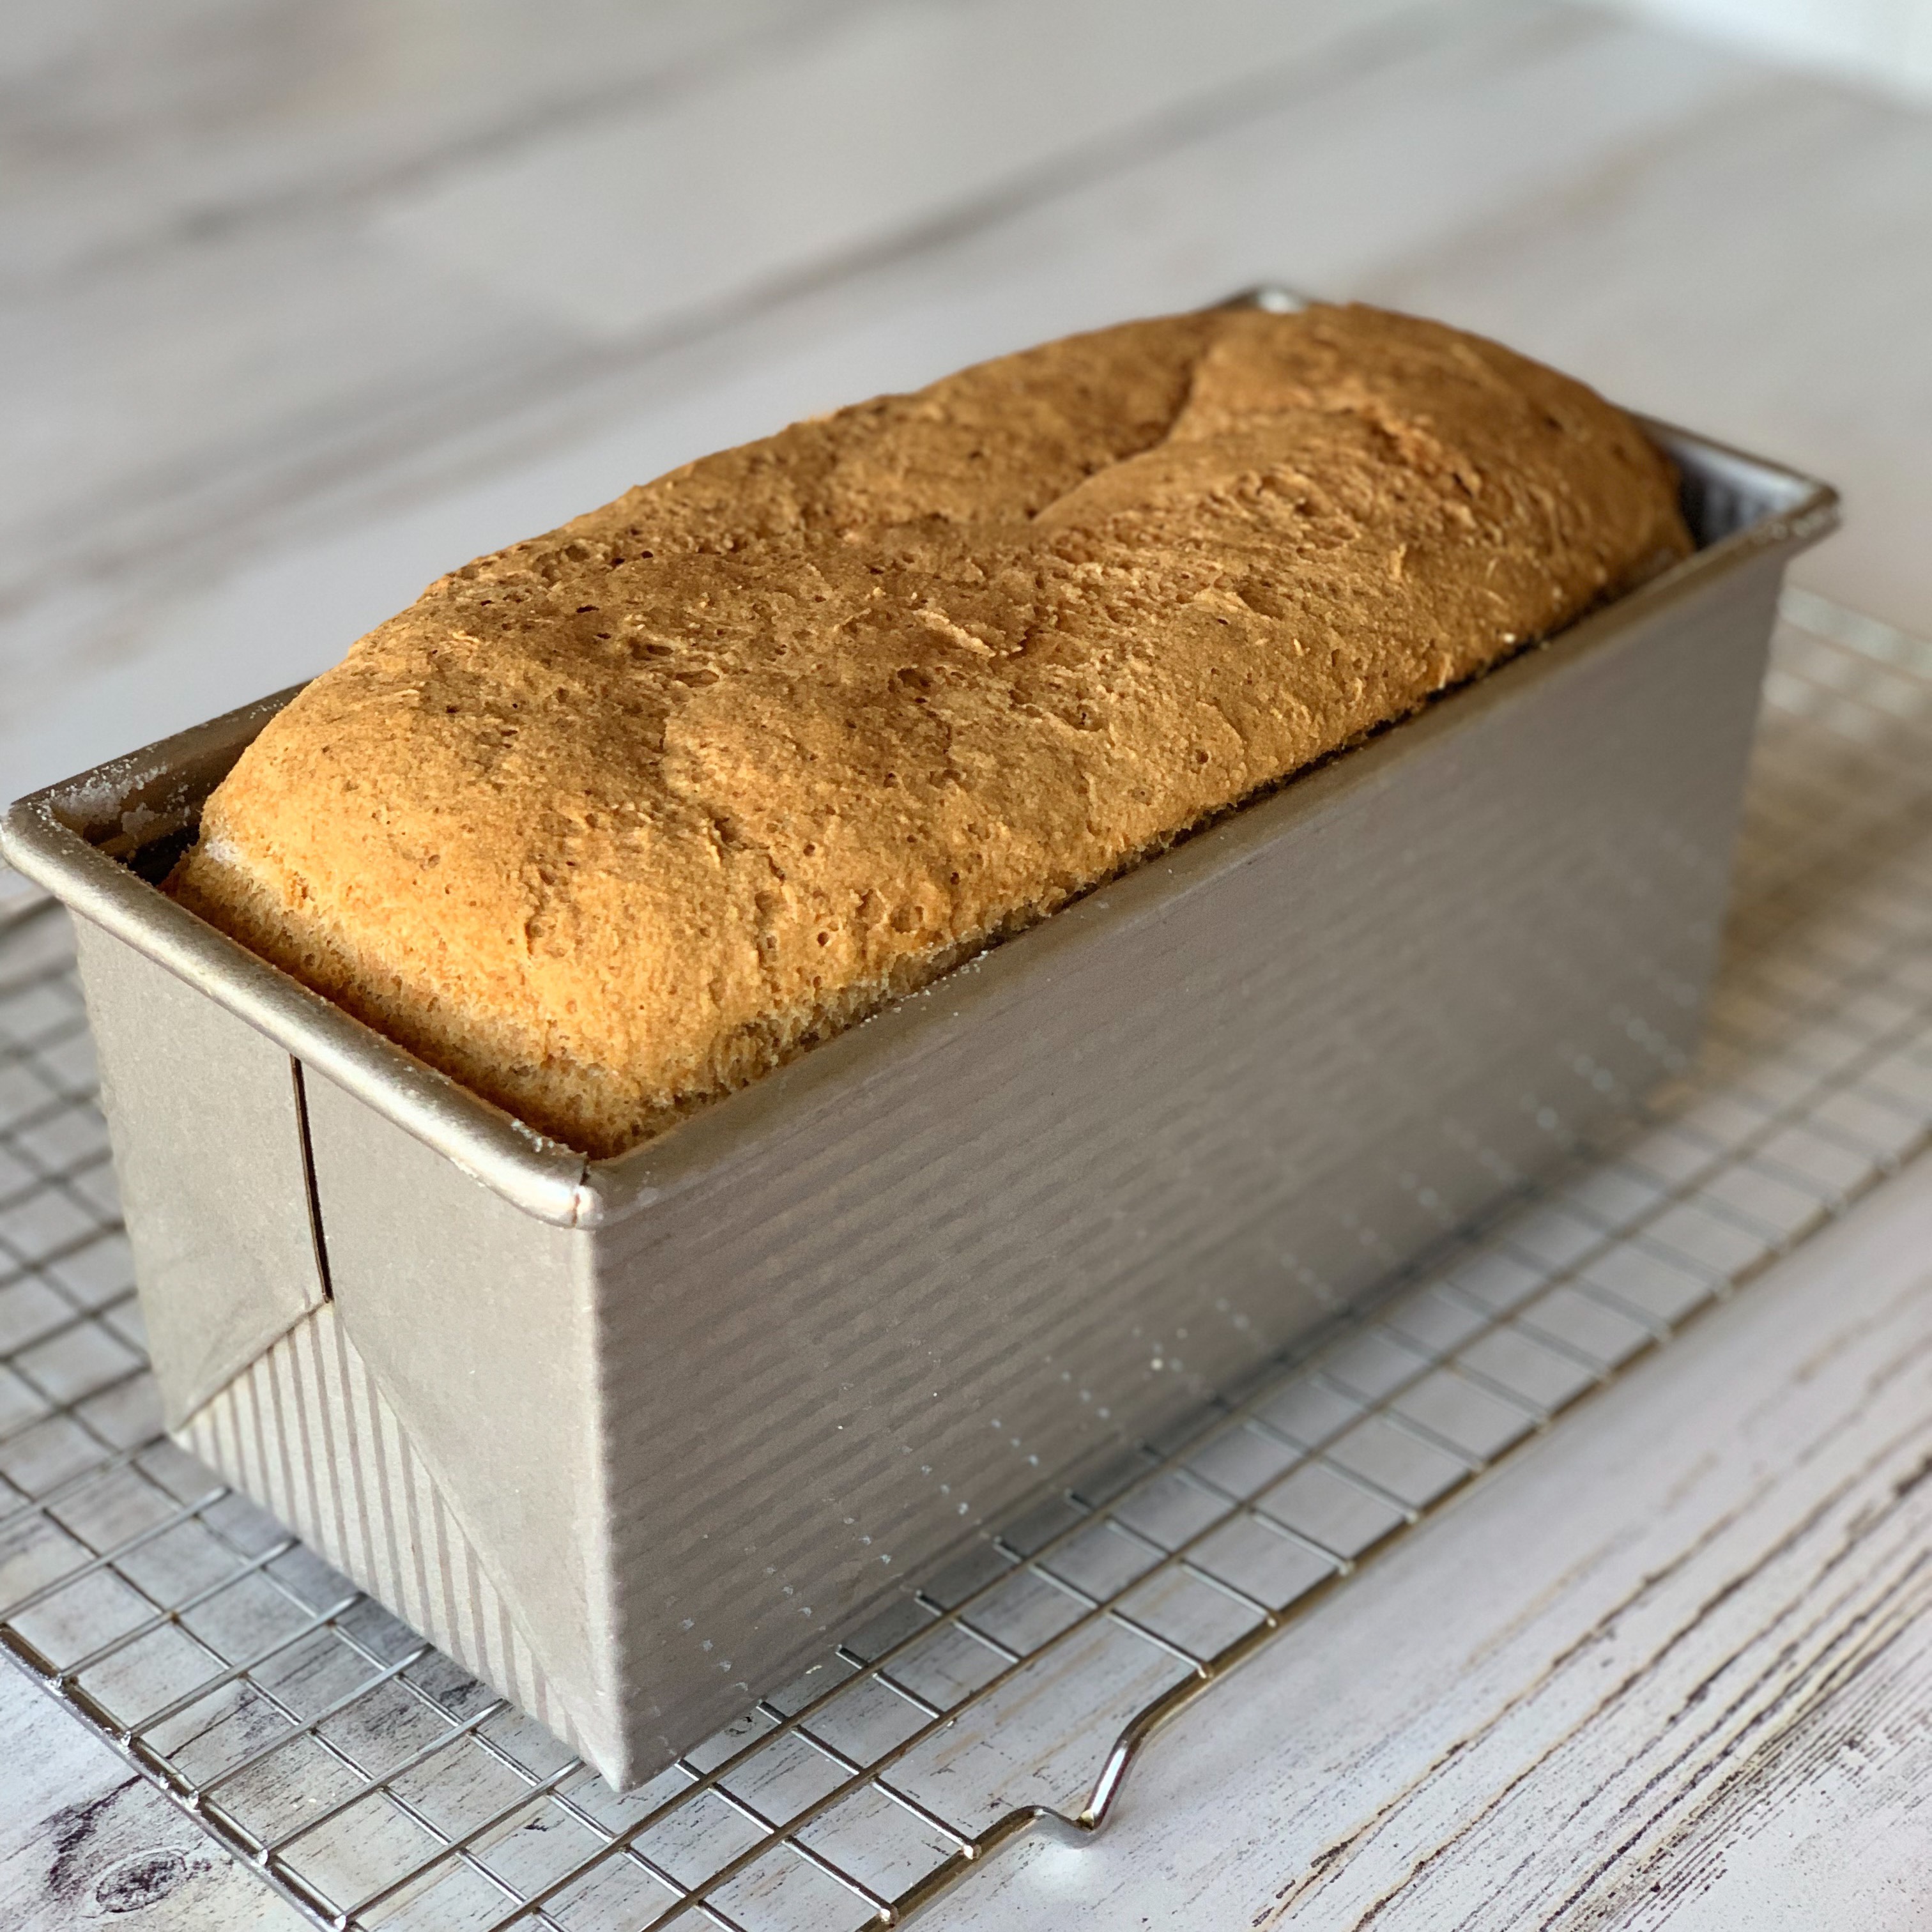
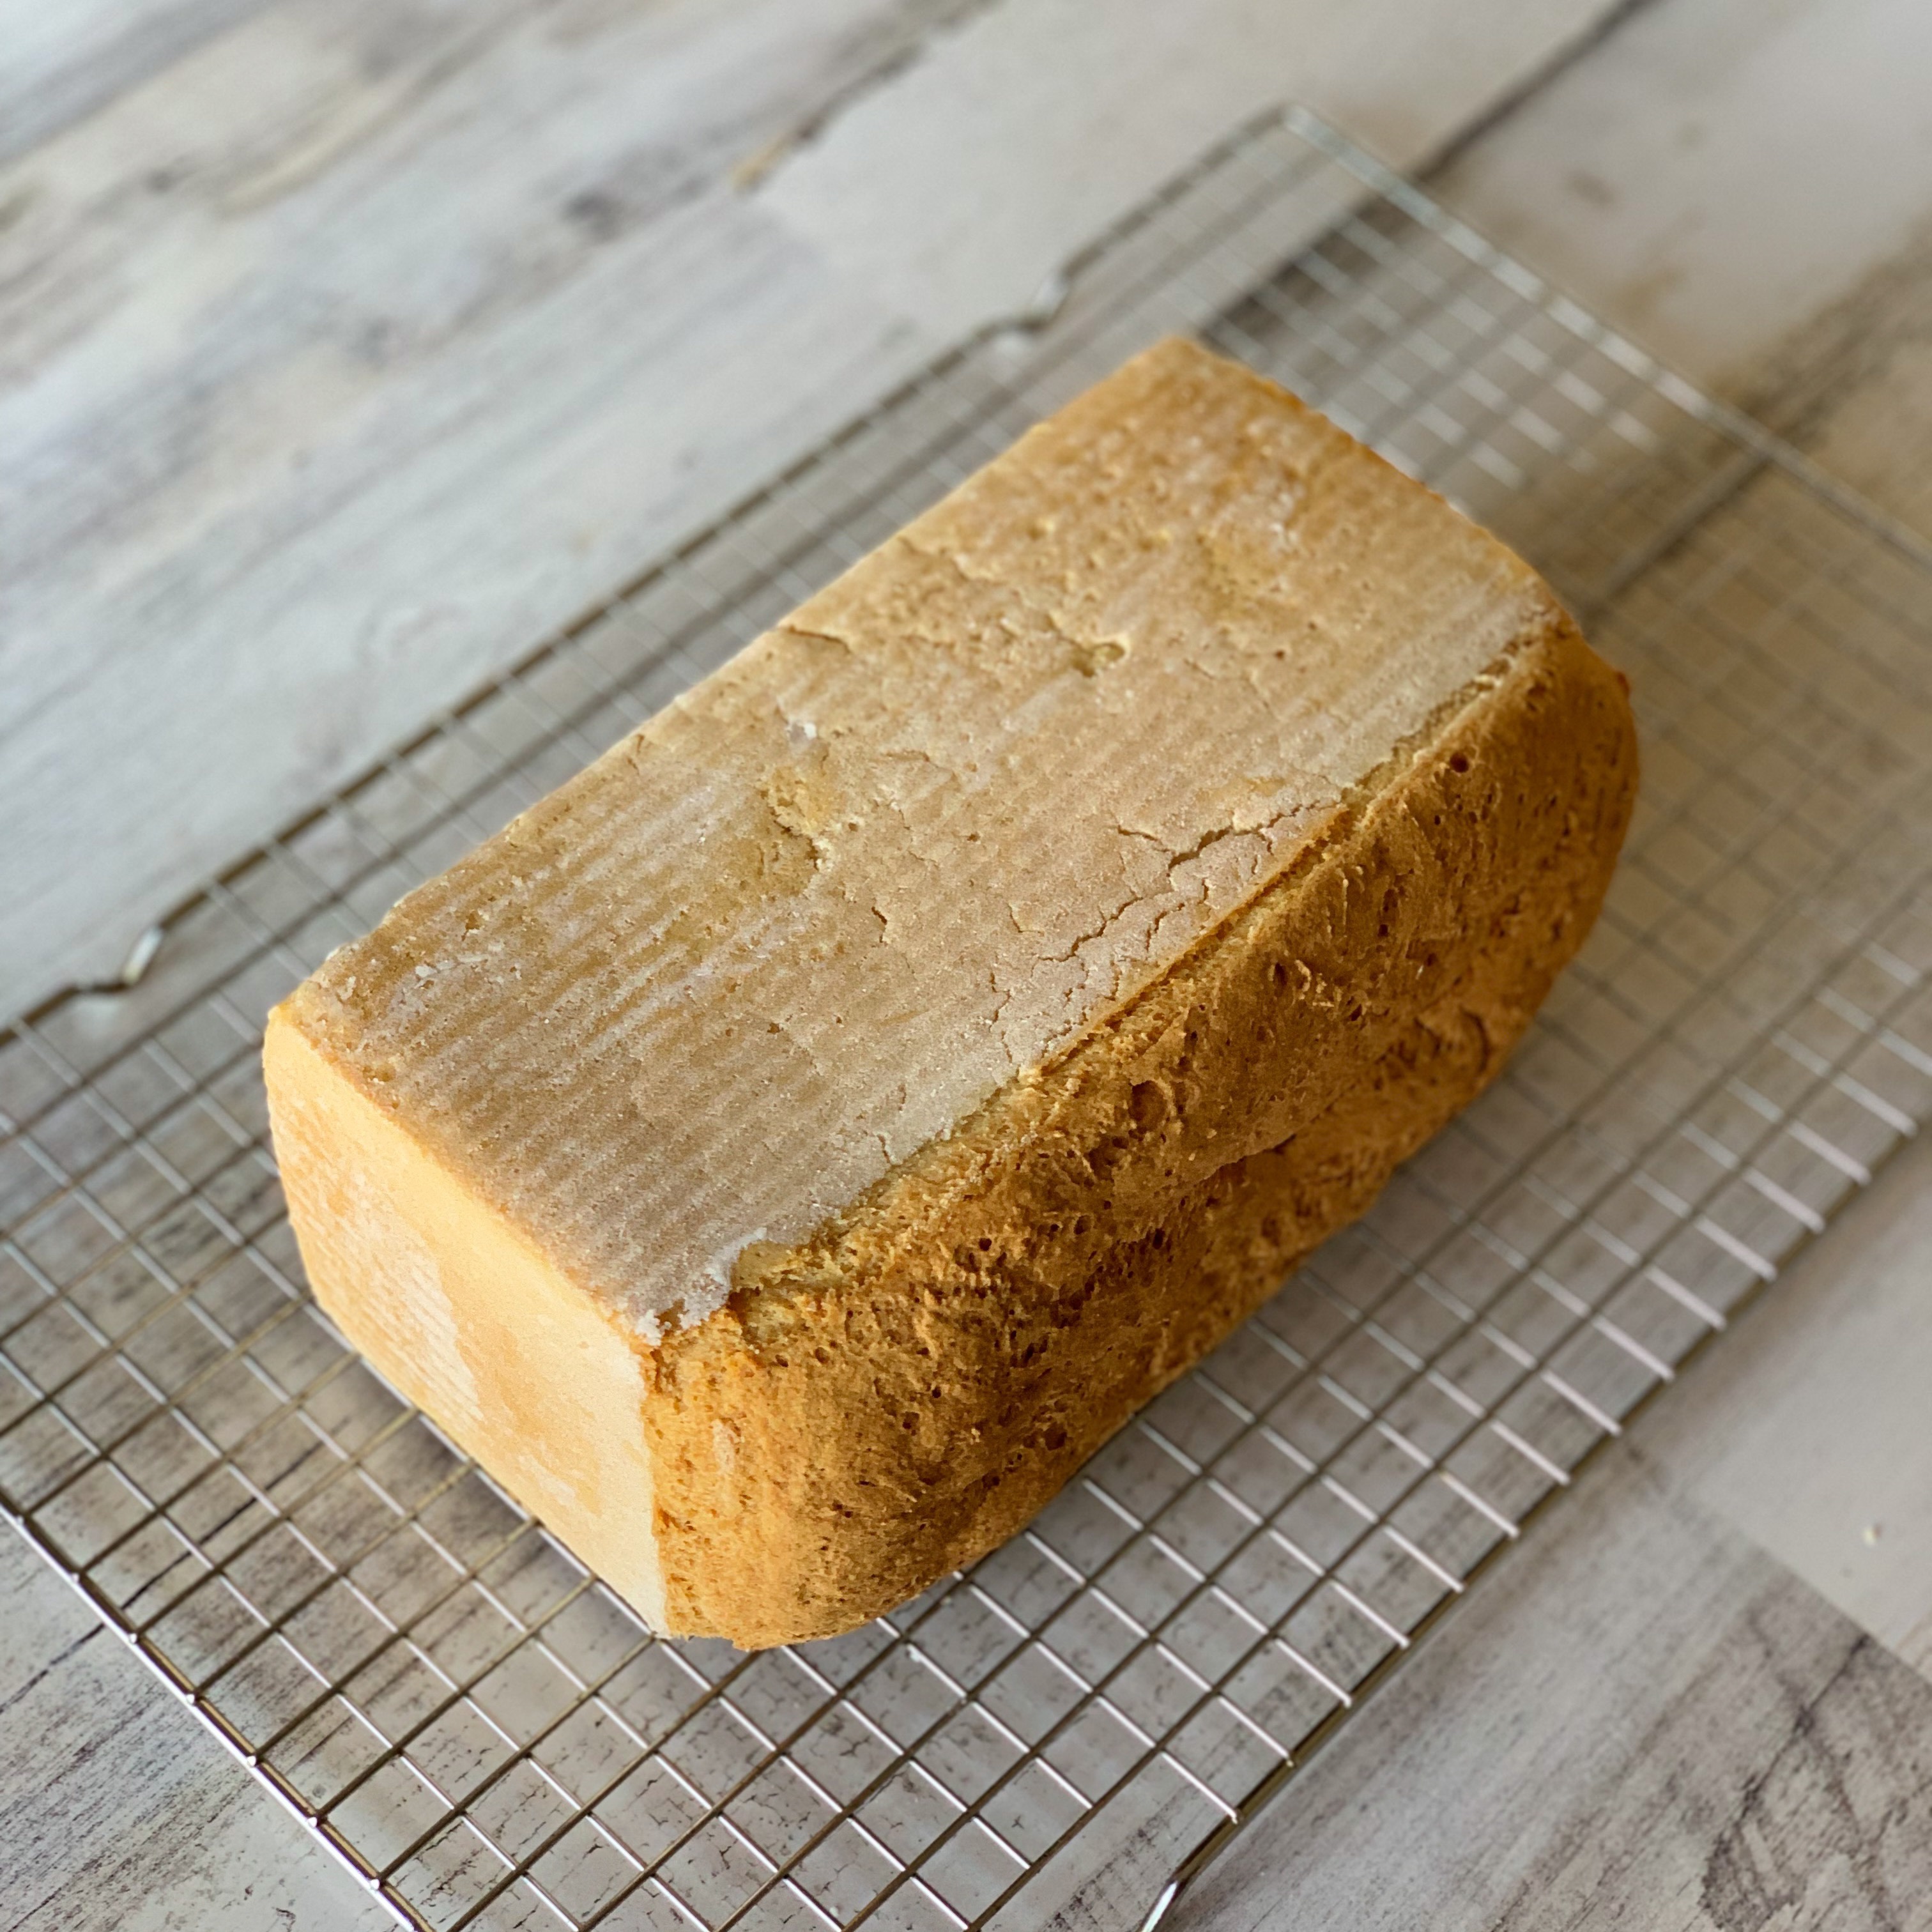
This is what properly-proved loaves look like:
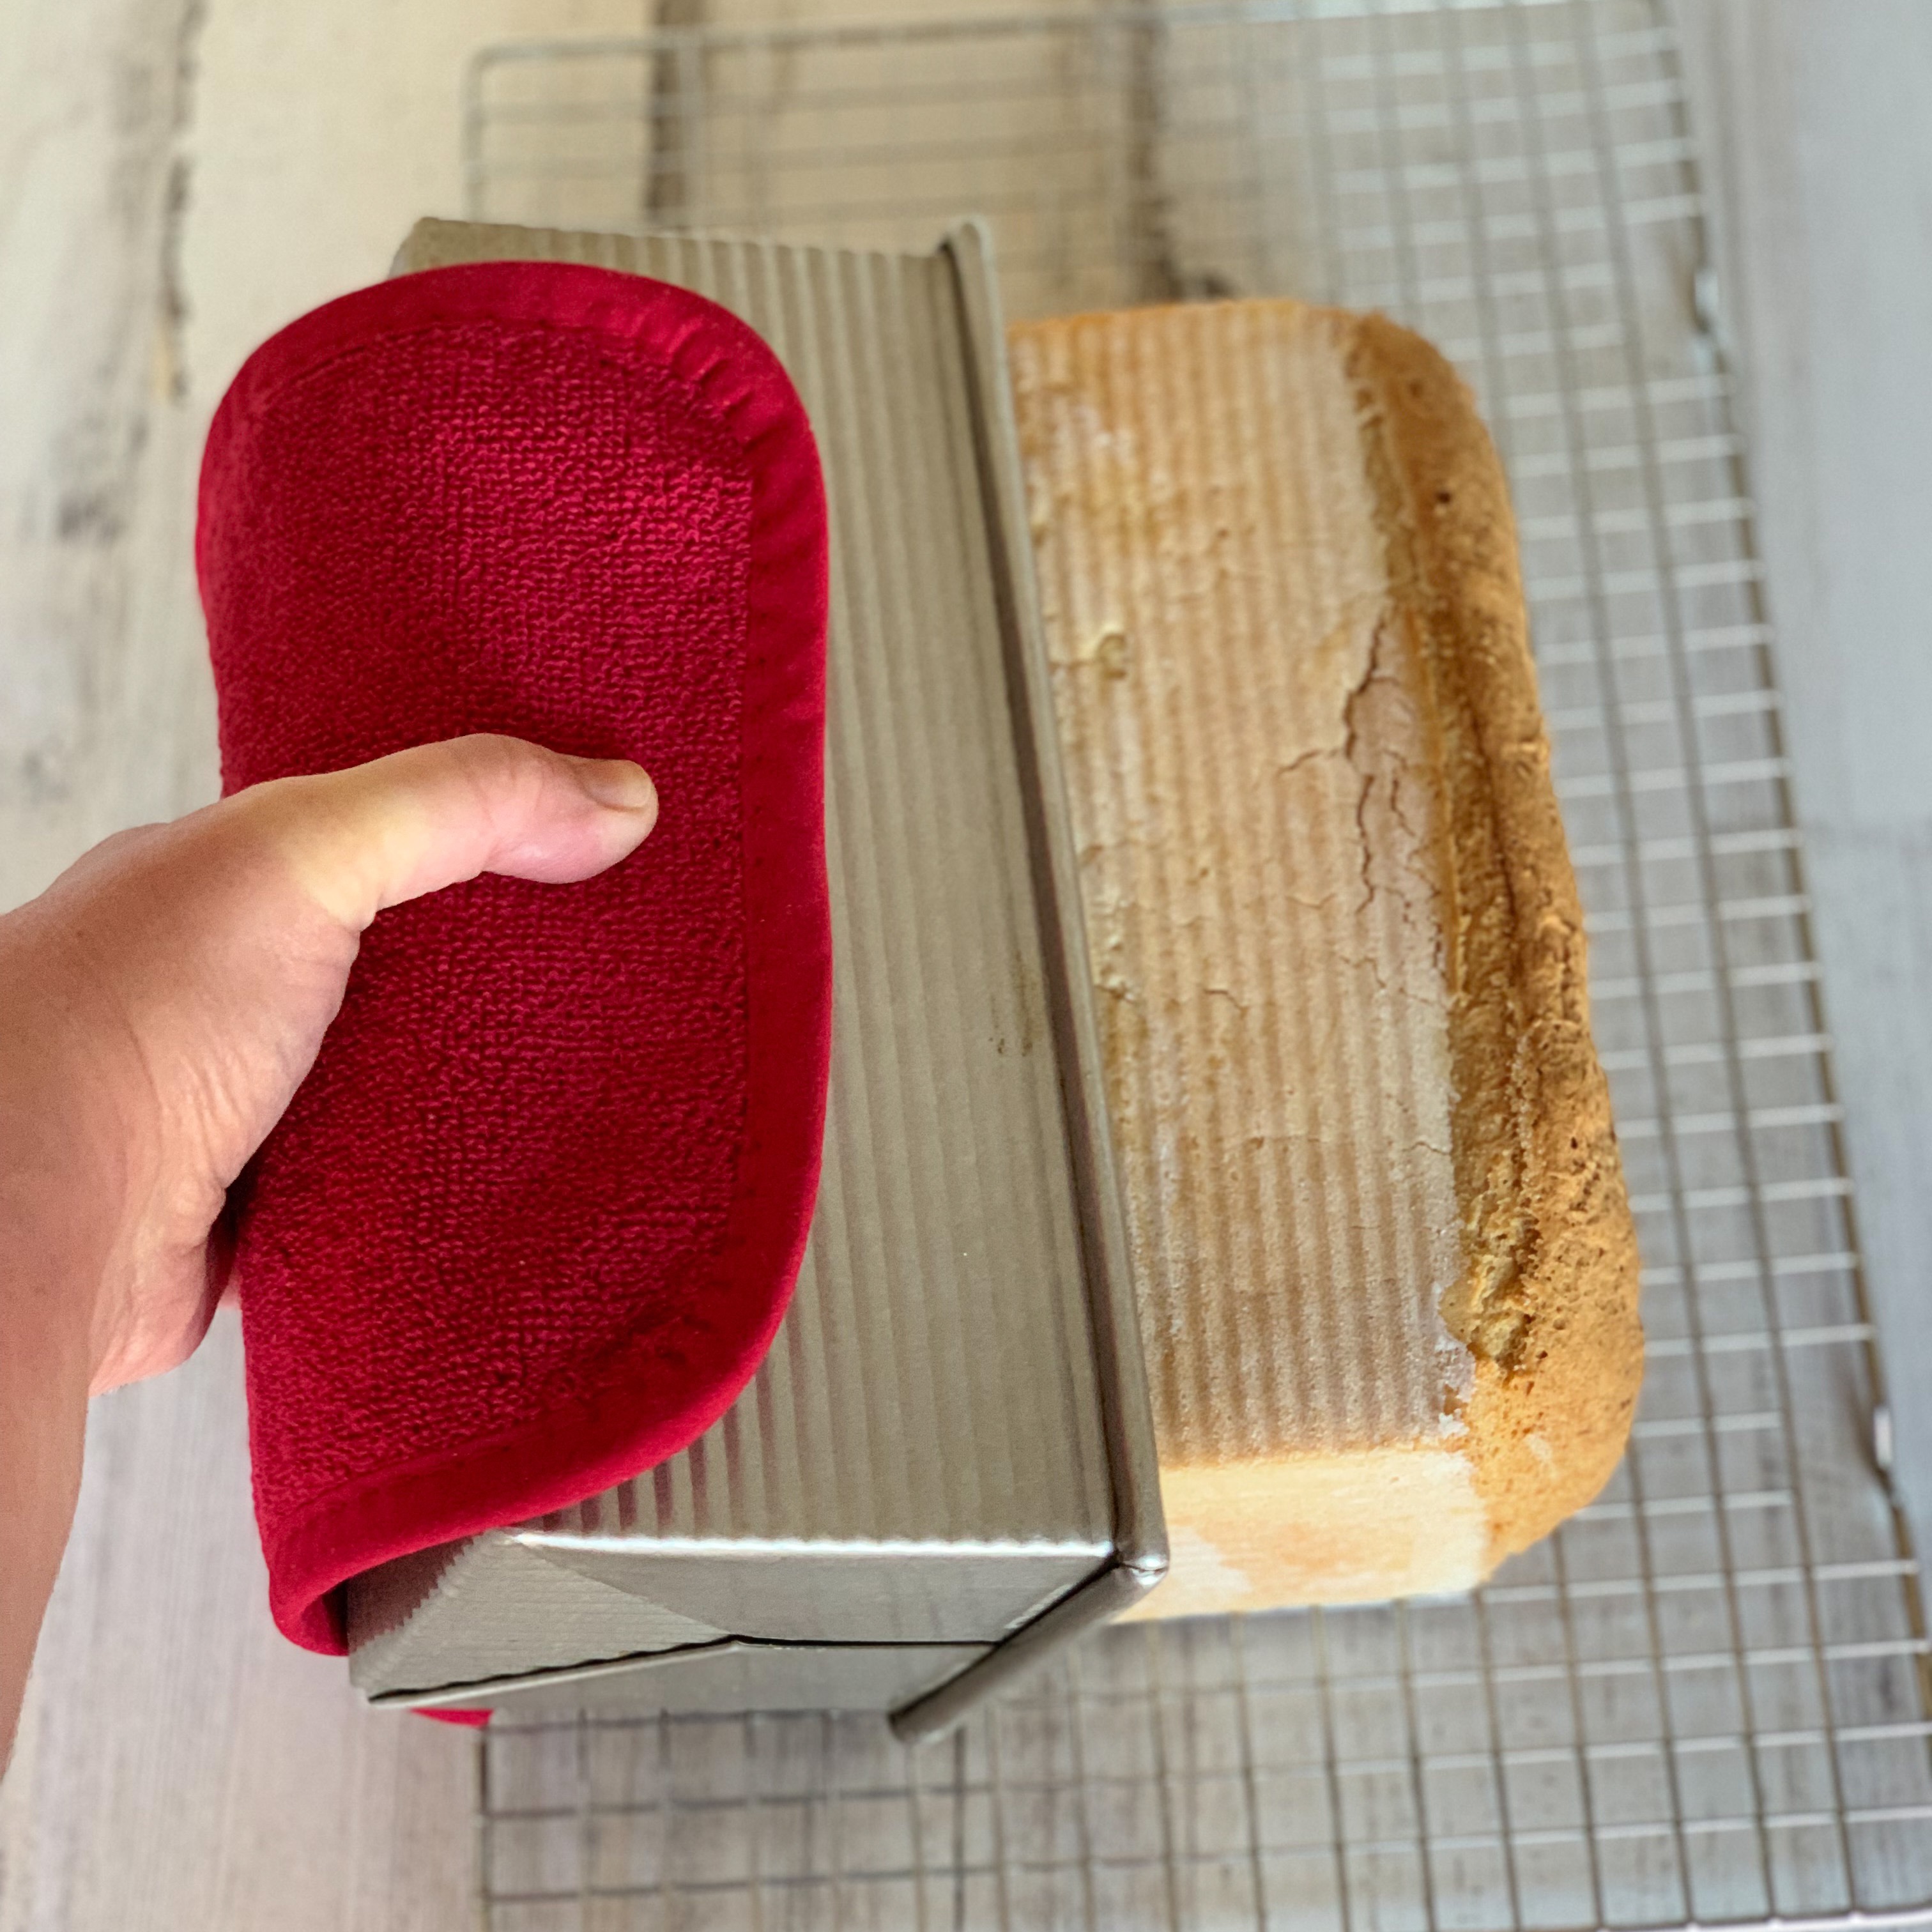
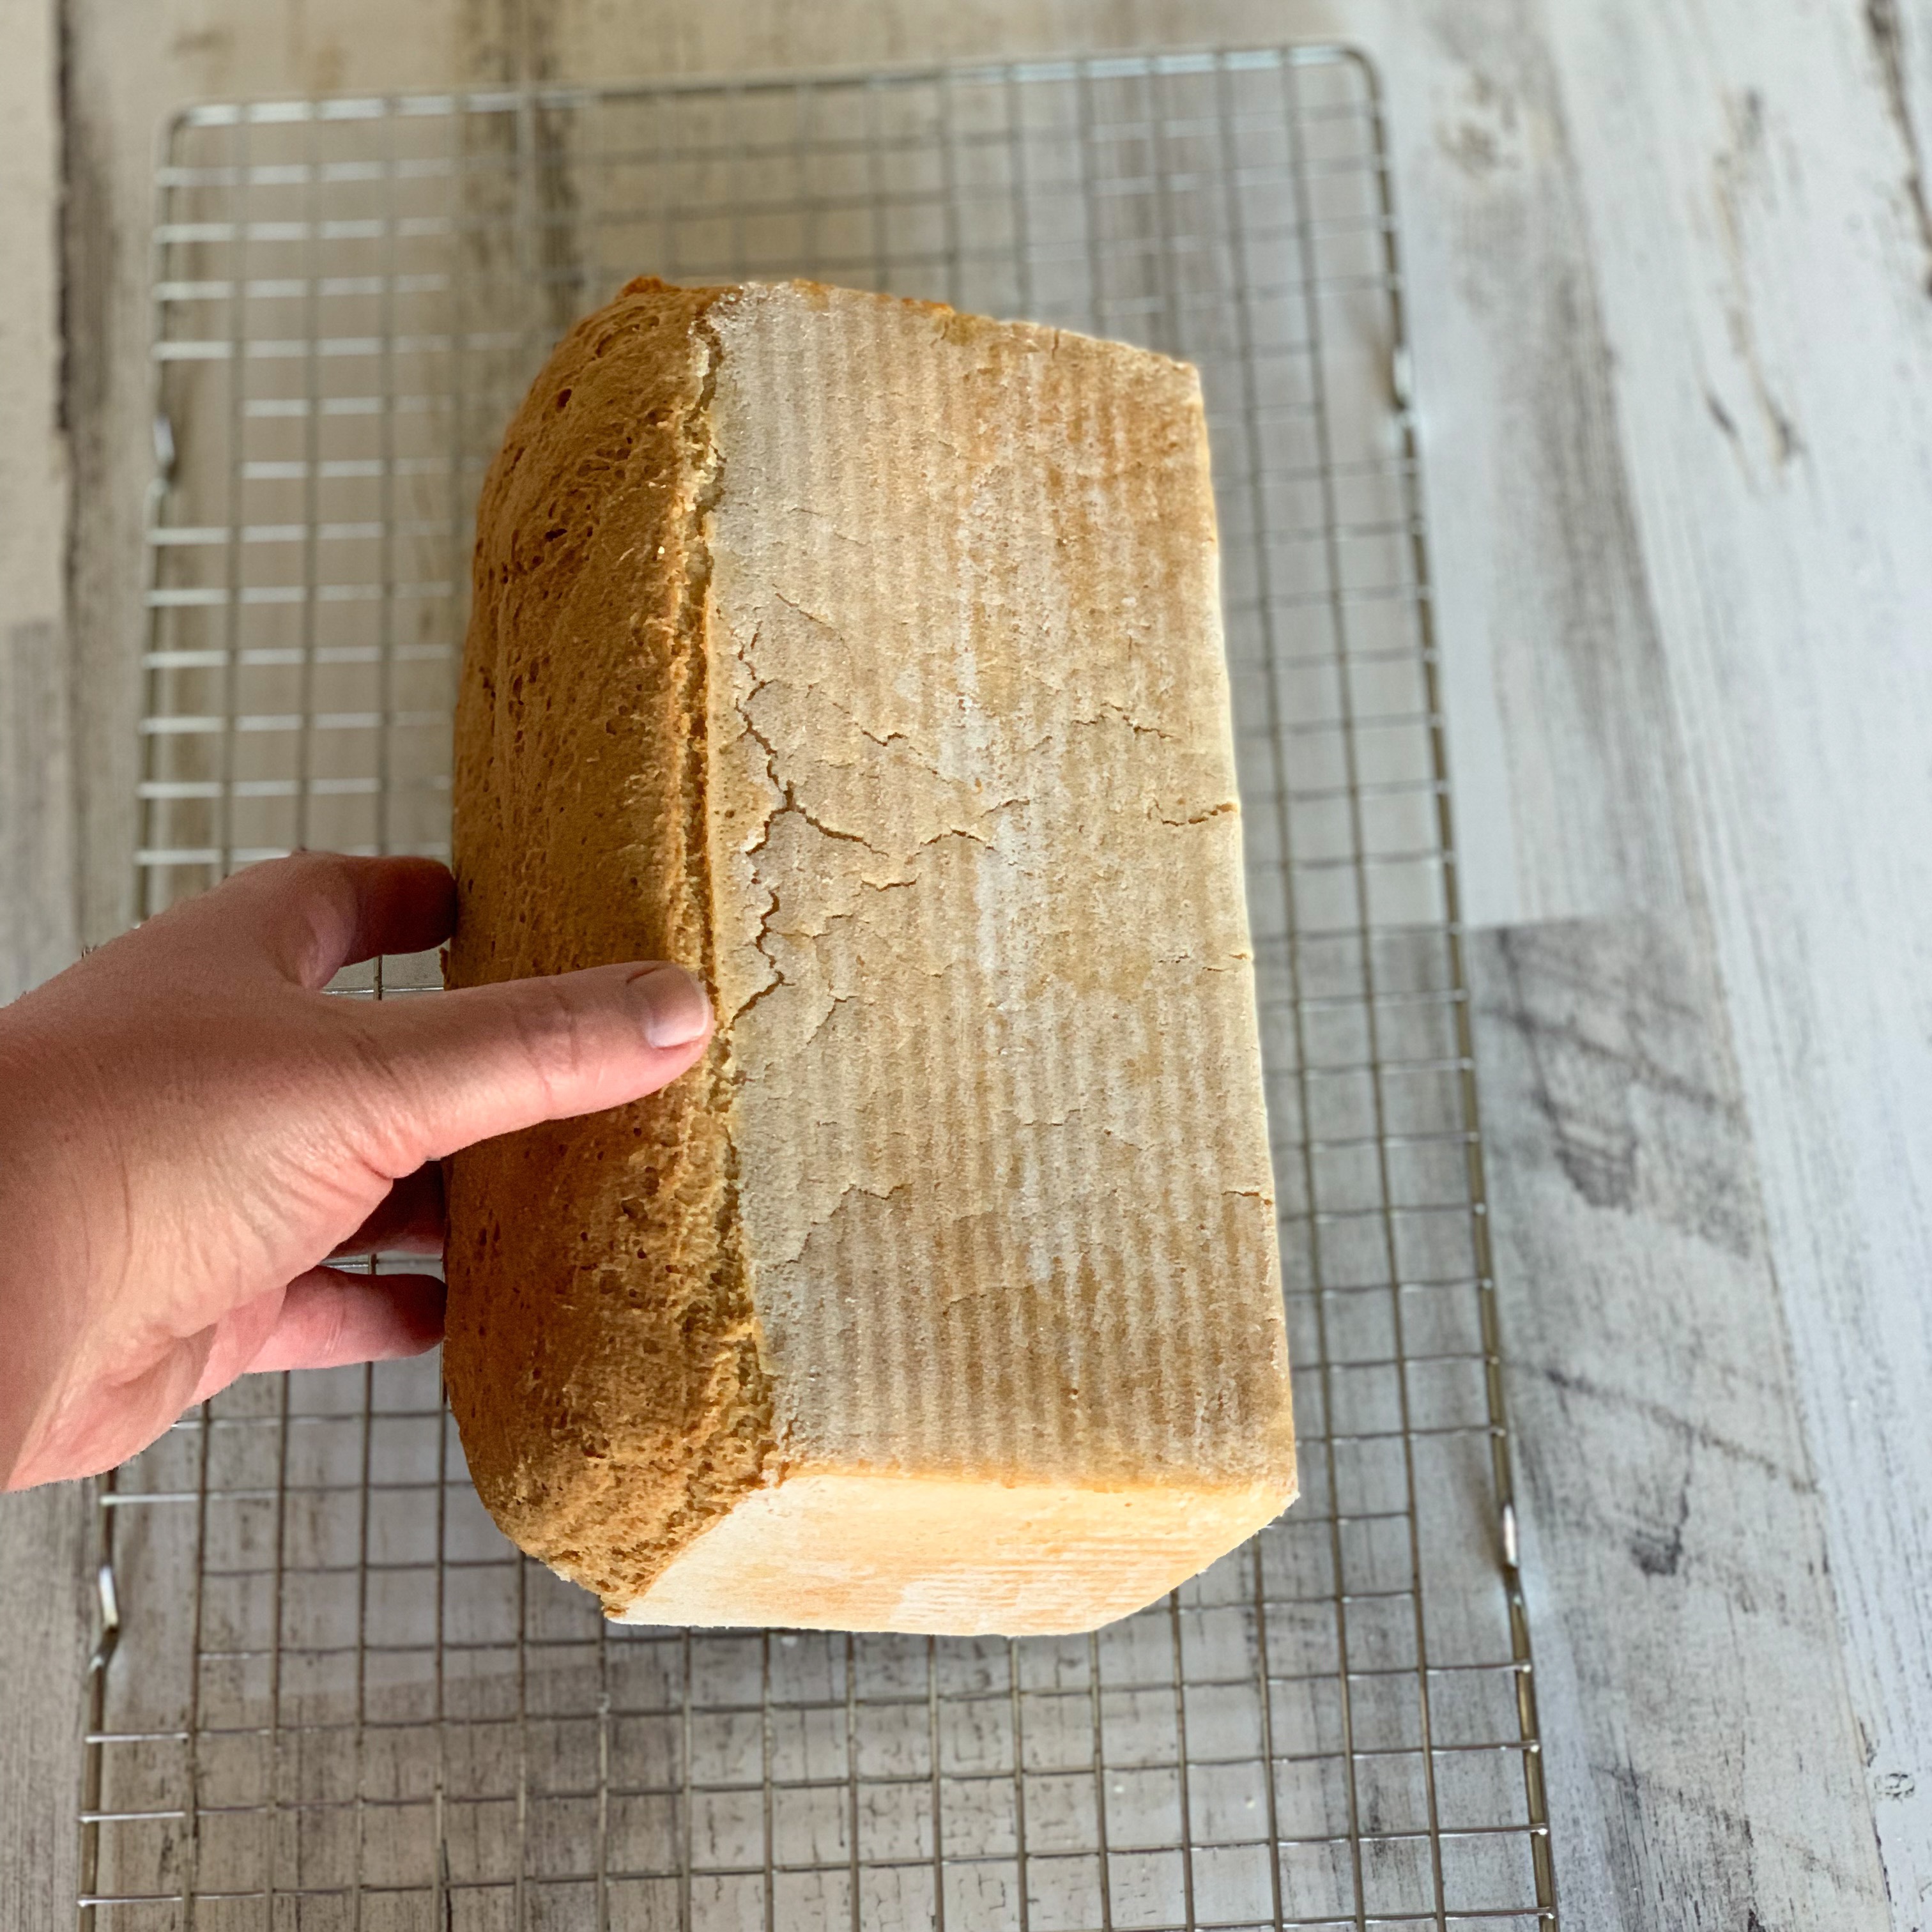
I put the cooled loaves back in the pans for those two photos so you could see what they looked like, but you do not actually want to leave the baked loaf in the pan for any time at all. Gently slide your loaf out of the pan on its side onto a cooling rack as shown:
Set a timer for 10 minutes, and turn the loaf onto the opposite side when it goes off. Do the same for 20 minutes, then 30 minutes. After that, you can stand your loaf upright to finish cooling completely.
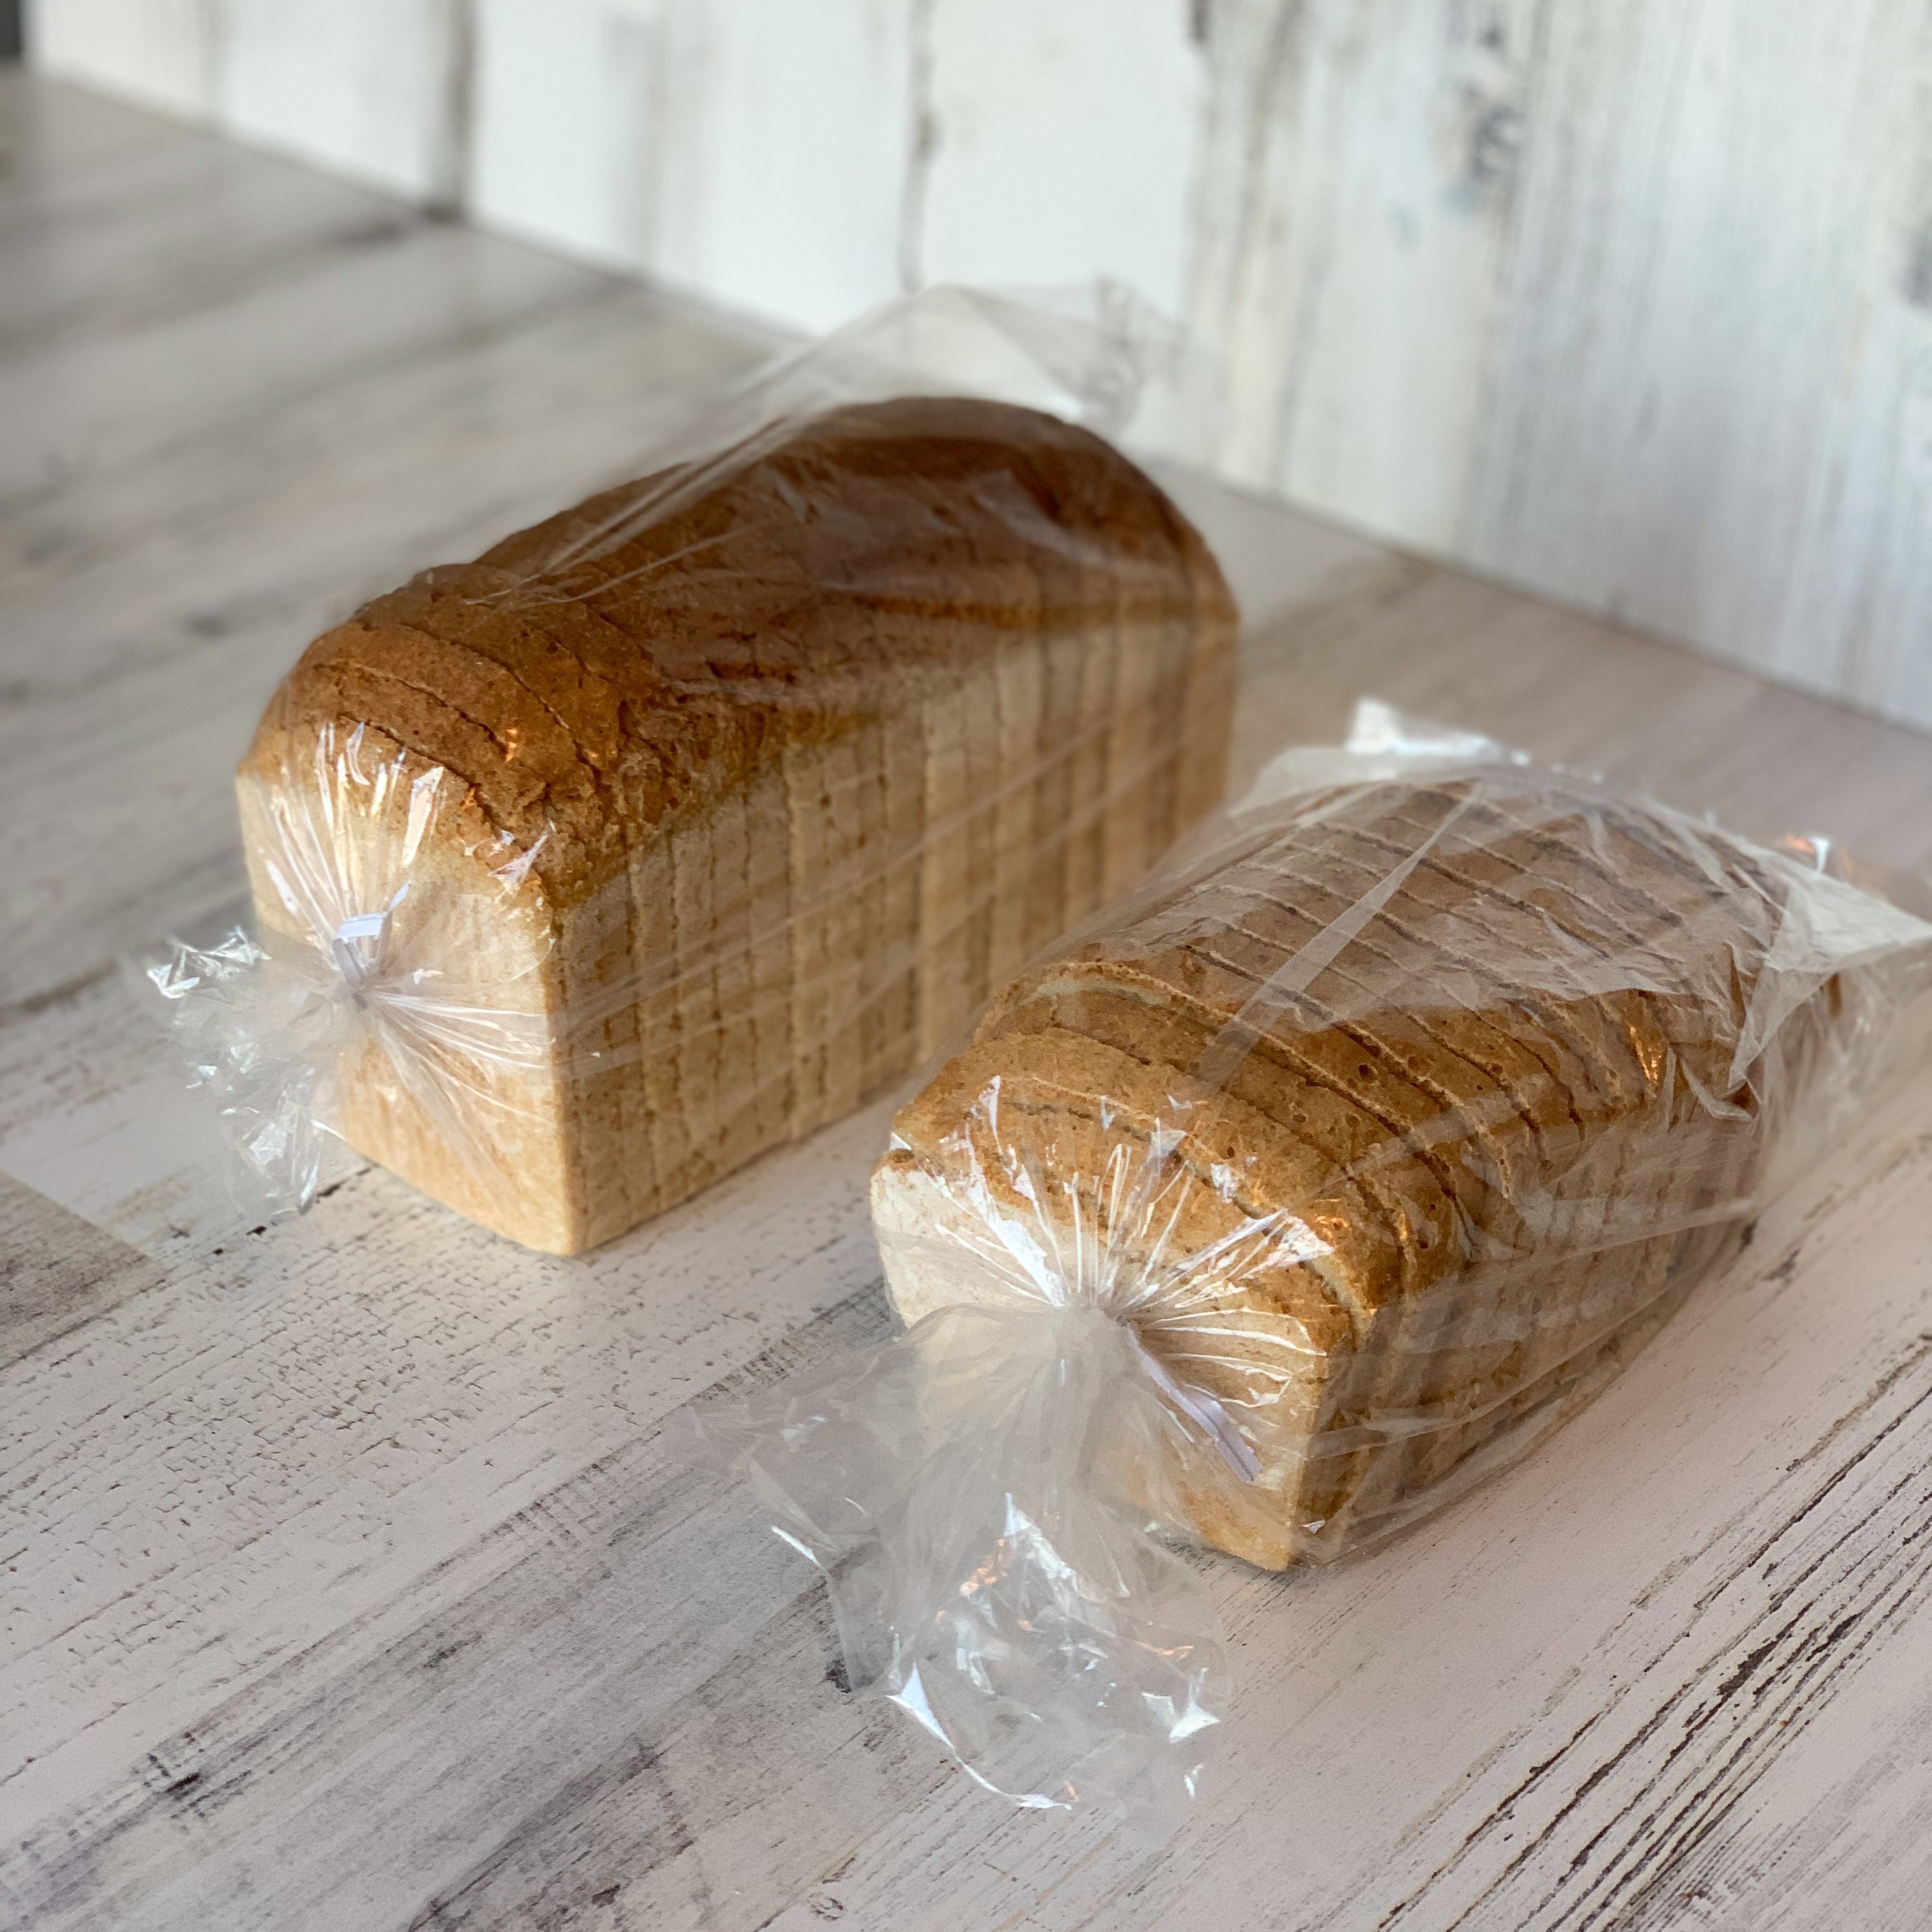
Wait until your loaf is completely cool to slice it. This will take at least two hours for a small loaf and up to four hours for a large one. I recommend slicing and eating your bread as soon as it’s completely cool, and not waiting any additional time after that. Homemade bread without preservatives starts to stale immediately, whether it’s gluten free or made with wheat flour. Slice, and then eat or freeze your loaf as soon as you can after it’s cool for the best quality.
Package your sliced bread in a plastic bag, store it in the freezer, and remove slices as you need them. I recommend either toasting your bread slices or defrosting them in the microwave on 50% power. You can make frozen bread soft and fresh again by warming it up and then letting it cool to room temperature. Eat your defrosted bread right away, though, or it will start to harden.
Here you can see how nice and tall your medium or large loaf will be if you bake it in a 4″ tall Pullman pan compared to a loaf baked in a standard height pan:

Enjoy your lovely bread!
Ashley Alexander from Living Free Ashley made a wonderful video of this recipe! If you haven’t subscribed to her channel yet, I encourage you to go check her out. Ashley is also gluten free and vegan, and she has a great style and personality that make her videos a joy to watch!
Fluffy Vegan & Gluten Free White Sandwich Bread - Small Loaf
Make a beautiful, soft, and fluffy loaf of vegan and gluten free bread in an 8.5" x 4.5" x 2.75" loaf pan. No xanthan gum, guar gum, or eggs are needed to make this amazing bread!
Ingredients
- 450 g Freely Vegan Gluten Free Flour (or DIY flour made with The Plant Based Egg)
- 1.5 g (rounded 1/4 tsp) Vitamin C Crystals
- 4.0 g (1 tsp) Vegan Sugar
- 10.5 g (3 1/2 tsp) Active Dry or Quick Yeast
- 400 g Seltzer Water (plain carbonated water)
- 9.6 g (1 1/2 tsp) Salt
- 25 g Vegan Sugar
- 14 g Vegan Butter (I use Earth Balance Spread)
Instructions
-
Add the vitamin C crystals and room-temperature flour to a medium-sized mixing bowl, then whisk them together. (Leave out the vitamin C crystals if you will be using lemon juice and vinegar instead.)
-
Make a well in the flour, then add the smaller amount of sugar and the yeast to the well. You can use either quick rise or active dry yeast in all of my bread recipes.
-
Warm your seltzer water to 80 degrees Fahrenheit. Use a thermometer to verify the temperature. If it is 74 degrees or more in your kitchen, just use room temperature seltzer water. Pour the seltzer water into the well, then set a timer and wait five minutes to let the yeast get bubbly. (For using lemon juice and vinegar instead of vitamin C crystals, decrease the amount of seltzer water to 380 grams, and add 10 g of lemon juice and 10 g of distilled vinegar to the water in the well after the yeast gets bubbly.)
-
Stir the liquid into the flour until you have a uniform dough. Make a well in the dough, then add the larger amount of sugar, the salt, and the vegan butter to the well. DO NOT stir them in yet! Place the bowl into a clean trash bag, twist the end, and tuck it under the bowl. Set a timer for one hour. Grease and flour your 8.5 x 4.5 x 2.75 inch loaf pan while you wait. This is an essential step, even with pans that are supposed to be non-stick. You want your loaf of bread to turn out of the pan easily, and the flour really helps the dough to rise up the sides of the pan properly.
-
When your timer goes off, use a hand mixer with dough hooks to mix the dough for one to two minutes on medium speed just until the sugar, salt, and vegan butter are incorporated evenly into the dough. Use a sturdy spatula to scrape the bottom and sides of the bowl. Mix the dough by hand several times to be sure you adequately mix in the dough that was on the sides and the bottom of the bowl.
-
Scrape the dough into your greased and floured pan. Spread it out evenly, being sure to press it into the corners. Place the filled loaf pan into your plastic bag. Set a timer for 20 minutes so you can check the rise. The length of time it takes will vary from 20 to 50 minutes or so, depending on the temperature and humidity in your kitchen. Keep a close eye on the rise after 20 minutes as it can go from not ready to over-proved very fast.
-
As soon as the pan is in the bag, pour water into the pan you should already have on the bottom rack of your oven for this purpose. Turn your oven on to 400 degrees Fahrenheit to preheat while your dough is rising. If your dough takes more than 25 to 30 minutes to rise, top off the water level in the pan. The water needs to be at least a 1/4" deep when you put the bread in the oven.
-
Your dough has sufficiently risen when the middle of the dough is about 1/2" to 3/4" above the top of the pan when viewed from eye level, and there are a few small bubbles starting to pop on the surface.
-
Place your pan in the middle of your hot, steamy oven. Immediately reduce the oven temperature to 375 degrees Fahrenheit, and set a timer for 70 minutes. Keep the oven door closed until there are only 10 to 15 minutes left on your timer. Then, you can check how brown your loaf is getting. Cover very loosely with foil for those last minutes if your loaf is getting too dark.
-
When your timer goes off, remove your bread from the oven. Gently slide your loaf out of the pan on its side onto a cooling rack. Set a timer for 10 minutes, and turn the loaf onto the opposite side when it goes off. Do the same for 20 minutes, then 30 minutes. After that, you can stand your loaf upright to finish cooling completely.
-
Wait until your loaf is completely cool to slice it. This will take at least two hours for a small loaf and up to four hours for a large one. I recommend slicing and eating your bread as soon as it's completely cool, and not waiting any additional time after that. Homemade bread without preservatives starts to stale immediately, whether it's gluten free or made with wheat flour. Slice, and then eat or freeze your loaf as soon as you can after it's cool for the best quality.
-
Package your sliced bread in a plastic bag, store it in the freezer, and remove slices as you need them. I recommend either toasting your bread slices or defrosting them in the microwave on 50% power. You can make frozen bread soft and fresh again by warming it up and then letting it cool to room temperature. Eat your defrosted bread right away, though, or it will start to harden.
Recipe Notes
- You must use either Freely Vegan gluten free flour or DIY flour made with The Plant Based Egg in this recipe. Freely Vegan all-purpose flour is available from either freelyvegan.com or Amazon. These flours are quite different from other GF flours and work without xanthan gum, guar gum, or eggs.
- You can use a combination of distilled white vinegar and lemon juice instead of the vitamin C crystals. To do this, reduce the seltzer water to 380 grams and add 10 grams of lemon juice and 10 grams of distilled white vinegar to the well with the bubbly yeast after the five minute wait and right before stirring the liquid into the flour.
Fluffy Vegan & Gluten Free White Sandwich Bread - Medium Loaf
Make a beautiful, soft, and fluffy loaf of vegan and gluten free bread in a 9" x 4" x 4" Pullman pan or a standard 9' x 5' loaf pan. No xanthan gum, guar gum, or eggs are needed to make this amazing bread!
Ingredients
- 675 g Freely Vegan Gluten Free Flour (or DIY flour made with The Plant Based Egg)
- 2.3 g (1/2 tsp) Vitamin C Crystals
- 6.0 g (1 1/2 tsp) Vegan Sugar
- 12 g (4 tsp) Active Dry or Quick Yeast
- 600 g Seltzer Water (plain carbonated water)
- 14.4 g (2 1/4 tsp) Salt
- 38 g Vegan Sugar
- 21 g Vegan Butter (I use Earth Balance Spread)
Instructions
-
Add the vitamin C crystals and room-temperature flour to a large mixing bowl, then whisk them together. (Leave out the vitamin C crystals if you will be using lemon juice and vinegar instead.)
-
Make a well in the flour, then add the smaller amount of sugar and the yeast to the well. You can use either quick rise or active dry yeast in all of my bread recipes.
-
Warm your seltzer water to 80 degrees Fahrenheit. Use a thermometer to verify the temperature. If it is 74 degrees or more in your kitchen, just use room temperature seltzer water. Pour the seltzer water into the well, then set a timer and wait five minutes to let the yeast get bubbly. (For using lemon juice and vinegar instead of vitamin C crystals, decrease the amount of seltzer water to 570 grams, and add 15 g of lemon juice and 15 g of distilled vinegar to the water in the well after the yeast gets bubbly.)
-
Stir the liquid into the flour until you have a uniform dough. Make a well in the dough, then add the larger amount of sugar, the salt, and the vegan butter to the well. DO NOT stir them in yet! Place the bowl into a clean trash bag, twist the end, and tuck it under the bowl. Set a timer for one hour. Grease and flour your 9 x 4 x 4 inch Pullman pan or a standard 9" x 5" loaf pan while you wait. This is an essential step, even with pans that are supposed to be non-stick. You want your loaf of bread to turn out of the pan easily, and the flour really helps the dough to rise up the sides of the pan properly.
-
When your timer goes off, use a hand mixer with dough hooks to mix the dough for one-and-a-half to two minutes on medium speed just until the sugar, salt, and vegan butter are incorporated evenly into the dough. Use a sturdy spatula to scrape the bottom and sides of the bowl. Mix the dough by hand several times to be sure you adequately mix in the dough that was on the sides and the bottom of the bowl.
-
Scrape the dough into your greased and floured pan. Spread it out evenly, being sure to press it into the corners. Place the filled loaf pan into your plastic bag. Set a timer for 20 minutes so you can check the rise. The length of time it takes will vary from 20 to 50 minutes or so, depending on the temperature and humidity in your kitchen. Keep a close eye on the rise after 20 minutes as it can go from not ready to over-proved very fast.
-
As soon as the pan is in the bag, pour water into the pan you should already have on the bottom rack of your oven for this purpose. Turn your oven on to 400 degrees Fahrenheit to preheat while your dough is rising. If your dough takes more than 25 to 30 minutes to rise, top off the water level in the pan. The water needs to be at least a 1/4" deep when you put the bread in the oven.
-
Your dough has sufficiently risen when the middle of the dough is just to the top of a Pullman pan, or about 1/2" to 3/4" above the top of a standard loaf pan when viewed from eye level. There should also be a few small bubbles starting to pop on the surface of your dough.
-
Place your pan in the middle of your hot, steamy oven. Immediately reduce the oven temperature to 375 degrees Fahrenheit, and set a timer for 80 minutes. Keep the oven door closed until there are only 10 to 15 minutes left on your timer. Then, you can check how brown your loaf is getting. Cover very loosely with foil for those last minutes if your loaf is getting too dark.
-
When your timer goes off, remove your bread from the oven. Gently slide your loaf out of the pan on its side onto a cooling rack. Set a timer for 10 minutes, and turn the loaf onto the opposite side when it goes off. Do the same for 20 minutes, then 30 minutes. After that, you can stand your loaf upright to finish cooling completely.
-
Wait until your loaf is completely cool to slice it. This will take at least three hours. I recommend slicing and eating your bread as soon as it's completely cool, and not waiting any additional time after that. Homemade bread without preservatives starts to stale immediately, whether it's gluten free or made with wheat flour. Slice, and then eat or freeze your loaf as soon as you can after it's cool for the best quality.
-
Package your sliced bread in a plastic bag, store it in the freezer, and remove slices as you need them. I recommend either toasting your bread slices or defrosting them in the microwave on 50% power. You can make frozen bread soft and fresh again by warming it up and then letting it cool to room temperature. Eat your defrosted bread right away, though, or it will start to harden.
Recipe Notes
- You must use either Freely Vegan gluten free flour or DIY flour made with The Plant Based Egg in this recipe. Freely Vegan all-purpose flour is available from either freelyvegan.com or Amazon. These flours are quite different from other GF flours and work without xanthan gum, guar gum, or eggs.
- You can use a combination of distilled white vinegar and lemon juice instead of the vitamin C crystals. To do this, reduce the seltzer water to 570 grams and add 15 grams of lemon juice and 15 grams of distilled white vinegar to the well with the bubbly yeast after the five minute wait and right before stirring the liquid into the flour.

Fluffy Vegan & Gluten Free White Sandwich Bread - Large Loaf
Make a beautiful, soft, and fluffy loaf of vegan and gluten free bread in a 13" x 4" x 4" large Pullman pan. No xanthan gum, guar gum, or eggs are needed to make this amazing bread!
Ingredients
- 1,015 g Freely Vegan Gluten Free Flour (or DIY flour made with The Plant Based Egg)
- 3.4 g (3/4 tsp) Vitamin C Crystals
- 9.0 g (2 tsp) Vegan Sugar
- 14 g Active Dry or Quick Yeast
- 900 g Seltzer Water (plain carbonated water)
- 22 g Salt
- 60 g Vegan Sugar
- 32 g Vegan Butter (I use Earth Balance Spread)
Instructions
-
Add the vitamin C crystals and room-temperature flour to your stand mixing bowl, then whisk them together. (Leave out the vitamin C crystals if you will be using lemon juice and vinegar instead.)
-
Make a well in the flour, then add the smaller amount of sugar and the yeast to the well. You can use either quick rise or active dry yeast in all of my bread recipes.
-
Warm your seltzer water to 80 degrees Fahrenheit. Use a thermometer to verify the temperature. If it is 74 degrees or more in your kitchen, just use room temperature seltzer water. Pour the seltzer water into the well, then set a timer and wait five minutes to let the yeast get bubbly. (For using lemon juice and vinegar instead of vitamin C crystals, decrease the amount of seltzer water to 855 grams, and add 22 g of lemon juice and 23 g of distilled vinegar to the water in the well after the yeast gets bubbly.)
-
Stir the liquid into the flour until you have a uniform dough. Make a well in the dough, then add the larger amount of sugar, the salt, and the vegan butter to the well. DO NOT stir them in yet! Place the bowl into a clean trash bag, twist the end, and tuck it under the bowl. Set a timer for one hour. Grease and flour your 13 x 4 x 4 inch large Pullman pan while you wait. This is an essential step, even with pans that are supposed to be non-stick. You want your loaf of bread to turn out of the pan easily, and the flour really helps the dough to rise up the sides of the pan properly.
-
When your timer goes off, use your stand mixer with the paddle attachment to mix the dough for about two minutes on medium speed just until the sugar, salt, and vegan butter are incorporated evenly into the dough. Use a sturdy spatula to scrape the bottom and sides of the bowl. Mix the dough by hand several times to be sure you adequately mix in the dough that was on the sides and the bottom of the bowl.
-
Scrape the dough into your greased and floured Pullman pan. Spread it out evenly, being sure to press it into the corners. Place the filled loaf pan into your plastic bag. Set a timer for 20 minutes so you can check the rise. The length of time it takes will vary from 20 to 50 minutes or so, depending on the temperature and humidity in your kitchen. Keep a close eye on the rise after 20 minutes as it can go from not ready to over-proved very fast.
-
As soon as the pan is in the bag, pour water into the pan you should already have on the bottom rack of your oven for this purpose. Turn your oven on to 400 degrees Fahrenheit to preheat while your dough is rising. If your dough takes more than 25 to 30 minutes to rise, top off the water level in the pan. The water needs to be at least a 1/4" deep when you put the bread in the oven.
-
Your dough has sufficiently risen when the middle of the dough is just to the top of the pan when viewed from eye level. There should also be a few small bubbles starting to pop on the surface of your dough.
-
Place your pan in the middle of your hot, steamy oven. Immediately reduce the oven temperature to 375 degrees Fahrenheit, and set a timer for 90 minutes. Keep the oven door closed until there are only 10 to 15 minutes left on your timer. Then, you can check how brown your loaf is getting. Cover very loosely with foil for those last minutes if your loaf is getting too dark.
-
When your timer goes off, remove your bread from the oven. Gently slide your loaf out of the pan on its side onto a cooling rack. Set a timer for 10 minutes, and turn the loaf onto the opposite side when it goes off. Do the same for 20 minutes, then 30 minutes. After that, you can stand your loaf upright to finish cooling completely.
-
Wait until your loaf is completely cool to slice it. This will take at least four hours. I recommend slicing and eating your bread as soon as it's completely cool, and not waiting any additional time after that. Homemade bread without preservatives starts to stale immediately, whether it's gluten free or made with wheat flour. Slice, and then eat or freeze your loaf as soon as you can after it's cool for the best quality.
-
Package your sliced bread in a plastic bag, store it in the freezer, and remove slices as you need them. I recommend either toasting your bread slices or defrosting them in the microwave on 50% power. You can make frozen bread soft and fresh again by warming it up and then letting it cool to room temperature. Eat your defrosted bread right away, though, or it will start to harden.
Recipe Notes
- You must use either Freely Vegan gluten free flour or DIY flour made with The Plant Based Egg in this recipe. Freely Vegan all-purpose flour is available from either freelyvegan.com or Amazon. These flours are quite different from other GF flours and work without xanthan gum, guar gum, or eggs.
- You can use a combination of distilled white vinegar and lemon juice instead of the vitamin C crystals. To do this, reduce the seltzer water to 855 grams and add 22 grams of lemon juice and 23 grams of distilled white vinegar to the well with the bubbly yeast after the five minute wait and right before stirring the liquid into the flour.
Thank so much for Part 3 and the recipes. I can hardly wait to make the bread. Thanks so much. 😋
Maggie
You’re very welcome, Maggie! I’m excited to hear about all of the beautiful breads you are going to make!
I made the small loaf today. Think it turned out beautiful. It is a little gummy when not toasted, but still has a nice texture and good flavor. My husband said it is the best looking loaf of Gluten free bread I ever made.
Thanks again for your help.
Maggie
Hi Maggie! I’m sorry it’s taken awhile to get back to you. My site was having technical problems and I couldn’t reply sooner. I’m glad your loaf mostly turned out well, but it shouldn’t be at all gummy. Did you wait until the loaf was completely cool before slicing? (Cutting into a still warm loaf is the most common cause of gumminess.) If not, I’m happy to help you troubleshoot to figure out what else might have done it.
Thanks for getting back to me. Yes, I waited until the loaf was completely cool. before slicing. I am wondering if it could be the seltzer water which has been in the refrigerator for a couple of weeks???
Maggie
That is most likely the issue, Maggie. Seltzer water needs to be used immediately after opening because it loses its fizz very quickly.
Thank you very much.
Maggie
I am excited to try this recipe! Your bread looks beautiful! I live at a high elevation, 6300 feet. Do you know if this bread will rise the same at high elevation? I’ve used a different recipe for gluten-free bread for years and I’ve never had good success with it rising well. I don’t know if it’s me, the recipe, or the high elevation.
Hi Camilla! Someone recently reached out to me who had made this recipe at high altitude. Their bread was over proofed before it went in the oven and sort of blew it’s top in the oven! Even so, the rest of the load baked up beautifully and they said it was the best they had ever made! I suggested that they cut the yeast back by a third next time, and also watch the rise very carefully. I think you may need to put it in the oven a little bit less risen than is optimal at sea level. Please let me know how these suggestions work for you if you give the recipe a try.
Adding all the volume measurements would help me. Some are missing. i would like to try it. Apopogize if i missed them some where
Hi Kenny! I don’t give measurements in my bread recipes anymore because flour is pretty much impossible to measure accurately. You really have to use a digital kitchen scale to weigh your ingredients when you make gluten free bread. You can get a digital scale from Target or Walmart for about $12.
Deborah, I have a question regards my bread being very tough. I have made the White Sandwich small loaf (Blend #7) recipe three times now; the taste and texture are great but the loaf is tough. I have to use an electric knife to slice the loaf. I have used your Plant Based Egg, seltzer water, the plastic bag, the steamy oven; ie, I have tried follow the recipe exactly. Any ideas ?
Hi Rod! That definitely shouldn’t happen. I’ve made several hundred loaves and have always been able to slice the bread easily by hand. I do use an offset serrated bread knife so maybe your knife is not doing the job. It may be one of the flours that you are using to make the blend. There are differences between brands and that could be an issue. Also, I have not tested all of the DIY blends in sandwich loaves (I do know that the two-ingredient flour works well for bread, though, as I made quite a few loaves with it). I always use Freely Vegan flour when I make bread now, so maybe give that a try.
I’ve made the medium loaf twice now and we love it! The loaves turned out looking just like your photos, but when we cut into them there was a big air gap in the center of the loaf under the crust. Both loaves were proofed for 20 min in my not-very-warm kitchen & looked just like your photos when they went into the oven. I have an oven thermometer so the temp was correct. Any thoughts on what might be going wrong?
Hi Joal! That air gap is called tunneling. It’s usually from under or over proofing, and 20 minutes in a cool kitchen doesn’t sound like quite enough time to rise. Were there little bubbles starting to form in the dough? If not, I would let your dough rise just a bit more next time. If there were, I would recommend making a slash in the top of your dough before putting it in the oven next time. You need a lame or a very sharp knife to do this without creating a jagged gash in your bread, and you’ll only want to cut about 1/3″ deep and at a 45 degree angle.
There were little bubbles starting to form so I will definitely try slashing the loaf next time (have a lame from my gluten-baking days). Thanks for your help!
A lame will be perfect! Please let me know how your next loaf turns out!
Hi! Can you tell me what is the use for the vitamine c? Is it absolutely necessary?
Thank you 🙂
Hi Roxanne! The vitamin C acts as a dough conditioner and improves the texture of the bread. You can substitute a combination of lemon juice and distilled vinegar, however, and those directions are in the recipe notes after the directions.
I just made this for the first time last night and am very new to gluten free baking. I made the small loaf and had a couple bumps on the way as I mixed some ingredients into the dry before I was supposed too. Besides that I noticed I had to add an extra 100ml of liquid, not sure if it is due to our elevation but we arent super high up, only at 1,140 something. However I do not currently own a scale so some of the ingredients might have been off, do you happen to have a version of this that uses cups instead of grams?
Hi Jennifer! 1,100 feet elevation should not make any difference, but not using a scale absolutely will. I don’t give measurements in my bread recipes anymore because flour is pretty much impossible to measure accurately. It sounds like you used too much flour, and adding more water was a good idea. It is also very important to wait to add the salt, sugar, and butter because they inhibit the yeast if added too soon. You can get a scale at Target or Walmart for about $12 so I hope you will try the recipe again soon!
Your slices are so nice on your photos. Do you have a slicer or do you cut free hand? If you have a slicer, what is your fav?
Hi Jill! I slice free hand using an offset serrated bread knife. I can’t find the exact ones I have as my mom got them years ago, but they look like this one: https://www.amazon.com/gp/product/B01F35UGWS/